



Most deep pour epoxy purchases start with a spreadsheet. Supplier A promises a longer working time. Supplier B claims a deeper pour. Supplier C shows the highest hardness. Ranking them looks easy, until you find out that each company tested its resin under different conditions.
A 50 mm casting poured in a cool room is not the same experiment as a 50 mm casting poured in a warm workshop. Clarity measured on a thin plaque also says little about how a thick river table will look.
If you buy for a distribution business, a furniture shop or a private label line, the real question is whether the data predicts how the resin behaves in your application. Below is how to compare the numbers, spot what’s missing, and build a supplier qualification process that holds up.
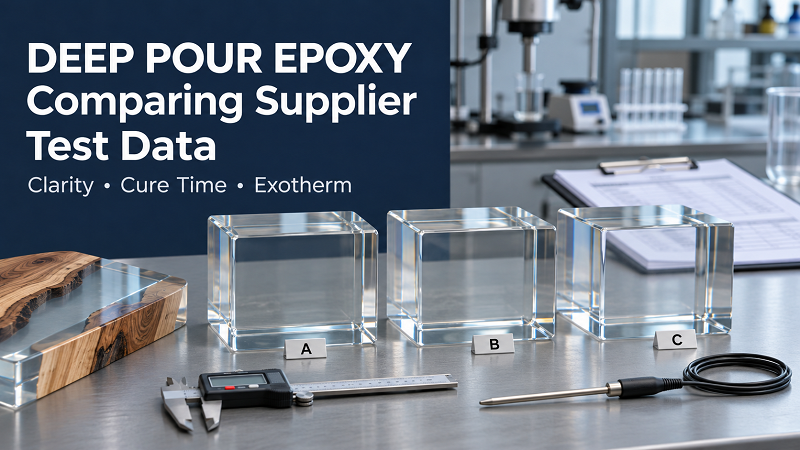
Start With the Application, Not the Numbers
Write a short brief first: casting depth, overall dimensions, typical batch size, workshop temperature range, target demolding schedule, and whether the resin goes in clear, pigmented, or around wood and inserts.
The brief decides which results count. A shop pouring wide river tables cares about heat buildup and stability in big castings. A distributor selling to small craft businesses cares more about easy mixing, bubble release, and results that stay consistent from one user to the next.
Split the must-haves from the nice-to-haves. A sound casting at full depth is a must. Cutting a few hours off demolding is a bonus. Fix your acceptance criteria before any supplier results arrive, or a flashy headline number will quietly rewrite your priorities.
Get the Evidence Behind the TDS
A technical data sheet (TDS) is a starting point, nothing more. Many list typical values rather than guaranteed batch limits. Have the supplier mark which figures are specifications, which are typical results, and which are only recommendations.
Then collect the exact resin and hardener codes, the document revision, sample batch numbers, test dates, methods and curing conditions. A report on a different hardener speed or an older formulation proves nothing about the product you’re being quoted.
Each document has a limited job. A safety data sheet covers hazards and handling, not casting quality. A certificate of analysis records selected batch checks and often leaves out long-term weathering and full mechanical testing. Independent lab reports carry real weight when the specimens and conditions match your product and the property in question. A lab logo alone doesn’t make mismatched samples comparable, so read the full report. A cropped certificate image isn’t enough.
Normalize Conditions Before You Rank
Build a comparison sheet that logs each result next to its test conditions. If a field is missing, write “not provided” instead of filling the gap with a guess.
| Property | Conditions to match or document |
|---|---|
| Mixed viscosity | Temperature, method, instrument settings, time after mixing |
| Working or gel time | Mixed mass, container geometry, temperature, endpoint |
| Maximum pour depth | Casting dimensions, total volume, mold, cooling, ambient temperature |
| Optical clarity | Specimen thickness, surface finish, cure age, measurement method |
| Hardness | Scale, specimen thickness, cure schedule, reading procedure |
| Yellowing | Exposure source, cycle, duration, specimen preparation, color calculation |
| Heat performance | Test method, load, cure history, acceptance criterion |
Unit conversion is fine where it’s exact: 1 cP equals 1 mPa·s. Adjusting a viscosity or cure time from one temperature to another is a different matter. Unless the supplier has validated, product-specific data, don’t do it.
Working Time, Gel Time and Cure Time Are Not the Same Thing
Suppliers use “pot life,” “working time” and “gel time” as if they were interchangeable. Ask how each endpoint was actually determined.
Working time usually means the window for pouring and removing bubbles. Gel time is a defined transition judged by a specific procedure. Demolding time is when the casting comes out without damage or distortion. None of them tells you the final properties have developed.
Take a hypothetical: 120 minutes from a small cup at 20°C versus 90 minutes from a larger mass at 25°C. The first number doesn’t prove a longer usable window. Mass and temperature differ, and the suppliers may have used different endpoints too.
Get the mixing ratio by weight and by volume as well. They aren’t interchangeable, because component densities differ. Stick to each supplier’s specified ratio during trials. Tweaking it to speed up or slow down cure ruins the comparison.
Pour Depth Means Little Without Exotherm
“Maximum pour depth” with no geometry or environment attached is only half a claim. Epoxy generates heat as it cures, and how much builds up depends on volume, depth, ambient temperature and how well the surroundings carry heat away. WEST SYSTEM’s technical guidance lists these as the main variables in casting behavior. [1]
Ask for a temperature-versus-time record from a representative casting. It should state where the probe sat, the starting material temperature, how the mold was built, the casting dimensions and any active cooling. A surface reading is no substitute for an internal one unless the report explains why.
Look at the peak temperature and the finished piece. Check for discoloration, cracks, distortion, voids and incomplete cure. A lower peak doesn’t win if the casting still can’t be demolded on your schedule.
Stay inside the supplier’s documented limits, too. A good small trial doesn’t justify jumping to a much larger casting, and a depth claim never stands apart from temperature and volume.
Measure Clarity, Don’t Trust Photos
Photos are good for catching obvious defects, and that’s about all. Lighting, backgrounds, editing and sample thickness all change how clear a piece looks.
Ask suppliers to separate light transmission, haze and initial color. ASTM D1003 covers haze and luminous transmittance of transparent plastics. They’re related measurements, but not the same one. A sample can pass plenty of light and still scatter enough to look cloudy. [2]
Compare specimens with matching thickness, surface preparation and curing history. For deep pour, also look at a casting at your actual depth. A thin polished sample can hide color that shows up over a longer optical path.
Treat bubble release as its own test: same mixing procedure, same mold, same observation times, and a note on whether vacuum, pressure or heat was used. Judge visible bubbles against an agreed standard rather than accepting “bubble free” on faith.
Yellowing Claims Need Exposure Details
“UV resistant” covers a lot of ground. A usable comparison needs the exposure method and the measured change, not just a number of hours.
Ask for the light source, irradiance, cycle, temperature, moisture conditions and specimen thickness. ASTM G154 deals with operating fluorescent UV apparatus. The exposure conditions and the property measurements afterward still have to be specified separately. [3]
Request initial and final color values, plus the color difference calculation or yellowness index used. ASTM E313 also stresses comparable specimen appearance, including thickness and translucency where relevant. [4]
Two reports that both say 500 hours aren’t equivalent if the light sources and cycles differ. Accelerated hours don’t convert into years of service either, not without a validated correlation. For purchasing, run every candidate through one shared protocol and keep the resulting claim narrow.
Read Hardness and Heat Resistance With Care
A higher Shore D reading looks good on a spec sheet. It says nothing about scratch resistance, toughness or how the surface handles a hot pan. ASTM D2240 describes an empirical indentation test and warns against drawing simple relationships to other hardness instruments or fundamental properties. [5]
Compare at the same cure age and temperature, with one consistent procedure, and find out whether the specimens were post-cured. A heat-treated lab sample can reach properties your customers will never see from room-temperature cure alone.
“Heat resistance” deserves the same scrutiny. Glass transition temperature, heat deflection temperature and a practical hot-object test answer three different questions. Ask for the method, loading, cure schedule and the damage criterion.
For furniture, test the whole intended finish system. If the casting sits under a protective topcoat, evaluate it that way before making claims about the finished surface.
Run a Shared Validation Trial
Once the paperwork review is done, shortlist suppliers for controlled trials. Code the samples where possible to cut brand bias, and log incoming batch details before anything is mixed.
Condition materials and molds the same way, within each product’s approved operating range. Use calibrated scales, each supplier’s prescribed ratio and a written mixing procedure. Leave pigments and inserts out of the first clear-resin round unless the application depends on them.
Repeat the critical measurements. One casting can expose an obvious problem, but it can’t show normal variability. As a screening approach, test several specimens and, if feasible, more than one production batch. Keep individual results alongside the averages so erratic behavior doesn’t get smoothed over.
Then run a production trial covering pouring, bubble management, demolding, sanding, polishing and any coating. Track labor time, scrap and rework next to the material results.
Keep labeled samples and photographs shot under consistent lighting. If a later shipment behaves differently, those references give you far better footing than memory or marketing images.
Turn the Results Into a Purchasing Specification
The final decision should weigh application performance, quality of evidence and manufacturing consistency. Don’t pick on the deepest advertised pour or the highest hardness alone.
Mandatory criteria come first. A product that fails the required casting trial doesn’t earn a second chance through a low price or nice packaging. Among those that pass, compare handling, production time, appearance, batch consistency, technical support and total cost per acceptable finished piece.
Then write it down as a purchasing specification: resin and hardener identified, approved ratio, test conditions, acceptance limits, sampling approach, and the documents required with each shipment. State which tests apply to every batch and which are periodic qualification checks.
Private label buyers should also agree on formulation change notification and label instructions. The approved sample has to represent the commercial product, and any material change should trigger a defined review before shipment.
If you’re inquiring with Jinhua Resin about deep pour epoxy supply, send your casting dimensions, temperature range, production schedule and target appearance. Use that brief to request the relevant technical documents and set up sample validation. A clear comparison process gives buyer and supplier a firmer basis for choosing a resin and keeping results steady as orders grow.