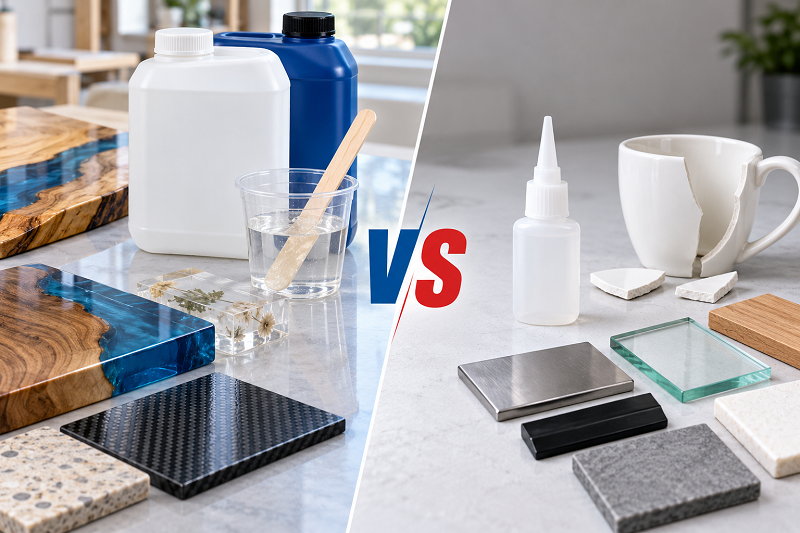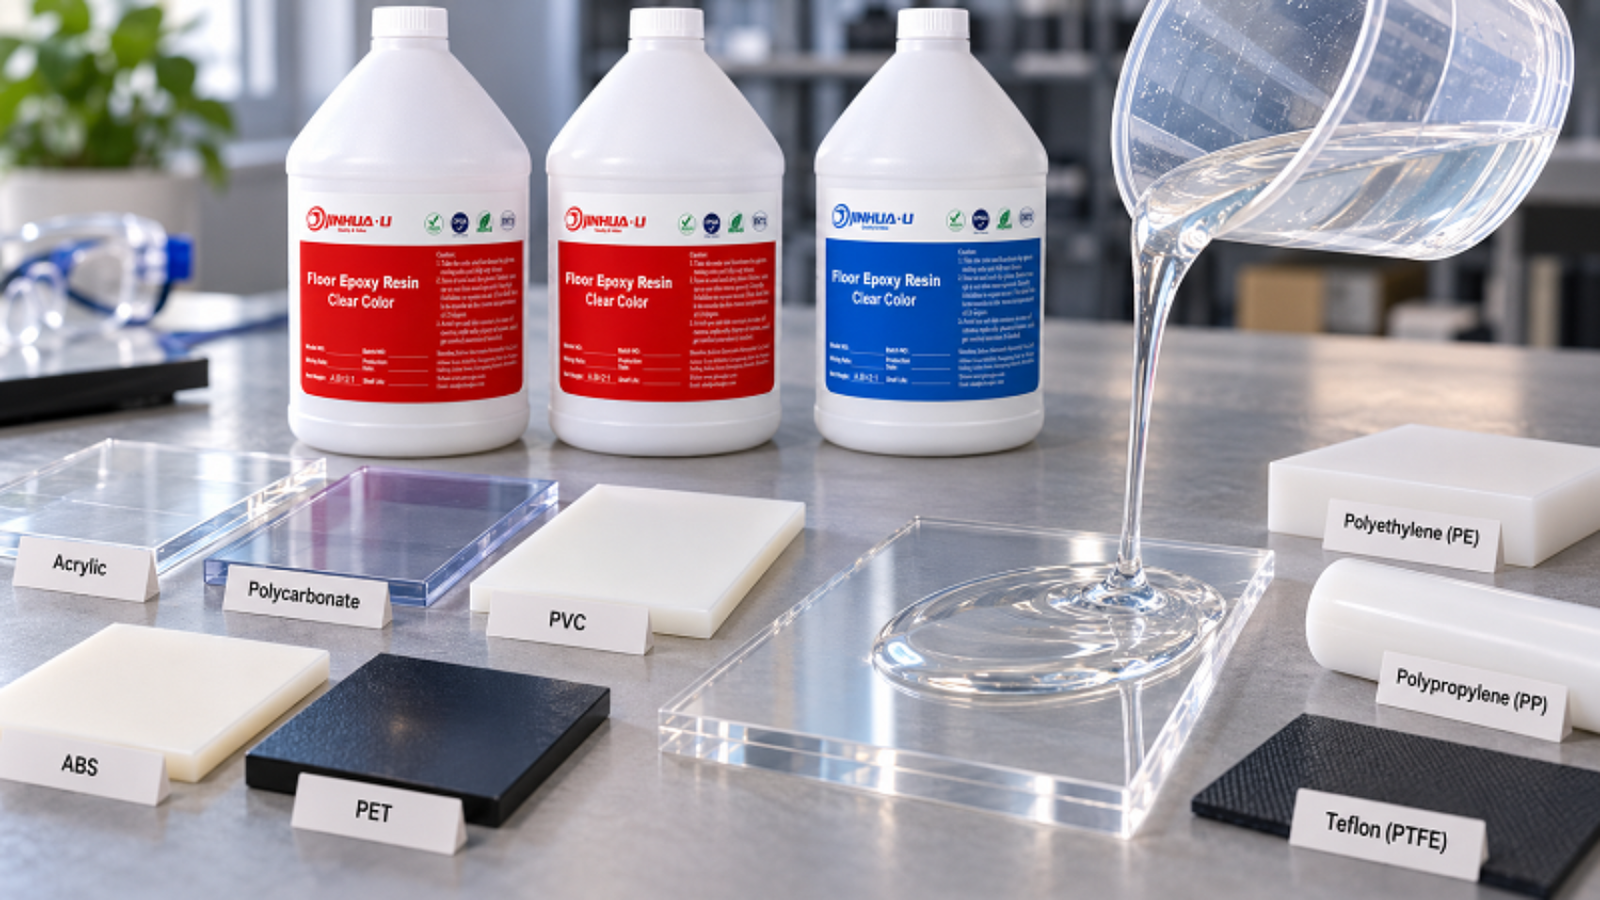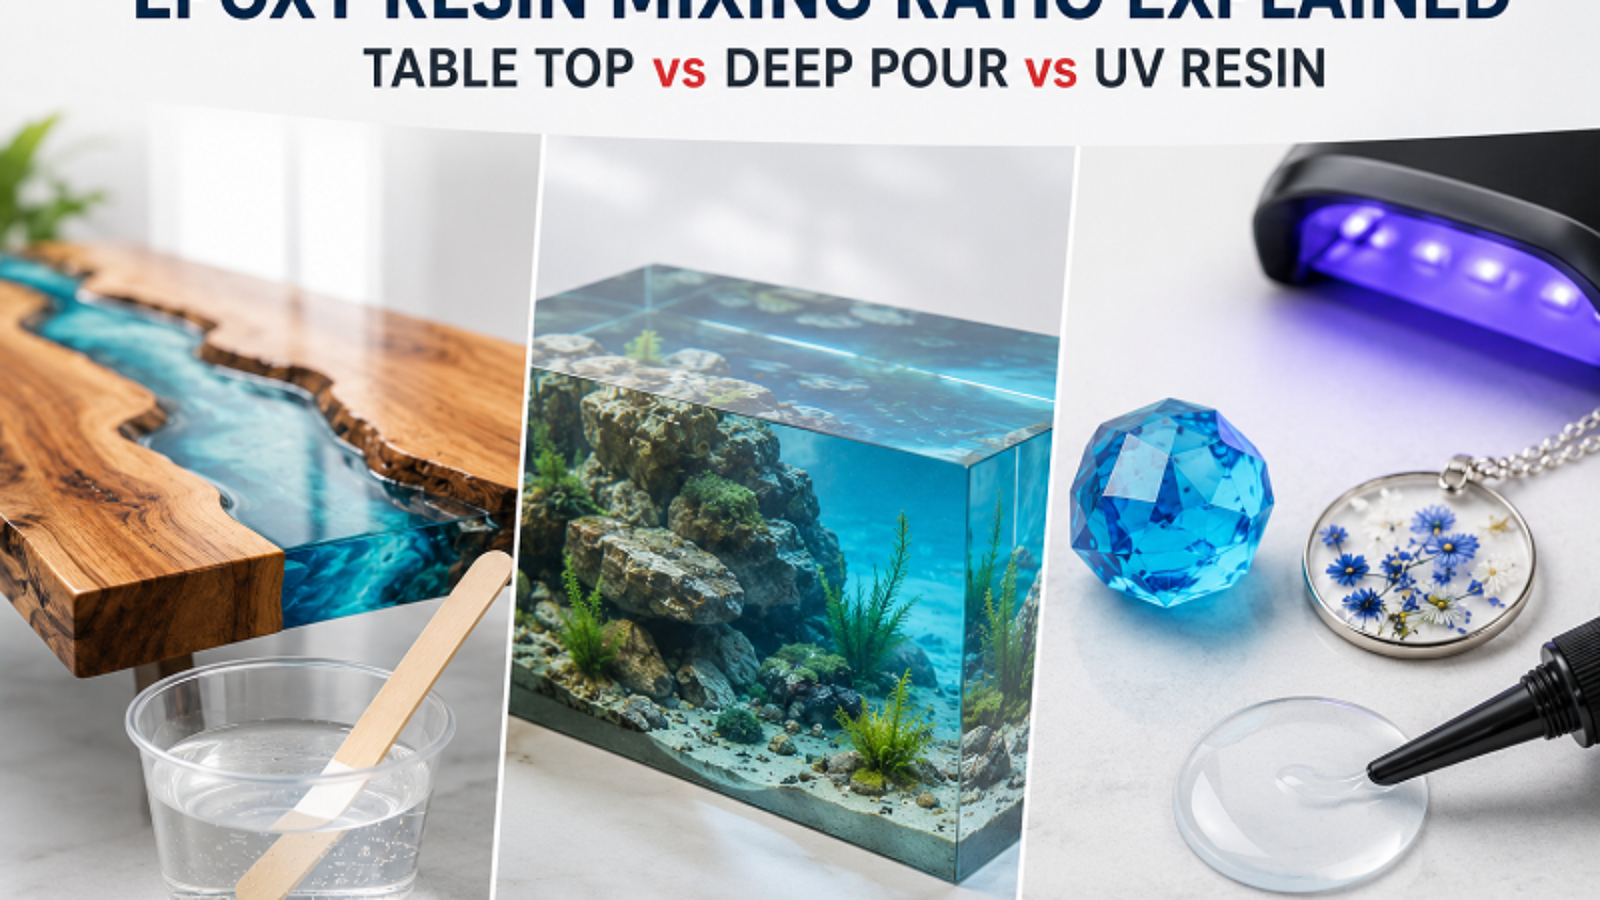


Epoxy Resin Flooring Vs. Countertop Grade

Epoxy Resin Flooring vs. Countertop Grade: Key Formulation Differences

“Can I just use the same epoxy for my floor and my countertop?” We get this question more often than you’d think — usually from a distributor trying to simplify their catalog, or a first-time buyer hoping to avoid stacking MOQs across two product lines.

Short answer: no. Not if you want either surface to actually perform. Epoxy Resin Floor Coating and countertop epoxy start from different design briefs, and that shows up in nearly every property that matters — viscosity, hardness, UV stability, cure speed, even what gets mixed in. Below is where the two genuinely diverge, and why a manufacturer formulates them as separate product lines in the first place rather than one “universal” epoxy.

Epoxy Resin Flooring Vs. Countertop Grade

Different Jobs, Different Priorities

A countertop sits indoors, gets wiped down daily, and is expected to stay glass-clear for years. It needs to shrug off knife nicks, tolerate a hot pan set down without thinking, and hold its clarity under UV coming through a kitchen window.

A floor gets walked on, rolled over with carts, hit with spills and chemicals, and in industrial or garage settings, ground down by tire traffic and foot traffic all day. Clarity almost never matters here. What matters is impact resistance, chemical resistance, and slip resistance.

Those two very different jobs are the reason the resin systems split apart from the first stage of formulation — not a marketing distinction, a chemistry one.

Viscosity and Application Method

Countertop-grade resin is generally built to self-level: low enough viscosity to spread into a smooth, glass-like surface, but controlled enough that it doesn’t run off the edge of a mold before it starts to gel.

Flooring formulations vary more, because floors get applied differently depending on the job:

  • Self-leveling floor epoxy sits at a viscosity close to countertop resin — used for seamless, high-gloss commercial and residential floors.
  • Trowel-applied or broadcast systems run thicker, often loaded with aggregate (silica sand, quartz) to build texture and thickness for industrial or garage floors that need real mechanical toughness.
  • Mortar and screed systems, the thickest tier, are almost paste-like — mixed with graded sand for warehouses and production floors expected to take heavy, repeated loads.

Pour a countertop-grade resin at trowel thickness on a floor, and it probably won’t self-level the way you’d want, may trap air it wasn’t designed to release, and won’t hold up to abrasion the way a floor needs. Do the reverse — flooring epoxy poured at countertop thickness on a tabletop — and you risk fast, uneven cure, more trapped bubbles, or a finish that never reaches the water-clear look buyers expect from Table Top Epoxy Resin.

UV Stability: The Biggest Chemistry Split

This is where the two categories part ways most sharply at the molecular level.

Countertop and table top epoxy resins almost always carry UV stabilizers, often built on non-yellowing chemistry — aliphatic hardener systems, or hybrid blends — because yellowing is one of the most visible, most complained-about defects in clear cast work. A countertop that starts yellowing six months after installation, sitting under a kitchen window, is a warranty claim in the making.

Epoxy Resin Floor Coating, especially base coats and industrial systems, typically runs on standard — often aromatic — resin chemistry, which yellows faster under UV. For flooring, that trade-off is usually fine. Most commercial and industrial floors either stay out of direct sun or get finished with a UV-stable polyurethane or polyaspartic topcoat specifically to handle sun exposure and add abrasion resistance. The epoxy base coat doesn’t need to be UV-stable on its own; the topcoat is doing that job.

Buyers who source flooring epoxy purely for yellowing resistance — without realizing a topcoat system is standard practice — sometimes end up paying for UV stability they don’t need, or worse, skipping the topcoat they actually do.

Hardness and Wear Resistance

Both categories cure hard. But “hard” means something different depending on what the surface has to survive.

Countertop epoxy targets scratch and mar resistance suited to kitchen use — knife nicks, a hot pan within stated limits, daily wiping with cleaning products.

Flooring epoxy, industrial-grade especially, is built for a different kind of durability: compressive strength and abrasion resistance under sustained mechanical load — forklifts, dropped tools, rolling equipment, years of impact rather than months. That usually calls for a higher cross-link density formulation, sometimes combined with aggregate fillers doing mechanical work the resin can’t do alone.

Shore D hardness numbers can look nearly identical between a countertop product and a flooring product on paper. But hardness alone says little about abrasion or impact resistance — the two properties that actually matter most for a floor.

Chemical and Stain Resistance

Both are epoxy systems, so both hold up reasonably well against chemicals compared with other coatings — but what they’re tested against differs.

Countertop epoxy is generally tested and marketed against household stains: wine, coffee, cooking oil, mild kitchen acids. Flooring epoxy, particularly industrial and commercial grades, is tested against a rougher list — motor oil, solvents, cleaning chemicals, sometimes battery acid or facility-specific chemicals. A formulation built for an auto shop floor is solving a different chemical-resistance problem than one built for a kitchen countertop, even though both get labeled “epoxy resin” on the box.

Additives: What Actually Goes Into Each System

This might be the clearest way to tell the two categories apart — just look at what’s in the mix.

Countertop and Table Top Epoxy Resin typically include:

  • UV stabilizers and non-yellowing agents
  • Defoamers, for a bubble-free clear finish
  • Pigments or dyes for color work — or nothing at all, for water-clear casting
  • Occasionally mica powders or metallic pigments for decorative pours

Epoxy Resin Floor Coating typically includes:

  • Aggregate fillers — silica sand, quartz — for texture, slip resistance, and buildable thickness
  • Color flake or chip blends for commercial and garage floor finishes
  • Anti-slip additives for safety compliance in wet or industrial spaces
  • Occasionally conductive or static-dissipative additives for specialized industrial floors, like electronics manufacturing

If you’re vetting a supplier’s private label capability, this is worth asking directly: does their formulation team actually work across both additive categories, or does production really specialize in one? Floor systems bring their own set of formulation and application questions that a countertop-focused supplier may not be set up to answer.

Cure Profile and Pot Life

Countertop resin is usually formulated with a longer working time, giving room for detailed pours, embedded objects, and multi-layer work without the material gelling mid-project. Full cure on a clear cast countertop can take several days to reach full hardness and chemical resistance, even if it’s touch-dry within 24 hours.

Flooring systems, especially in commercial settings where downtime costs money, are often formulated to get back into service faster — reopening to foot or vehicle traffic within 24 to 72 hours is common. That typically means a different hardener chemistry and a faster cross-link speed than a countertop system, which prioritizes working time over turnaround.

Cost and MOQ Considerations for Buyers

This is where the formulation gap turns into a purchasing decision.

Countertop-grade and UV-stable formulations generally cost more per kilogram than standard Epoxy Resin Floor Coating base coat, mostly due to the UV stabilizer package and the tighter quality control a clear, bubble-free finish demands. If you’re a distributor stocking both categories, don’t assume one blended MOQ or price tier covers your whole catalog — ask for separate technical data sheets and separate pricing per grade.

If your business sells into both flooring and furniture/countertop markets — common among private label distributors — it’s worth confirming early whether your manufacturer can reliably formulate and supply both grades, or whether they really specialize in one. A supplier strong in deep pour epoxy for tabletops isn’t automatically equipped for an industrial, aggregate-loaded flooring system. The reverse is just as true.

The Bottom Line

Epoxy Resin Floor Coating and Table Top Epoxy Resin share a resin chemistry family, but they’re engineered around different problems. Countertop formulations chase clarity, UV stability, and a self-leveling finish. Flooring formulations chase abrasion resistance, mechanical durability, and flexibility across trowel, broadcast, and self-leveling application methods.

Before placing an order — especially a private label or OEM order — confirm which grade you actually need, and get data specific to that grade from your manufacturer. The wrong grade in the wrong place doesn’t just underperform. It fails in ways that get expensive to fix after the fact.

Epoxy Resin Manufacturer

How to Read an Epoxy Resin TDS/SDS Before You Order

Ask ten buyers what they check before placing an order and most will say price, then lead time. The data sheets usually come third, if at all. That’s the wrong order. A TDS and SDS will tell you more about whether a supplier can actually hold to spec than a sales call ever will.

TDS vs. SDS — they’re not the same document

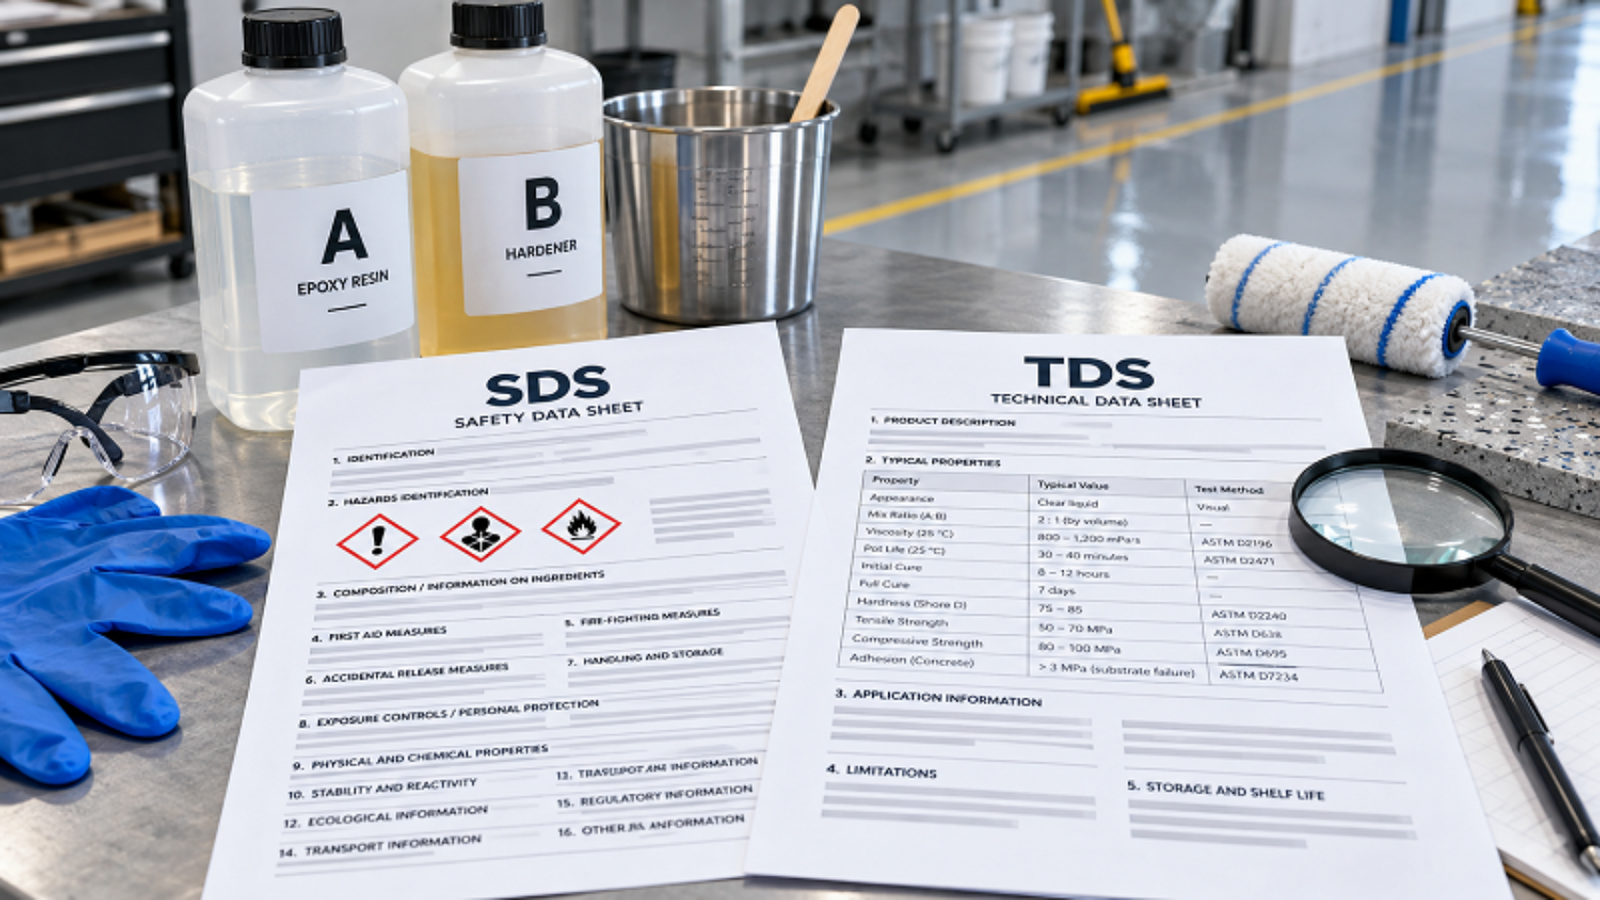
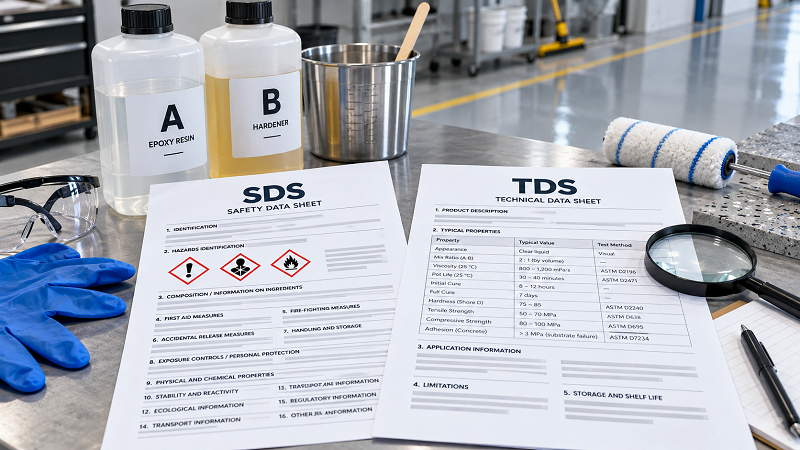
A Technical Data Sheet covers performance: viscosity, mix ratio, pot life, cure time, hardness, clarity. It’s the “what this resin does” document.

A Safety Data Sheet covers composition and hazard: chemical makeup, handling rules, exposure limits, disposal requirements. It’s the “what this resin is” document.

A lot of buyers sourcing from an epoxy resin manufacturer file both away without reading them closely. Worth changing that habit. These two sheets are often the fastest way to catch a mismatch before it turns into a production problem three months later.

Epoxy Resin Manufacturer

What to look at on the TDS first

Start with the mix ratio. Check whether it’s given by volume, by weight, or both. A supplier who lists only one number is handing you half the picture — resin and hardener rarely share the same density, so the volume ratio and the weight ratio diverge. Dose by the wrong figure and the cure chemistry drifts off.

Then pot life and cure time. People mix these up constantly, and honestly some suppliers do too. Pot life is how long the mixed batch stays workable once you’ve combined resin and hardener. Cure time is how long it takes to fully harden once poured or applied. A 45-minute pot life paired with a 24-hour cure behaves nothing like a 20-minute pot life paired with a 72-hour cure, even if both products get marketed under the same “deep pour epoxy” label.

Viscosity is next, and the number means little without a temperature attached. A resin rated at 400 cP at 25°C could run closer to 800 cP in a workshop that sits at 15°C in winter. If your production floor runs cold, ask the supplier for viscosity figures at your actual working temperature — the lab standard alone won’t tell you much.

For deep pour specifically, check the maximum pour depth listed. Go past it and you risk exothermic cracking, cloudiness, or yellowing — defects that only show up after the resin has cured, at which point there’s no fixing them. If a TDS skips this figure entirely, ask before you order, not after.

And for table top epoxy, look at Shore hardness and any notes on UV stability or long-term yellowing. A resin that scratches within weeks or ambers within a season generates returns. Not repeat business.

What to look at on the SDS first

Section 3 lists the chemical composition and CAS numbers. If you sell into a regulated market, this is the section your compliance team will actually pull from — not whatever’s on the product landing page.

Section 9 has flash point, VOC content, specific gravity. These figures drive shipping classification and storage rules, which affect landed cost more than most buyers expect going in.

Section 15 covers regulatory declarations — REACH, RoHS, and similar. If a supplier can’t produce an SDS with this section properly filled out, that’s not automatically a dealbreaker, but it’s reason enough to ask more before committing to volume.

Signs worth pausing on

A generic SDS that doesn’t quite match the product you ordered. Some manufacturers run one template SDS across an entire resin line, which means the hazard data on file may not reflect what’s actually in your specific batch.

No batch-to-batch tolerance data on the TDS. Ask directly what variance the manufacturer holds on viscosity and pot life run to run. Plus or minus 5% is normal. A supplier who can’t answer that question at all is telling you something, even without meaning to.

Numbers with no test method behind them. A data sheet worth trusting cites the standard for each figure it reports — ASTM D2196 for viscosity, ASTM D2240 for hardness, and so on. Figures without a method are harder to verify, and harder to hold anyone accountable to later.

Why this is worth the extra ten minutes

These two documents aren’t paperwork you glance at once and file. Read closely, they’re the clearest signal available before you place an order — whether this manufacturer actually controls their process, or is reselling whatever came off the line that particular week.

A supplier worth ordering from should answer follow-up questions on both sheets without hedging, and should be willing to test at your real working conditions rather than pointing back to lab standard numbers. If they can’t, that tells you plenty on its own.

Epoxy Resin Manufacturers (3)

2026 Epoxy Resin Price Guide for Manufacturers

If you’ve been sourcing epoxy resin for any length of time, you already know that “stable pricing” is more of an aspiration than a guarantee. But 2026 has been a particularly sharp reminder of that reality — and for procurement teams and epoxy resin manufacturers alike, understanding what’s driving current prices isn’t optional anymore. It’s operational.

This guide breaks down where prices actually stand, what’s been pushing them around, and what to watch going into the second half of the year.

Epoxy Resin Manufacturers (3)

Where Prices Stand Right Now

Regional price gaps in 2026 are wider than most buyers budgeted for. Here’s the rough picture as of Q1–Q2:

  • Northeast Asia: ~$2.62/kg
  • Southeast Asia: ~$3.10/kg
  • Middle East: up 31.9% since late 2025, driven by feedstock tightening
  • Europe: ~$5.23/kg — the steepest in the major markets

For any epoxy resin manufacturer operating across multiple regions, these aren’t just numbers to track — they’re decisions waiting to happen. Whether you’re locking in contracts, adjusting formulas, or rethinking sourcing geography, the spread matters.


What’s Actually Moving the Market

Prices don’t shift in a vacuum. In 2026, several overlapping forces have been doing the heavy lifting:

Feedstock Pressure at the Top
Bisphenol A (BPA) and Epichlorohydrin (ECH) — the two primary raw inputs for most epoxy systems — saw sustained cost increases through late 2025 and into early 2026. When your inputs get more expensive and supply doesn’t loosen up, the pressure flows downstream quickly. Every epoxy resin manufacturer felt this, but how much of it reached the end buyer depended almost entirely on how well-positioned their procurement was heading into the year.

Geopolitical Friction and Shipping Disruption
Conflict-related disruptions in key trade corridors pushed freight costs up and complicated lead times. For epoxy resin manufacturers running lean inventory models, this created a compounding problem — higher input costs plus longer replenishment cycles meant tighter margins and less pricing flexibility.

Demand Spikes in High-Growth Sectors
The electric vehicle and renewable energy buildout hasn’t slowed down. Both sectors are heavy consumers of epoxy-based materials — battery encapsulation, structural composites, wind blade manufacturing. That demand pull has kept the market tight even when supply conditions might otherwise have allowed some relief.

Asian Supply Tightening
Scheduled maintenance shutdowns and capacity adjustments among major Asian producers created temporary but significant supply gaps, particularly in Q1. For buyers who rely heavily on a single sourcing region, this was a painful quarter.


How Smart Manufacturers Are Responding

Not every epoxy resin manufacturer navigated 2026 the same way. The ones that came through with minimal disruption tended to share a few common approaches:

They bought ahead, not behind.
Forward procurement — building inventory when feedstock prices dipped — gave some manufacturers a meaningful cost cushion that competitors without that buffer simply didn’t have. It’s not a complicated strategy, but it requires discipline and market visibility to execute consistently.

They diversified their supplier base.
Relying on a single BPA or ECH supplier in a tight market is a structural vulnerability. The epoxy resin manufacturers that fared best in Q1 were the ones that had already spread their upstream dependencies across multiple partners and geographies.

They locked in contracts where it made sense.
Spot buying can look attractive when prices are falling. In a rising market, it’s a liability. Manufacturers with long-term supply agreements in place were insulated — at least partially — from the worst of the Q1 run-up.

They communicated early.
This one doesn’t show up in a cost model, but it matters: manufacturers that flagged potential price or lead time impacts to their customers weeks in advance — rather than days — preserved relationships that spot-buying situations tend to fracture.


What to Watch in H2 2026

The back half of the year brings its own set of variables. A few things worth tracking closely:

BPA and ECH feedstock trajectory. If upstream costs stabilize, there’s room for some regional price softening — particularly in Asia. If they don’t, the pressure stays.

EV and renewable energy demand. Order books in both sectors remain strong. Unless that changes materially, demand-side pressure on epoxy resin isn’t going anywhere.

Regional capacity additions. Several new production facilities are expected to come online in Asia through 2026 and 2027. If timelines hold, this could shift the supply picture meaningfully by late Q4.

Currency and freight. Dollar strength and ongoing freight volatility continue to affect landed costs for buyers sourcing internationally — something every epoxy resin manufacturer with a cross-border supply chain needs to factor in.


A Note on What Price Guides Don’t Tell You

Spot prices and regional averages are useful benchmarks, but they don’t capture the full picture of what you’re actually paying — or what you’re risking.

The epoxy resin manufacturer quoting you the lowest price today might be doing so because they haven’t yet passed on their own cost increases. That gap closes eventually, sometimes suddenly. The one quoting slightly higher might be the one whose supply chain is actually in a position to deliver reliably six months from now.

Price is one input into a sourcing decision. Supply continuity, relationship depth, and the ability to absorb market shocks without disrupting your production schedule are the variables that tend to matter more when things get difficult — which, based on 2026 so far, is a scenario worth planning for.


Bottom Line

2026 has been a year that separated well-structured epoxy resin manufacturers from those operating on thinner foundations. The price volatility was real, but so was the variation in how different suppliers responded to it.

For buyers, the takeaway is straightforward: use this moment to pressure-test your current supplier relationships. For manufacturers, it’s a reminder that supply chain resilience isn’t a cost center — it’s a competitive advantage that shows up most clearly when the market stops cooperating.

Prices will settle. The habits built around managing through volatility tend to stick around longer.

Epoxy Resin Manufacturers (2)

River Tables and River Countertops: Why Furniture Brands Are Shifting to Deep Pour Epoxy Wholesale Sourcing

A Product Category That Outgrew Its DIY Origins

River tables started as a niche project in the custom woodworking community — live-edge slabs, deep-fill epoxy channels, conference tables that commanded five-figure prices from architects and interior designers. That was ten years ago. Today, river tables appear in furniture retail chains, hospitality fit-outs, residential kitchen renovations, and mass-market home goods catalogues. The aesthetic went mainstream. The supply chain didn’t keep up.

Most of the deep pour epoxy resin reaching North American and Australian furniture makers still moves through the same fragmented channels it did when river tables were a hobbyist pursuit: craft supply distributors, small-batch resin brands, direct import by individual studios. For B2B buyers — furniture brands, wholesale distributors, contract manufacturers — the opportunity is in professionalization: bringing supply chain discipline, consistent formulation quality, and volume pricing to a segment that has mostly operated without it.

This article maps the B2B demand structure for deep pour epoxy in the furniture market, explains why formulation requirements for professional furniture applications differ from hobbyist products, and identifies what wholesale buyers should look for when qualifying a Chinese epoxy resin manufacturer for this segment.

Epoxy Resin Manufacturers (2)

The Market Structure: Who’s Actually Buying Deep Pour Epoxy

Understanding the demand structure matters for anyone building a wholesale or distribution business in this space. Deep pour epoxy buyers in the furniture sector aren’t a monolithic customer base — they have different volume requirements, different formulation needs, and different purchasing behaviors.

Custom Furniture Studios

Single-operator or small-team workshops producing bespoke river tables, live-edge dining tables, and custom bar tops. Volume per order: 5–50 liters. Purchasing frequency: irregular, project-driven. Price sensitivity: moderate — they’re selling finished pieces at significant markup and can absorb a premium for product they trust. What they care about most: optical clarity, color stability (their finished pieces need to look the same in five years as they do on delivery), and reliable technical support when something goes wrong.

This is the buyer who reads every line of a TDS and calls the supplier when the pour behaves differently from last time. For distributors, they’re high-touch but high-loyalty. Get the product right and they don’t switch.

Mid-Scale Production Furniture Brands

Companies producing river table collections for retail — furniture stores, online platforms, hospitality procurement channels. Volume per order: 100–500 liters. Purchasing frequency: monthly or quarterly. Price sensitivity: higher — they’re competing on price at the retail level and need consistent material cost. What they care about most: batch-to-batch consistency (finish quality needs to be identical across a production run of 50 tables), pour depth predictability, and documentation that supports their quality system.

This is the buyer who needs a Certificate of Analysis with every shipment and will run incoming inspection on resin properties. Supply disruption is a production line problem, not an inconvenience.

Contract Manufacturers and Hospitality Fit-Out Specialists

Companies pouring large-format epoxy elements — bar tops, reception counters, feature walls — for commercial clients. Volume per order: 200–2,000 liters. Purchasing frequency: project-based with occasional blanket orders. What they care about most: maximum pour depth per layer (commercial projects often require sections that exceed consumer product specifications), open time in large-volume pours, color match stability across multiple orders placed months apart.

This segment is the most technically demanding. The pour depth requirements push against the thermal management limits of most commercial deep pour products. Color consistency across orders requires a supplier with documented raw material stability, not just batch-to-batch QC.

Retail Resin Brands (Private Label)

Brands that source epoxy resin from China and sell under their own label — consumer packaging, branded documentation, positioned against retail competitors. Volume per order: 200–1,000 liters across multiple SKUs. What they care about: OEM capability, private label packaging, documentation that matches their brand’s quality positioning, and a supplier relationship that can scale with their growth.

This buyer is not buying a commodity. They’re buying a supply chain partnership. The epoxy resin manufacturer’s OEM capability — custom labeling, bilingual documentation, packaging format flexibility — is as important as the product specification.


Why Professional Furniture Applications Demand More Than Hobbyist Formulations

The deep pour epoxy products marketed to hobbyists and the formulations required for professional furniture production are not the same thing. The differences matter for B2B buyers who are supplying professional fabricators.

Pour Depth: The Commercial Reality

Consumer deep pour products are typically specified to a maximum single-layer depth of 50–75mm (2–3 inches). That covers most hobbyist applications. Commercial furniture production regularly requires deeper single pours — 100mm channels in wide river tables, 150mm decorative elements in hospitality installations, thick casting blocks for sculptural furniture components.

At these depths, the thermal management requirements are significantly more demanding. A product specified to 75mm maximum depth doesn’t just “work less well” at 100mm — it risks thermal runaway: exothermic overheating that causes cracking, yellowing, volatile release, and in severe cases, mold damage or fire. Professional fabricators working at commercial scale need products with documented pour depth limits above the 75mm consumer product ceiling, with supporting temperature rise data rather than marketing claims.

Color Consistency Across Production Runs

A custom furniture studio producing one table can manage minor color variation between the epoxy pours on that piece. A production furniture brand manufacturing 50 river tables for a retail order cannot — every table needs to be visually identical. A hospitality specifier ordering additional units of a feature counter six months after the initial installation cannot have a visible color shift between the original and the replacement.

Color consistency across production runs requires a supplier with documented raw material sourcing stability, batch-to-batch colorimetric testing, and a change control process that prevents undocumented formula adjustments. None of this is guaranteed by ISO 9001 alone — it has to be specifically verified.

Open Time in Large-Volume Pours

In commercial production environments, a single pour often involves mixing and placing significantly larger volumes than the 1–2 liter quantities typical of hobbyist application. Mixing 10 liters of deep pour epoxy generates more total exothermic heat than mixing 1 liter — even in a deep pour formulation. The effective pot life decreases as mixed volume increases, because the larger mass generates and retains more heat.

Professional buyers need pot life data across a range of mixed masses, not just the standard 100g or 150g laboratory test condition. A product with 60 minutes pot life at 150g may have 35 minutes effective pot life at 5,000g — a difference that matters significantly when managing a large commercial pour.

Ambient Temperature Performance Range

Consumer product documentation typically specifies performance at 20–25°C. Professional furniture production happens in workshops across diverse climate zones: a furniture factory in Queensland operates at ambient temperatures that routinely exceed 30°C in summer; a contract manufacturer in Minnesota works through winters where the shop floor drops below 15°C. Both conditions materially affect pot life, working time, and maximum pour depth.

Professional buyers sourcing deep pour epoxy for resale into diverse geographic markets need temperature-range data, not a single-condition specification.


The Wholesale Sourcing Equation: What Changes at Volume

Moving from sample purchases to wholesale supply relationships in the deep pour epoxy category changes the relevant evaluation criteria significantly.

Formulation Stability at Volume

At sample and small-order quantities, formulation variation between batches is masked by the fact that each order is typically used in a single pour session. At wholesale volumes — where a single shipment might supply a furniture brand for 8–12 weeks of production — batch-to-batch variation in viscosity, cure speed, or color accumulates and becomes visible in finished product output.

The QC regime required for wholesale supply is meaningfully more rigorous than for sample orders. Per-batch Certificate of Analysis is table stakes. What distinguishes serious wholesale suppliers from product sellers is the depth of that CoA: actual measured values (not pass/fail notation), colorimetric data (Gardner color or APHA), and viscosity data for both components at multiple temperatures.

Private Label Packaging for the Furniture Market

The furniture market has specific packaging conventions that differ from general-purpose resin applications. River table fabricators typically work in 1:1 or 2:1 ratio systems with component volumes matched for mixing convenience — a 15-liter Part A paired with a 7.5-liter Part B, for example, rather than arbitrary drum quantities that require customers to measure out matching weights.

Wholesale buyers supplying professional fabricators need a Chinese epoxy resin manufacturer capable of filling to matched-component specifications, not just bulk drums. Custom labels, application guides, and bilingual documentation (for markets like Canada with French-language requirements, or Australia with GHS-specific SDS format) are the basic OEM requirements for this channel.

Supply Consistency and Forward Planning

Professional furniture production can’t be managed around resin supply uncertainty. A furniture brand on a 6-week production cycle for a retail order needs to know that the epoxy supply will be available on schedule, with consistent specifications, for the duration of the order. Supply gaps, specification changes, or documentation delays at the manufacturer level translate directly into production delays and contract penalties at the furniture brand level.

Wholesale buyers should establish supply agreements that include volume commitments, lead time guarantees, advance notification of raw material changes, and defined remedies for supply failures. These provisions exist in mature industrial supply relationships — they’re not standard in the casual supplier-buyer conversations that characterize much of the deep pour epoxy market today.


Qualifying a Chinese Deep Pour Epoxy Manufacturer for Furniture Applications

The qualification criteria for a deep pour epoxy supplier serving professional furniture applications are more demanding than for general-purpose resin sourcing. These are the minimum requirements.

Pour depth documentation. Temperature rise curves at 50mm, 75mm, 100mm, and 150mm pour depths. Maximum recommended depth per layer at 20°C, 25°C, and 30°C ambient. This data should be available without special request — if it isn’t, the manufacturer doesn’t have it.

Color stability data. Initial Gardner color or APHA value. Yellowing index at full cure (ASTM E313). UV aging data — YI increase after defined accelerated UV exposure. Batch-to-batch color consistency data across at least 5 production batches.

Pot life at range of mixed masses. Standard 100g/150g laboratory data plus data at 1kg and 5kg mixed masses. Without this, wholesale buyers can’t accurately communicate pot life to professional fabricators working at commercial volume.

Raw material sourcing transparency. Named primary raw material suppliers, qualified supplier list, and raw material change notification policy. Color consistency across production runs is only achievable if raw material inputs are stable — and raw material stability requires documented supplier management.

OEM and packaging capability. Matched-component filling capability. Custom label production. Bilingual documentation capability. Minimum order quantities for OEM production that work for wholesale buyers at realistic launch volumes.

Export documentation. IMDG classification for both components, GHS-compliant SDS in destination-market format, UN-certified packaging, and Certificate of Analysis per shipment.

Jinhua Resin (jinhuaresin.com) is a Guangdong-based epoxy resin manufacturer producing deep pour epoxy formulations for professional furniture and commercial installation applications. Temperature rise data, color stability documentation, pot life across mixed masses, matched-component OEM packaging, and full export documentation are standard for wholesale buyers.


A Reference: Deep Pour Epoxy Specification Requirements by Buyer Segment

Buyer TypeVolume/OrderKey Spec RequirementsOEM Need
Custom studio5–50LClarity, color stability, tech supportLow
Production furniture brand100–500LBatch consistency, CoA, pour depth dataMedium
Contract manufacturer200–2,000LMax pour depth >75mm, temp-range data, color matchMedium–High
Private label brand200–1,000LFull OEM, custom packaging, bilingual docsHigh

The Professionalization Opportunity

The deep pour epoxy segment is in transition. Five years ago, most volume moved through craft channels to hobbyist buyers. Today, production furniture brands, hospitality contractors, and retail resin labels are buying at wholesale volumes and expecting industrial-grade supply chain support — consistent formulation, documented specifications, OEM capability, and reliable logistics.

The Chinese epoxy resin manufacturers who can serve this transition — who have the formulation depth to produce genuine deep pour products, the QC systems to deliver batch consistency at wholesale volume, and the OEM infrastructure to support private label brands — are a smaller subset than the field of suppliers who will claim to. For B2B buyers building businesses in this segment, the qualification work is the moat.


Sourcing deep pour epoxy wholesale for furniture production or private label? Jinhua Resin offers pour depth documentation, color stability data, matched-component OEM packaging, and wholesale supply programs for the professional furniture market: jinhuaresin.com

Epoxy Resin Shelf Life

How to Store Unused Epoxy Resin? 5 Proven Ways to Extend the Epoxy Resin Shelf Life of Part A & B

Whether you rely on slow-reacting deep pour epoxy for massive timber castings or standard surface coats for countertops, epoxy remains a climate-sensitive compound. Almost every woodworker or resin artist has run into the same headache: opening a half-used bottle from months ago only to discover Part A turned into a milky, crystalline slush, or Part B aged into a dark amber color that fails to cure properly.

This isn’t just a waste of expensive raw materials; it can completely ruin a project you spent weeks preparing.

The good news? Unopened or partially used resin systems can easily maintain their performance for 12 to 24 months—provided you protect them from environmental hazards. Here is a breakdown of the silent culprits behind resin degradation and five practical rules to double your resin’s shelf life.

Epoxy Resin Shelf Life


What Ruins Unused Epoxy Resin?
Before you can store Part A and Part B properly, you have to understand what’s happening inside those bottles. Unmixed epoxy isn’t just sitting there—it’s constantly reacting to its environment.

  • Air & Moisture (The Hardener’s Worst Enemy): Part B hardeners love water. The second you leave the cap off, the liquid starts sucking humidity right out of the room. This triggers a chemical reaction called amine blushing, leaving you with amber-colored liquid, thick sludge, or a piece that stays sticky and foggy forever.
  • Sunlight & UV Rays: UV radiation tears apart the polymer chains in unmixed resin. Leave a clear bottle near a window, and it’ll turn yellow and brittle long before you even get a chance to mix it.
  • Wild Temp Swings: Summer heat bakes the liquid, triggering tiny thermal reactions inside the jug that kill its shelf life. On the flip side, winter cold freezes Part A into a solid, cloudy mess.

5 Rules to Keep Your Resin Fresh for Months

1. Keep the Room Temperature Steady (15℃-25℃)

If there is one thing liquid polymer hates, it’s a roller-coaster climate. Find a spot in your shop or house that stays consistently between 15℃ and 25℃.

  • Keep It Away from Heat: Don’t leave your stash in a hot summer garage, next to a radiator, or anywhere near direct sunlight. High ambient heat cooks the chemical batch, aging it months ahead of time.
  • Busting the Winter “Freeze” (Crystallization): If your workspace drops below 10℃, Part A might look like milky white slush or turn completely rock-hard. Don’t panic and don’t throw it away. It hasn’t gone bad; it just crystallized. Tighten the cap, submerge the bottle in a warm water bath (50℃-60℃) for 30 to 60 minutes, and watch the crystals melt right back into liquid glass.

    2. Lock Out Air (Seal Immediately & Use Inert Gas Barriers)
    Air exposure is the main reason amine hardeners turn yellow and lose their reactivity.

    Wipe Threads & Cap Instantly: After pouring what you need, wipe the bottle threads clean with a dry paper towel to prevent the cap from gluing shut, then tighten the lid immediately.

    Pro Hack for Half-Empty Jugs: When using large containers of deep pour resin, pouring out half leaves a massive air gap inside the jug. Spraying a quick burst of inert heavy gas (like Argon or specialized resin preserver spray) into the container before capping creates an invisible blanket over the liquid, displacing moisture and oxygen.

    3. Block UV Light: Say No to Clear Bottles
    Direct light compromises the optical clarity of your raw materials.

    Always store your compounds inside their original opaque containers (usually high-density polyethylene or metal cans).

    If you transfer liquid into smaller working bottles for daily use, choose dark amber or opaque squeeze bottles and tuck them inside a closed cabinet away from windows.

    4. Never Mix Up Caps or Dispensing Tools
    Cross-contamination is an easy mistake that ruins entire batches.

    Part A and Part B caps often look identical. If you accidentally swap them, residual chemicals on the inside of the cap will trigger a tiny localized cure along the threads, forming hard crusts or contaminating the whole jug.

    The Fix: Mark your “A” and “B” lids clearly using bold, different-colored markers. Never use the same stir stick or pump for both components.

    5. Practice FIFO & Smart Decanting
    Label Everything (The FIFO Rule): As soon as a box arrives at your shop, slap the date on the bottle with a Sharpie. Write down when it arrived and the exact day you popped the seal. Always reach for the oldest bottle on the shelf first—opening a fresh jug when you still have half-used stock sitting around is just asking for expired chemicals.Don’t Keep Cracking the Main Jug: Buying deep pour resin in bulk gallons saves money, but opening a massive container just to grab a few ounces for a small coaster project is a huge mistake. Every time you open that lid, fresh, humid air rushes in. Instead, pour off a small working batch into smaller, airtight squeeze bottles for daily use. That way, your main stash stays factory-sealed and fresh for the big builds.
    Final Thoughts
    Epoxy resin isn’t a non-perishable product; think of it as a reactive liquid that demands careful handling. By controlling temperature, air exposure, light, and cross-contamination, you can ensure your unused Part A and Part B remain crystal clear, fully reactive, and ready for your next build—even a year down the road.
Table Top Epoxy

Crystal Clear Every Time: How Manufacturers Control Clarity and Eliminate Bubbles in Table Top Epoxy

The Problem That Shows Up Three Days After the Pour

A woodworker pours a river table. The pour looks clean — no visible bubbles, good color, self-leveling nicely. Three days later, full cure reveals a haze across the center panel, a cluster of micro-bubbles just below the surface, and a faint yellow tint that wasn’t there in the liquid. The wood is fine. The technique was fine. The table is a reject.

This scenario plays out constantly in the table top epoxy segment, and the root cause attribution is almost always wrong. The customer blames technique. The distributor suspects the customer. The manufacturer defends the product. In most cases, the actual problem is a combination of formulation characteristics and application conditions that nobody in the chain explained clearly at the point of sale.

For B2B buyers sourcing table top epoxy for resale or private label, understanding what drives optical clarity — and what drives bubble formation — is not just technical knowledge. It’s the difference between a product that generates repeat orders and one that generates support calls.

Table Top Epoxy

Optical Clarity: What It Is and What Degrades It

“Crystal clear” is a marketing phrase. In manufacturing terms, optical clarity in cured epoxy resin is measured through three distinct properties, each with a different cause and a different solution when it goes wrong.

Yellowness Index (YI)

Yellowing is the most common clarity complaint in table top epoxy. It manifests as a warm amber tint in the cured resin, ranging from barely perceptible to strongly discolored depending on the formulation and the conditions under which it cured.

The primary cause of initial yellowing — yellow color present immediately after cure, before any UV exposure — is the hardener chemistry. Aromatic amine hardeners (including DETA, TETA, and similar compounds) are inherently yellowing. They’re reactive and fast, which is why cheap commodity epoxy often uses them, but they produce a colored cure. Cycloaliphatic amine hardeners and modified aliphatic systems cure to a substantially cleaner color. A table top epoxy formulated with non-yellowing hardener chemistry starts clear; one formulated with aromatic amines starts amber.

Secondary yellowing — color development over time with UV exposure — is a separate mechanism. Even a non-yellowing hardener system will yellow under sustained UV exposure without adequate photoprotection. UV stabilizer packages (hindered amine light stabilizers, or HALS, combined with UV absorbers) slow this process. The concentration and selection of these additives is a formulation decision; it doesn’t show up on the product label and requires direct inquiry with the manufacturer.

What to ask:

  • What hardener chemistry does the formulation use — aromatic, aliphatic, or cycloaliphatic amine?
  • What is the initial Yellowness Index at full cure (ASTM D1925 or ASTM E313)?
  • What UV stabilizer package is included, and what is the expected color retention under defined UV exposure conditions?

Haze and Cloudiness

A cured epoxy that looks clear in a thin section but shows haze or cloudiness in a thicker pour, or when viewed at an angle, has a scattering problem — light is being deflected by microscopic structures within the polymer matrix rather than passing through cleanly.

There are several sources of this scattering:

Incomplete mixing. Epoxy resin and hardener that aren’t thoroughly combined cure inhomogeneously — some regions richer in resin, some richer in hardener. These composition gradients create refractive index variations that scatter light. This is a user technique issue but also a formulation issue: higher-viscosity products are harder to mix completely, and products with narrow mixing ratios (where a small measurement error produces a large stoichiometric deviation) are less tolerant of imprecision.

Phase separation from moisture. Amine hardeners react with atmospheric moisture and CO₂. In humid conditions, this can cause blushing — a white, waxy surface layer — or internal cloudiness from moisture-induced phase separation. Formulations with moisture-tolerant hardener systems are significantly more robust in real-world application conditions.

Incompatible additives. Pigments, dyes, or other additives that aren’t fully compatible with the resin system can migrate, aggregate, or phase-separate during cure, creating localized cloudiness. This matters for any private label brand adding colorants to a clear base resin — the compatibility of the colorant system with the base needs to be validated, not assumed.

Residual stress in thick sections. In deeper pours that generate significant exothermic heat, thermal stress during cure can create micro-fractures or density variations in the polymer that scatter light. This is why deep pour products and table top products are distinct formulations — and why using a table top epoxy in a deep pour application produces both thermal and optical problems.

Surface Finish Quality

A perfectly clear epoxy can still look wrong if the surface finish is poor — fish-eyes, orange peel texture, or a matte rather than gloss surface. Surface finish is partly a formulation characteristic (surface tension, flow-out behavior, defoamer presence and concentration) and partly an application condition issue (substrate contamination, temperature during pour, overly aggressive torching).

The defoamer question is worth exploring directly with the manufacturer. Defoamers reduce surface tension and help air escape from the mixed resin during the working time window. Under-defoaming leaves micro-bubbles. Over-defoaming causes fish-eye craters. Getting the concentration right for a given viscosity and working time is a formulation optimization — and it’s one of the less visible variables that distinguishes a product developed for table top applications from a general-purpose casting resin.


Bubble Formation: Causes, Types, and Control

Bubbles in cured epoxy are not all the same. They form through different mechanisms, at different stages of the application process, and require different interventions. Knowing which type you’re dealing with determines whether the solution is a formulation change, a process change, or a user education change.

Mixing Bubbles

The act of combining Part A and Part B introduces air. Mixing too vigorously — especially with a drill mixer at high speed — whips air into the resin the way a whisk aerates cream. These bubbles are typically small and uniformly distributed through the mixed resin.

Most table top epoxy formulations have sufficient working time and low enough viscosity for mixing bubbles to self-degas — the bubbles rise to the surface and pop under their own buoyancy during the working time window. Formulations with higher viscosity, shorter working time, or insufficient defoamer don’t degas adequately, and the mixing bubbles become permanent.

What this means for sourcing: Viscosity at application temperature and working time are the two formulation specs most predictive of self-degassing performance. A product with 800–1,200 cPs at 25°C and 30+ minutes working time will self-degas reliably. A product with 2,500 cPs at 20°C and 20 minutes working time will not.

Substrate Outgassing

Wood — particularly freshly cut, green, or porous species like oak and walnut — outgasses moisture and air when warm resin is applied. The heat from the mixed resin, combined with the temperature differential between the resin and the wood, drives gas out of the substrate and into the resin layer from below.

These bubbles typically appear 10–30 minutes after the pour, rising from the wood surface upward. They’re often larger and more localized than mixing bubbles, and they can’t be fully addressed by torching — more bubbles keep coming as the outgassing continues.

The standard professional practice is a seal coat: a thin, brushed application of epoxy to the substrate before the flood coat, allowed to cure to the point where outgassing is complete before the flood coat is applied. The seal coat traps the outgassed air in the thin cured layer rather than letting it migrate into the flood coat.

For private label brands, this application guidance needs to be in the product documentation. Customers who don’t know about seal coating will blame the product for substrate outgassing bubbles.

Recoat Bubbles

In multi-layer applications, bubbles can form at the interface between a cured first coat and a second pour. The cause is usually one of two things: the first coat has fully cured and a hard barrier has formed that traps air between layers, or solvent cleaning between coats introduced contamination that disrupts surface tension.

The recoat window — the time after the first coat during which a second pour will chemically bond without adhesion issues — is a product-specific specification. Most table top epoxy products have a recoat window of 4–24 hours after the first pour; outside this window, mechanical preparation (light sanding) is required before recoating.

This specification is frequently missing from product TDS sheets. If your product doesn’t specify the recoat window, request it from the manufacturer — and if they don’t have data on it, treat that as a formulation gap.


The Formulation Variables That Actually Matter

Sourcing table top epoxy for resale means making formulation choices that affect end-user outcomes. These are the variables worth interrogating at the manufacturer level.

Viscosity at application temperature. Lower viscosity means better self-leveling, better self-degassing, and better penetration into wood grain on the seal coat. Products in the 800–1,500 cPs range at 22–25°C are the practical sweet spot for table top applications. Viscosity above 2,000 cPs at room temperature requires more deliberate degassing technique from the end user.

Pot life vs. working time. Covered elsewhere in this series, but relevant here: longer working time gives bubbles more time to rise and self-degas before the viscosity increases enough to trap them. Products with 30–40 minutes working time at standard conditions are more forgiving than products with 15–20 minute windows, all else equal.

Hardener type and its color contribution. As discussed, cycloaliphatic or modified aliphatic hardeners for non-yellowing cure. This is not negotiable for a premium table top product — aromatic amine hardeners will always produce a yellower cure.

UV stabilizer package. HALS + UV absorber combination at adequate concentration for the product’s intended outdoor and window-adjacent applications. The formulation should specify expected color retention performance — yellowing index increase over a defined UV dose.

Defoamer type and concentration. Not visible on TDS sheets but directly affects surface finish and bubble performance. Ask whether the formulation uses a silicone or non-silicone defoamer — silicone defoamers can interfere with certain topcoat adhesion applications and may not be appropriate for all use cases.

Self-leveling additives. Some formulations include flow-leveling additives that improve surface finish without requiring a perfectly level substrate. Relevant for professional installers doing on-site pours.


Questions to Ask Your Table Top Epoxy Manufacturer

On clarity:

  • What hardener chemistry does the formulation use, and what is the measured Yellowness Index at full cure?
  • What UV stabilizer package is included? What is the expected YI increase after accelerated UV exposure testing (ASTM G154 or equivalent)?
  • Has the formulation been tested for haze or cloudiness in pours at 3mm, 6mm, and 12mm depth?

On bubbles:

  • What is the viscosity at 20°C, 23°C, and 25°C?
  • What defoamer type and concentration is used?
  • Does the formulation self-degas when mixed at low speed? At what working time and temperature?
  • Is there documented data on substrate outgassing behavior with common wood species?

On application guidance:

  • What is the recommended recoat window for second-layer pours?
  • Is seal coat application recommended, and if so, what are the recommended seal coat parameters?
  • At what ambient temperature range is the formulation designed to perform?

Jinhua Resin (jinhuaresin.com) is a Guangdong-based epoxy resin manufacturer producing table top epoxy formulated specifically for clarity-critical applications. Non-yellowing hardener chemistry, UV stabilizer packages with documented color retention performance, optimized defoamer concentration, and full TDS documentation including viscosity data across temperature range are standard for all table top epoxy product lines.


A Formulation Spec Reference for Table Top Epoxy Buyers

PropertyTarget RangeWhy It Matters
Viscosity (Part A, 25°C)800–1,500 cPsSelf-leveling and bubble release
Working time (25°C)30–45 minTime for bubbles to self-degas
Initial Yellowness Index< 2.0 (ASTM E313)Color quality at cure
Hardener typeCycloaliphatic or modified aliphaticNon-yellowing cure
UV stabilizerHALS + UV absorberLong-term color retention
Recoat window4–24 hoursMulti-layer application guidance
Shore D hardness (full cure)75–85Surface durability

The Clarity Problem Is Mostly a Documentation Problem

The majority of clarity and bubble complaints in the table top epoxy segment are not caused by defective products. They’re caused by products that perform well within their design parameters but are used outside those parameters — wrong ambient temperature, wrong substrate preparation, wrong mixing technique, wrong recoat timing — because the documentation didn’t explain the parameters clearly enough.

For B2B buyers, this is an opportunity. A supplier who can provide clear, specific, application-condition documentation — not just a TDS with physical property numbers, but actual guidance on seal coats, recoat windows, temperature ranges, and mixing technique — gives their distribution customers a product that works reliably in the field. That reliability is what generates the second order, the third order, and the referral.

The formulation matters. The documentation matters equally.


Sourcing table top epoxy for distribution or private label? Jinhua Resin provides non-yellowing formulations with documented clarity performance, UV stability data, and full application guidance for all table top epoxy product lines: jinhuaresin.com

Epoxy Resin Manufacturers (2)

7 Quality Control Checkpoints to Evaluate Before Choosing a Chinese Epoxy Resin manufacturers

The Audit That Never Happens

Most B2B buyers evaluate Chinese epoxy resin suppliers the same way: request samples, test the samples, negotiate price, place an order. If the samples pass, the supplier passes. The assumption is that sample quality predicts production quality — and that assumption fails often enough that it deserves scrutiny.

Sample quality and production quality are not the same thing. Samples can be hand-blended in a lab by the factory’s best chemist, using freshly sourced raw materials, with extra QC attention because a new customer is watching. Production runs happen under different conditions: scheduled batches, standard raw material inventory, production staff working to throughput targets, QC processes that are good enough to catch obvious failures but not calibrated to catch the kind of batch-to-batch drift that erodes product performance over months.

The seven checkpoints in this guide don’t replace sample evaluation. They add to it — probing the systems and practices behind the sample, so that what arrives on the fifth order resembles what arrived on the first.

Epoxy Resin Manufacturers (2)

Checkpoint 1: Raw Material Sourcing Transparency

The quality of a formulated epoxy resin is a direct function of its raw materials. Base resin quality, hardener purity, additive consistency — these variables set the ceiling on what the finished product can achieve. A factory that doesn’t track or disclose its raw material sourcing can’t give you meaningful assurance about the consistency of those inputs over time.

What to ask:

  • Who are your primary suppliers for base epoxy resin and hardener components?
  • Do you use a qualified supplier list (QSL) for raw materials, or do you purchase based on price?
  • What happens when your primary raw material supplier is unable to deliver — do you have approved alternates, and are those alternates validated against the same quality standards?
  • Have there been any raw material supplier changes in the past 12 months, and if so, what re-validation was done?

The answer to the last question is particularly revealing. Raw material substitutions without re-validation are a leading cause of silent product drift — the finished product seems similar but has shifted in some property the factory doesn’t measure and the buyer doesn’t notice until a downstream customer complains.

A factory with a serious QC system will have a documented raw material change control process. One without it will give you a vague answer about “using the same quality materials” without being able to specify what same means in practice.


Checkpoint 2: In-Process Quality Control

QC that only happens at the end of production — final product testing before shipment — catches defective batches but doesn’t prevent them or diagnose why they happened. In-process QC, applied at defined points during synthesis or blending, catches problems earlier, generates data that enables root cause analysis, and builds a production record that supports traceability.

What to look for:

  • Viscosity checks at defined stages of the blending process
  • Refractive index or density measurements to confirm component ratios
  • Temperature monitoring during reactive synthesis steps
  • Intermediate QC hold points where batch continuation is conditional on test results

What to ask:

  • At what points during production is in-process testing performed?
  • What are the acceptance criteria at each in-process checkpoint?
  • If an in-process test fails, what is the disposition process — rework, discard, or does production continue?
  • Can you share a sample batch production record showing in-process test data?

The production record request is the most diagnostic question here. Factories with genuine in-process QC have records. Factories without it don’t — and will either tell you the records are confidential (which may be true but is also a deflection) or explain that they test the final product, which isn’t the same thing.


Checkpoint 3: Finished Product Testing Scope and Methods

Every factory tests finished product before shipment. The relevant questions are what they test, how they test it, and what they do with results that fall outside spec.

Minimum expected test scope for epoxy resin:

  • Viscosity (Part A and Part B separately, at defined temperature)
  • Color / Gardner color number
  • Epoxide equivalent weight (for resin component)
  • Amine value or active hydrogen equivalent weight (for hardener component)
  • Mixed ratio verification
  • Gel time / pot life at defined conditions

Additional tests relevant for specific applications:

  • Shore D hardness at full cure (table top, casting)
  • Optical clarity — yellowness index, haze (clear casting applications)
  • Residual epichlorohydrin content (U.S. market, Prop 65 relevance)
  • Tensile and flexural properties (structural applications)

What to ask:

  • What tests are performed on every production batch as standard?
  • What test methods do you use — ASTM, ISO, or internal methods?
  • What are the acceptance limits for each test?
  • Can you share a Certificate of Analysis for a recent production batch?

The CoA request is standard. What’s less standard is asking for the actual measured values, not just pass/fail notation. A CoA that shows “Viscosity: PASS” without a number tells you the batch was within spec but not where within spec — and batch-to-batch variation within spec is exactly the kind of drift that causes downstream problems without triggering a formal rejection.


Checkpoint 4: Batch Traceability and Record Retention

If a quality problem surfaces with a specific shipment, the ability to trace that shipment back to its production batch, and the production batch back to its raw material inputs, determines whether the root cause can be identified and whether the problem can be reliably prevented from recurring.

Without traceability, a quality complaint produces a conversation that goes: “We received this batch and it has a problem.” “We tested the batch before shipment and it passed.” Stalemate. Nobody can determine what actually happened.

What to ask:

  • Do you assign unique batch numbers to each production run?
  • What batch-level records do you retain, and for how long?
  • If I report a quality problem with a specific shipment, can you pull the production records for that batch — including in-process test data and raw material lot numbers?
  • What is your retention period for batch records and CoAs?

A minimum acceptable answer: unique batch numbers on all product, CoA retained per batch, raw material lot numbers recorded in the batch record, retention period of at least 2 years. Factories operating to ISO 9001 or equivalent QMS standards will have defined retention periods and record formats; ask for the relevant procedure document.


Checkpoint 5: ISO Certification — What It Covers and What It Doesn’t

ISO 9001 certification is frequently cited by Chinese epoxy resin manufacturers as evidence of quality. It is evidence of something — a documented quality management system that has been audited by a third-party certification body. It is not evidence that the specific products they make are good, or that their QC test methods are rigorous, or that their raw materials are high quality.

ISO 9001 certifies that a quality management system exists and is being followed. The standard doesn’t specify what the acceptance criteria should be for any particular product — only that criteria exist and are documented. A factory could be ISO 9001 certified and have acceptance criteria that allow wide batch-to-batch variation, as long as those criteria are documented and consistently applied.

What to actually verify:

  • Request the current ISO 9001 certificate and check the expiry date. Certificates are typically valid for 3 years with annual surveillance audits; an expired certificate is worse than no certificate because it indicates a lapse.
  • Ask which certification body issued the certificate. Recognized international accreditation bodies (TÜV, Bureau Veritas, SGS, Intertek, DNV) carry more weight than obscure local certifiers.
  • Ask when the most recent surveillance audit was conducted and whether any nonconformances were identified.

ISO 9001 is a floor, not a ceiling. Its presence is a necessary but not sufficient condition for a reliable supplier.


Checkpoint 6: Change Control and Customer Notification

This checkpoint is the one that matters most for long-term supply relationships — and the one that’s almost never discussed in initial supplier conversations.

Change control is the process by which a factory manages modifications to its products or processes: raw material changes, equipment changes, process parameter changes, formulation adjustments. Without a formal change control process, any of these changes can happen without the buyer’s knowledge — which means the product you’re receiving on order 10 may differ from the product you approved on order 1, without anyone having deliberately made it different.

The consequences range from minor (slight viscosity increase that customers notice but don’t complain about) to serious (cure behavior change that causes application failures at the end-user level and triggers warranty claims back through the supply chain).

What to ask:

  • Do you have a formal change control procedure for product and process changes?
  • What types of changes require customer notification before implementation?
  • What is your process for re-validating product performance after a significant change?
  • Has any change been made to this product’s formulation or production process in the past 24 months? If so, what was the change and how was it validated?

The last question creates a useful test: a factory with active change control will be able to answer it specifically, because they have records. A factory without it will either say “no changes” (plausible but unverifiable) or give a vague answer that reveals they don’t have a systematic way of tracking this.

The supplier agreement you sign should include a clause requiring written notification of any formulation or process change prior to implementation, with a defined re-validation and approval process before the changed product ships. This clause is frequently absent from standard factory contract templates. Negotiate it in.


Checkpoint 7: Complaint Handling and Corrective Action

How a supplier handles quality complaints tells you more about their QC culture than how they present in a qualification meeting. A factory that responds to complaints with defensiveness, generic reassurances, or requests for the buyer to prove the problem is real has a different QC culture from one that opens a formal investigation, pulls batch records, runs root cause analysis, and provides a written corrective action report.

What to ask before any complaint exists:

  • What is your formal complaint handling process?
  • When a quality complaint is received, what is the typical response timeline?
  • Do you conduct root cause analysis on quality complaints, and can you share an example of a corrective action report from a previous complaint?
  • What is your policy on replacement or credit for confirmed quality failures?

The request for a sample corrective action report is intentionally awkward — it asks the factory to show evidence of a past problem. Factories with a mature QC culture will understand why this is being asked and will provide a sanitized example. Factories without it will be uncomfortable with the question, which is informative.

During an active supply relationship: Response time to a complaint acknowledgment should be 24–48 hours. A preliminary assessment — whether the factory believes the complaint is related to their product — within 5 business days. A full root cause analysis and corrective action plan within 15–20 business days for production-related issues.

Suppliers who meet these timelines consistently are treating quality as a system, not as a crisis management exercise.

Jinhua Resin (jinhuaresin.com) is a Guangdong-based epoxy resin manufacturer with documented QC processes across all seven checkpoints described in this guide: raw material qualified supplier lists, in-process test records, per-batch CoA with actual measured values, full batch traceability, current ISO 9001 certification, formal change control with customer notification, and defined complaint handling procedures. Documentation available on request for qualified B2B buyers.


A Supplier Evaluation Scorecard

Use this framework when comparing multiple Chinese epoxy resin manufacturers:

CheckpointMinimum AcceptableStrong Signal
Raw material sourcingNamed primary suppliers, QSL existsApproved alternate suppliers with validation records
In-process QCAt least one in-process test with recordsMultiple checkpoints, sample batch record available
Finished product testingViscosity + color + ratio on every batchFull test scope per application, actual values on CoA
Batch traceabilityUnique batch numbers, CoA retained 2 yearsRaw material lots recorded, full production record available
ISO certificationCurrent certificate from recognized bodyRecent surveillance audit, no open nonconformances
Change controlWritten notification policy existsFormal change control procedure, re-validation required
Complaint handling48-hour acknowledgment, RCA conductedWritten corrective action reports, defined resolution timeline

A supplier who scores “minimum acceptable” across all seven is workable. One who scores “strong signal” across most of them is worth a long-term relationship.


The Question Behind All Seven Checkpoints

Every checkpoint in this guide is asking a version of the same question: does this factory’s quality system produce consistent product, or does it produce consistent samples?

The difference matters because samples are evaluated once, at the start of a relationship. Product is received repeatedly, under varying production conditions, across changing raw material lots, over months and years. A quality system that’s calibrated for sample production but not for production consistency will let you down — not on the first order, probably not on the second, but at some point in the relationship when conditions deviate from the ideal and the factory’s systems aren’t robust enough to catch it.

The seven checkpoints are the questions that reveal which kind of factory you’re dealing with before that moment arrives.


Evaluating Chinese epoxy resin manufacturers for B2B supply? Jinhua Resin provides full QC documentation — raw material sourcing records, per-batch CoA with actual values, ISO 9001 certification, and change control procedures — for all export product lines: jinhuaresin.com

Deep Pour Epoxy

Managing Exothermic Heat in Deep Pour Epoxy: A Factory-Level Guide for Large Volume Casting

The Problem That Doesn’t Show Up in the Product Description

Deep pour epoxy fails in a specific way. Not gradually, not ambiguously — it cracks, discolors, smokes, or in severe cases generates enough heat to warp the mold, damage the substrate, or create a fire hazard. When it happens, the instinct is to blame the resin. The actual cause, in the large majority of cases, is thermal management — not product defect.

The exothermic reaction that cures epoxy resin is self-reinforcing: crosslinking generates heat, heat accelerates crosslinking, accelerated crosslinking generates more heat. In a thin flood coat, the surface area is large relative to the volume, heat dissipates quickly, and the cycle stays controlled. In a deep pour — a river table blank, a thick art casting, a potted electrical assembly — the mass-to-surface-area ratio inverts. Heat accumulates faster than it escapes. The reaction accelerates beyond the formulation’s design parameters. Something goes wrong.

Understanding this mechanism is not academic for B2B buyers sourcing deep pour epoxy. It determines which products are actually suitable for deep pour applications, how to specify pour depth limits for downstream customers, and what to look for in a Chinese epoxy resin manufacturer product documentation that signals genuine deep pour capability versus a standard table top product in a different container.

Deep Pour Epoxy

The Physics of Exothermic Cure: What’s Actually Happening

When Part A resin and Part B hardener are combined, the curing reaction begins immediately. The reaction is exothermic — it releases energy as heat. The rate of that heat release is a function of the reaction kinetics, which are themselves temperature-dependent: higher temperature means faster reaction, which means faster heat release, which means higher temperature.

This feedback loop is called thermal runaway. In small volumes, the heat generated is modest and the surface-to-volume ratio is high enough that ambient conditions absorb it without the temperature rising enough to significantly accelerate the reaction. In large volumes, the feedback loop can produce peak temperatures well above 100°C at the center of the pour — hot enough to cause thermal cracking as the exterior cools faster than the interior, yellowing from thermal degradation of the cured polymer, volatile release from hardener components, and in extreme cases, combustion of mold materials.

The three variables that govern whether thermal runaway occurs — and how severe it is — are:

Mass. More material means more total heat generated. A 5kg pour generates five times more heat than a 1kg pour of the same formulation, assuming equivalent geometry. The relationship between mass and peak temperature is nonlinear — doubling the mass more than doubles the peak temperature because the larger mass also has a less favorable surface-to-volume ratio.

Geometry. A wide, shallow pour dissipates heat laterally. A narrow, deep pour traps heat vertically. The same volume of resin in a 600mm × 600mm × 50mm mold will behave very differently from the same volume in a 200mm × 200mm × 450mm mold. This is why maximum pour depth — not maximum pour volume — is the critical specification for deep pour products.

Formulation. The hardener chemistry determines the base reaction rate and its temperature sensitivity. Slow-cure aliphatic hardeners with low exotherm profiles are the foundation of true deep pour formulations. Standard table top epoxy uses faster-reacting hardener systems optimized for surface cure and working time, not for thermal management at depth. Using table top epoxy in a deep pour application is not a formulation substitution — it’s a category error.


What Deep Pour Formulations Actually Do Differently

A genuine deep pour epoxy resin formulation differs from table top epoxy at the chemistry level, not just the label.

Hardener selection. Deep pour formulations use hardener systems with intrinsically lower reaction rates — cycloaliphatic amines, modified polyamides, or specific aliphatic amine blends selected for low exotherm. The tradeoff is longer cure time: where a table top epoxy might achieve handling strength in 8–12 hours, a true deep pour formulation at the same temperature may take 36–72 hours or longer. That’s not a product weakness — it’s the mechanism by which peak temperature is kept below the threshold for thermal damage.

Cure temperature profile. In a well-formulated deep pour system, the temperature rise during cure should be gradual and the peak temperature should stay below approximately 60–70°C even in pours of 5–10cm depth. A product that exceeds this threshold at standard pour depths is not a deep pour product regardless of what the label says. Temperature rise curves — plots of internal temperature versus time at different pour depths and ambient temperatures — are the product data that actually characterizes deep pour behavior. If a manufacturer can’t provide these curves, they don’t have deep pour data.

Viscosity. Deep pour formulations are typically lower viscosity than table top products, for two reasons: lower viscosity at mixing means air bubbles release more easily from a thick section where they can’t be torched after pouring, and lower viscosity reduces the mechanical energy input required during mixing, which reduces the risk of introducing air during the mixing process itself.

Optical performance. The longer cure cycles of deep pour products mean extended exposure to ambient conditions before the polymer network is fully locked. Formulations intended for clear casting need UV stabilizers and antioxidants that maintain optical clarity over multi-day cure windows. A clear table top product may yellow significantly when subjected to a 72-hour cure cycle that a dedicated deep pour formulation handles without color shift.


Pour Depth Limits: The Number That Matters Most

Maximum recommended pour depth is the single most important specification on a deep pour epoxy TDS. It’s also the number most frequently absent, vague, or wrong.

“Suitable for deep pours” is not a specification. “Maximum pour depth: 2–4 inches” without a stated ambient temperature or mass constraint is incomplete. The complete specification looks like: “Maximum recommended pour depth of 75mm in a single layer at ambient temperatures between 18–24°C, with a 24-hour wait between layers for multi-layer pours.”

The reason the ambient temperature condition matters: reaction kinetics are temperature-dependent. A pour depth that stays within safe thermal limits at 20°C may overheat at 28°C. Buyers whose downstream customers work in warm climates — southern U.S., Australia, Southeast Asia — need pour depth specifications that account for realistic operating temperatures, not just laboratory standard conditions.

When evaluating deep pour epoxy from a Chinese epoxy resin manufacturer, ask specifically:

  • What is the maximum recommended single-layer pour depth, and at what ambient temperature was this tested?
  • What is the recommended waiting time between layers for multi-layer pours?
  • Can you provide temperature rise curves for pours at different depths (25mm, 50mm, 75mm, 100mm)?
  • What ambient temperature range do these specifications apply to?

A manufacturer without this data cannot make a credible claim that their product is engineered for deep pour applications. They may have a product that works adequately in typical conditions — but they don’t know where the limits are, and neither will your customers.


Mold Considerations and Their Interaction with Thermal Management

The mold material affects thermal management in ways that are often overlooked by buyers focused purely on resin selection.

Silicone molds are poor heat conductors. A deep pour in a silicone mold traps heat more aggressively than the same pour in an aluminum or wood mold. Maximum pour depths in silicone should be reduced — sometimes significantly — relative to the manufacturer’s recommendation for open pours or rigid molds.

Melamine-coated MDF — the standard mold material for river tables — has reasonable heat dissipation when the pour is in contact with the wood, but the melamine surface can delaminate at elevated temperatures. If the resin is running too hot, the mold surface shows it before the casting does.

HDPE sheets are commonly used for river table side dams. HDPE softens at around 120°C, which is within the range achievable in a severe thermal runaway event. A pour that overheats in an HDPE-dammed mold can soften the dams, causing blowout.

Ambient temperature during cure. For outdoor or uncontrolled-environment curing, ambient temperature variation during the cure cycle affects the reaction rate and therefore the peak temperature. A pour that’s within limits at 20°C at 8pm can exceed them at 2pm the following day if ambient temperature rises significantly. This matters for woodworking shops without climate control and for any outdoor installation application.

The interaction between mold material, pour depth, ambient temperature, and formulation determines the actual thermal outcome — not any single variable in isolation. B2B buyers who are providing deep pour epoxy to professional fabricators need to communicate this system-level understanding in their product documentation, not just the maximum pour depth number.


Layer Pouring Strategies for Depths Beyond the Single-Pour Limit

When a project requires a total depth that exceeds the recommended single-layer pour depth, the standard approach is sequential layer pouring — pouring the total depth in multiple layers with a waiting period between pours.

The waiting period serves two purposes: it allows the first layer to advance in cure to the point where it won’t remix with the second pour, and it allows the first layer’s exothermic peak to pass so the second pour doesn’t add thermal energy to a still-reacting first layer.

The minimum waiting time between layers is typically 24 hours at standard ambient temperatures for most deep pour formulations, but this varies by product and temperature. Pouring the second layer too early — when the first layer is still warm from its own exotherm — compounds the thermal load and creates conditions for overheating even when individual layers are within the single-layer depth limit.

For very deep multi-layer pours, a practical rule: the surface of the first layer should be cool to the touch, not just firm, before the second pour begins. A surface that’s firm but still warm is still generating heat internally.

Chemical bonding between layers is maintained as long as the first layer hasn’t reached full cure — a partially cured surface bonds chemically with fresh resin. Once a layer has fully cured (typically 48–72+ hours depending on the formulation), a mechanical key is needed: light sanding of the surface before the next pour.


What to Ask Your Deep Pour Epoxy Manufacturer

These questions separate genuine deep pour products from table top products with ambitious marketing:

  • Can you provide temperature rise curves for your product at 25mm, 50mm, 75mm, and 100mm pour depths at 20°C and 25°C ambient?
  • What is the maximum recommended pour depth per layer at 20°C? At 25°C? At 30°C?
  • What hardener chemistry does the formulation use, and what is the peak exotherm for a 1kg mass at 25°C (100g test)?
  • What is the recommended minimum wait time between layers, and at what ambient temperature does this recommendation apply?
  • What is the cure time to handling strength and full cure at 20°C and 25°C?
  • Is the formulation designed specifically for deep pour, or is it a modified table top product?

The last question is the most direct. Some manufacturers will answer it honestly. Others won’t know the difference between the two. The answer — and the confidence with which it’s delivered — is informative either way.

Jinhua Resin (jinhuaresin.com) is a Guangdong-based epoxy resin manufacturer producing deep pour epoxy formulations specifically engineered for large-volume casting applications. Temperature rise data, pour depth specifications across ambient temperature ranges, and full TDS documentation are available for all deep pour product lines.


A Practical Reference: Thermal Management Variables and Their Effects

VariableEffect on Peak TemperatureMitigation
Pour depth increaseSignificant increaseReduce pour depth; use multi-layer approach
Ambient temperature increaseModerate–significant increaseReduce pour depth at elevated temp; cure in climate-controlled environment
Mass increase (same depth)Moderate increaseBreak large pours into sections
Silicone mold (vs. open/rigid)Moderate increaseReduce max pour depth by 20–30%
Table top epoxy (vs. deep pour formula)Severe increaseDo not substitute; use purpose-formulated product
Pre-heated substrateModerate increaseAllow substrate to reach ambient temperature before pouring

The Line Between “Works in Deep Pour” and “Is a Deep Pour Product”

A lot of epoxy resin products can survive a 50mm pour under ideal conditions. That’s not the same as being engineered for deep pour applications. The difference shows up at the margins: at 75mm instead of 50mm, at 28°C instead of 20°C, in a silicone mold instead of an open wood form, on a day when ambient temperature rises during the cure window.

For B2B buyers supplying professional fabricators and end users, the margin cases are where product failures happen and where warranty claims originate. Specifying a product that’s genuinely engineered for the application — with temperature rise data, documented pour depth limits, and a hardener chemistry selected for thermal management — is not over-engineering. It’s the difference between a supplier relationship that works and one that generates calls about cracked river tables.


Sourcing deep pour epoxy for professional fabrication or distribution? Jinhua Resin provides temperature rise data, pour depth specifications, and full TDS documentation for deep pour epoxy product lines: jinhuaresin.com

Epoxy Resin Manufacturer

From Formula to Final Product: A Step-by-Step Guide to Custom Epoxy Resin OEM Development

What “Custom Formulation” Actually Means in Practice

Custom OEM epoxy resin development is one of those phrases that means completely different things depending on who’s using it. To a buyer, it might mean adjusting the viscosity of an existing product, changing the mix ratio, or specifying a different cure speed. To a factory, “custom” might mean anything from relabeling a standard formula to building a new chemistry from scratch.

The gap between those definitions is where projects stall, timelines blow out, and buyers end up with a product that’s almost right but not quite right — and no clear path back to the specification they originally wanted.

This guide maps the actual process: what custom OEM epoxy resin development looks like from the first conversation to the first production run, what decisions happen at each stage, where the common failure points are, and how to structure the supplier relationship so that what arrives in the container matches what was agreed on paper.

Epoxy Resin Manufacturer

Stage 1: Defining the Specification Before Talking to Suppliers

The most expensive mistake in custom epoxy development is starting the supplier conversation before the product specification exists in writing. It seems obvious stated that way. In practice, most buyers start with a vague performance target — “I need a table top epoxy that cures clearer than what I’m currently using” or “I want a deep pour product with a longer working time” — and expect the factory to translate that into a specification.

Factories will translate it. The translation may not match what you had in mind.

A workable product specification for custom OEM development covers, at minimum:

Performance targets:

  • Viscosity range (cPs at a defined temperature)
  • Mix ratio (A:B by weight or volume)
  • Pot life and working time (at defined temperature and mass)
  • Cure schedule (tack-free time, handling strength time, full cure time)
  • Maximum pour depth per layer (for casting products)
  • Shore D hardness at full cure
  • Optical clarity requirements (if applicable — yellowing index, haze)

Regulatory and market requirements:

  • Target market(s) and applicable regulations (Prop 65 for U.S., REACH for EU, AICIS for Australia)
  • Any restricted substances that must be absent from the formulation
  • SDS format requirements for the destination market

Packaging and presentation:

  • Container format and size
  • Mix ratio labeling
  • Bilingual requirements (if applicable)

Commercial parameters:

  • Target volume and order frequency
  • Required MOQ for the custom formula
  • Acceptable price range

None of this needs to be fixed before the first supplier conversation — some of it will be shaped by what’s technically achievable. But having it written down, even as a draft, changes the quality of that conversation significantly. You’re negotiating against a document rather than a verbal description that each party remembers differently.


Stage 2: Supplier Qualification — Before the Formulation Work Starts

Custom formulation development requires a different supplier qualification process than standard product sourcing. The question isn’t just “can you make this product” — it’s “do you have the chemistry capability to develop it, and can I trust that the formula you develop will remain stable over time.”

The key questions at this stage:

In-house formulation capability or toll blending? Some factories that market themselves as epoxy resin manufacturers are actually compounders — they purchase base resins and hardeners and blend to a recipe, but don’t have the chemistry expertise to develop new formulations from the molecular level. There’s nothing inherently wrong with this model for standard products, but it limits what’s achievable in custom development. A true formulation-capable manufacturer has chemists, analytical equipment, and the ability to work from performance targets rather than pre-existing recipes.

Ask directly: do you have in-house formulation chemists? What analytical equipment do you use for QC? Can you provide a performance target specification and develop a formula to meet it, or do you need the customer to provide the formula?

IP and confidentiality. Custom formulations represent intellectual property. The question of who owns the formula — buyer, factory, or jointly — needs to be addressed before development starts, not after it’s complete. A factory that won’t sign a non-disclosure agreement or formula exclusivity agreement before development work begins is telling you something about how seriously they take IP protection.

Get the NDA signed before sharing detailed performance specifications or application context that could inform formula development.

Reference products and validation capability. Ask the factory for reference samples of their existing epoxy resin product line. Evaluate them against your performance targets. A factory whose standard products are already close to what you need is a much lower-risk development partner than one whose standard products are far from your target specification.

Also ask about their testing and validation capability: do they have a lab that can run the property tests your specification requires? Or will they be sending samples out for third-party testing, which adds time and cost to every iteration cycle?


Stage 3: The Development Iteration Cycle

Custom formulation development is iterative by nature. The factory proposes an initial formula, produces a lab-scale sample, ships it for evaluation, receives feedback, adjusts, and repeats. In practice, a straightforward custom development — adjusting an existing product’s viscosity and cure speed — might take 2–3 iterations over 6–8 weeks. A genuinely novel formulation targeting performance characteristics outside the factory’s existing portfolio can take 4–6 months and 8–10 iterations.

Buyers who haven’t done this before routinely underestimate the timeline. The iteration cycle is not slow because factories are inefficient — it’s slow because formulation chemistry is empirical. You can’t calculate your way to a specific optical clarity or a specific flexibility at cure; you have to test it, measure it, and adjust.

What good iteration looks like:

Each sample submission should come with a formulation iteration record — what was changed from the previous version, what property the change was intended to address, and what the factory’s predicted outcome was. This documentation disciplines the development process and builds a record that explains why the final formula looks the way it does. If your development partner can’t produce this documentation, the iteration is happening by trial and error rather than by principled adjustment.

Evaluation criteria for each iteration:

Define your evaluation protocol before the first sample arrives. What tests will you run? Who will run them — you, a third-party lab, or a combination? What measurement will constitute pass/fail for each property? What properties are hard requirements vs. nice-to-haves?

Without a defined evaluation protocol, feedback to the factory becomes impressionistic — “this one feels better but the color is still a bit off” — which is not enough information to drive a targeted next iteration.

Managing iteration shipping costs:

Each development iteration involves shipping a sample from China. Air freight for small sample quantities runs $40–120 per shipment depending on size and carrier. Over 8–10 iterations, that’s a meaningful cost. Some factories offer to send digital data (viscosity curves, cure speed graphs, hardness data) before shipping physical samples — request this for early iterations where the performance gap is still large. Reserve physical shipping for iterations where digital data suggests you’re close to target.


Stage 4: Formula Lock and Production Scale-Up

When a formulation iteration passes all evaluation criteria, the formula gets “locked” — formally documented with exact component identities, grades, and ratios, and designated as the production specification. Formula lock is a formal milestone, not just an informal agreement that “this one’s good.”

The formula lock document should specify:

  • Each raw material component by CAS number and supplier grade
  • Weight ratios of each component to four significant figures
  • Processing parameters (mixing sequence, temperature, mixing time)
  • QC test methods and acceptance criteria for each testable property
  • Shelf life and storage conditions

This document is the product. Not the sample. Not the lab notebook. Not the chemist’s memory. If the factory can’t produce a formal formula lock document, the product definition lives only in the factory’s systems — which means any personnel change, raw material substitution, or process adjustment can alter the product without the buyer knowing.

The scale-up gap:

Lab-scale samples and production-scale batches don’t always produce identical results. Mixing dynamics at production scale differ from lab scale. Heat management in large reactors differs from small vessels. A formula that performed perfectly at 1kg sample scale may require adjustment at 200kg production scale.

This is not a failure — it’s a normal feature of chemical manufacturing. The question is whether it’s expected, planned for, and handled transparently, or whether it surfaces as a surprise when the first production batch doesn’t match the approved sample.

Request a pilot production run — typically 20–50kg — as an intermediate step between lab sample approval and full production. Evaluate the pilot batch against the locked formula specification before placing the first commercial order.


Stage 5: QC Framework and Change Control

Custom formulation development doesn’t end at first production. It ends at the establishment of a quality system that keeps the product consistent over the life of the supply relationship.

Per-batch Certificate of Analysis: Every production batch should be accompanied by a CoA confirming that tested properties are within the specification range. The CoA should reference the locked formula specification, list the test methods used, and include actual measured values — not just pass/fail. A CoA that says “viscosity: PASS” without the actual viscosity number is not a CoA; it’s a piece of paper.

Raw material change notification: Raw material supply chains shift. A resin manufacturer’s chemical supplier changes grades, discontinues a product, or substitutes an alternative. Any of these changes can alter the final product’s properties, even if the factory believes the substitution is equivalent. Your supply agreement should require written notification before any raw material change, with an obligation to re-validate the affected properties and get buyer approval before the change goes into production.

This clause is frequently absent from standard factory supply agreements. Negotiate it in before signing.

Audit rights: For high-volume or high-value custom formulations, the ability to audit the factory’s QC records and production logs provides assurance that the formula lock is being respected in practice. Remote audit (documentation review) is a reasonable first level; on-site audit may be warranted for critical applications.

Jinhua Resin (jinhuaresin.com) is a Guangdong-based epoxy resin manufacturer with in-house formulation capability for table top epoxy, deep pour casting resin, and UV resin. Custom OEM development programs include IP protection agreements, formal formula lock documentation, per-batch CoA, and raw material change notification protocols. Pilot production runs available before first commercial order.


Timeline Reference: What to Expect at Each Stage

StageTypical DurationKey Deliverable
Specification drafting1–2 weeks (buyer)Written product specification
Supplier qualification2–3 weeksQualified development partner, signed NDA
Development iteration6–16 weeksApproved sample, iteration record
Formula lock1 weekFormal formula lock document
Pilot production2–3 weeksPilot batch CoA
First commercial order4–6 weeks from orderProduction batch + CoA
Total minimum16–24 weeksProduction-ready custom formula

This is the timeline for a straightforward development. Novel chemistries, regulatory complexity, or multiple evaluation cycles extend it.


The Question That Separates Development Partners from Sample Suppliers

There’s a question that reliably distinguishes a factory capable of genuine custom formulation development from one that will send you samples of their standard products with a custom label:

“If I give you a performance specification rather than a formula, can you develop a formula to meet it? And if the first iteration doesn’t meet the spec, what’s your process for diagnosing why and determining what to change?”

The answer to the first part is binary — yes or no. The answer to the second part reveals whether the factory has a principled development process or a trial-and-error one. Factories with genuine formulation capability will describe a diagnostic approach: measuring specific properties, identifying which component drives which property, and making targeted adjustments. Factories without it will describe trying something different and seeing what happens.

Both can produce a good sample eventually. Only one will do it in a timeframe and with a consistency that works for a commercial supply relationship.


Planning a custom epoxy resin OEM development? Jinhua Resin offers structured development programs with IP protection, formal formula lock, and pilot production validation: jinhuaresin.com

Uv Resin

UV Resin Curing Wavelengths Explained: Matching Light Source to Formulation for Industrial Use

The Part of UV Resin Sourcing Nobody Talks About Until Production Stalls

Sourcing UV resin for industrial use involves two separate decisions that most buyers treat as one. The first is the resin itself — formulation, viscosity, cure depth, adhesion properties, chemical resistance. The second is the curing equipment — light source type, wavelength output, irradiance, conveyor speed or exposure time.

Both decisions matter. But they only work when they’re matched to each other.

A UV resin formulated with photoinitiators that absorb at 365nm will cure poorly — or not at all — under a mercury arc lamp with peak output at 254nm, even if everything else about the setup looks right. A formulation designed for broad-spectrum mercury exposure will underperform under a narrow-band 395nm LED system if the photoinitiator package wasn’t selected for that wavelength.

The mismatch between resin formulation and curing equipment is one of the most common — and most avoidable — production problems in UV resin applications. It surfaces as incomplete cure, tacky surfaces, delamination, or inconsistent through-cure in thicker sections. It gets blamed on the resin. It gets blamed on the equipment. The actual cause is a specification gap between the two that nobody checked at the sourcing stage.

This article closes that gap.

Uv Resin

How UV Curing Works: The Photochemistry Basics

UV resin cures through photopolymerization — a chain reaction initiated by UV light rather than heat. The mechanism depends on photoinitiators: specialty molecules embedded in the resin formulation that absorb photons at specific wavelengths and break apart into reactive radical or cationic species. Those species then initiate the crosslinking reaction that converts liquid resin to solid polymer.

The critical variable is the match between photoinitiator absorption spectrum and light source emission spectrum. Photoinitiators don’t respond to all UV light equally. They have specific absorption peaks — wavelengths at which they’re maximally efficient at converting photons to reactive species. Light that falls outside those peaks passes through the resin largely unused, generating heat rather than cure.

This is not a minor efficiency issue. At significant spectral mismatch, the resin simply won’t cure — or will cure only at the surface while remaining liquid underneath. In thin-film applications like electronics conformal coating or optical bonding, this manifests as surface tack. In thicker applications like casting or potting, it shows up as an uncured core.

The UV Spectrum: What the Wavelength Ranges Mean

The UV spectrum relevant to industrial curing runs from approximately 200nm to 420nm. Within that range, different bands have different penetration characteristics and different interactions with common photoinitiator chemistries:

UV-C (200–280nm): Shortest wavelength, highest energy per photon. Strong surface cure, very limited depth penetration. Relevant for surface sterilization and some specialty coating applications, less common in epoxy resin curing.

UV-B (280–315nm): Intermediate range. Some photoinitiator systems are optimized for this band, but not the majority of industrial applications.

UV-A (315–400nm): The primary workhorse range for industrial UV resin curing. Most commercial photoinitiators — including the Irgacure and Omnirad families widely used in epoxy and acrylate systems — have major absorption peaks between 320nm and 380nm. Better depth penetration than UV-C or UV-B.

Visible violet (400–420nm): Increasingly relevant as LED curing systems have pushed toward longer wavelengths for efficiency reasons. Some formulations specifically designed for LED curing use photoinitiators optimized for 395nm or 405nm.


Light Source Types: What’s Actually Available

Mercury Arc Lamps (Broadband)

The traditional workhorse of industrial UV curing. Mercury vapor discharge produces a broad emission spectrum with peaks at multiple wavelengths across the UV range — 254nm, 313nm, 365nm, 404nm, and others. The broadband output means mercury arc lamps are relatively forgiving: most standard UV resin formulations cure adequately under mercury arc because the lamp output overlaps with a wide range of photoinitiator absorption spectra.

The practical disadvantages: mercury lamps run hot, have meaningful warm-up and cool-down requirements, contain mercury (creating disposal obligations in regulated markets), and degrade over time — output drops as the lamp ages, and a lamp that cured well at installation may be undercuring at 1,000 hours of use.

For high-volume industrial production lines where cure consistency is critical, mercury lamp aging introduces variability that requires active management: regular output measurement, scheduled replacement intervals, and process validation after lamp changes.

Mercury Lamps with Iron or Gallium Additives

Doped mercury lamps — iron-doped or gallium-doped — shift the emission spectrum toward longer wavelengths or fill in specific spectral gaps in standard mercury output. Iron doping adds emission in the 350–400nm range, improving surface cure for pigmented systems where shorter UV wavelengths are absorbed by pigment before reaching the photoinitiator. Gallium doping adds output at around 403nm and 417nm, useful for thick-section curing and for some cationic epoxy systems.

For buyers sourcing UV resin for applications with pigmentation or for thick-section potting, the lamp dopant is a variable worth discussing with both the resin supplier and the equipment supplier simultaneously — not as separate conversations.

UV LED Systems

LED-based UV curing has become the dominant technology in new industrial installations over the past decade, and for good reasons. LEDs produce narrow-band output centered on a specific peak wavelength — typically 365nm, 385nm, 395nm, or 405nm — with no warm-up time, instant on/off capability, no mercury content, dramatically lower heat output, longer service life (20,000+ hours vs. 1,000–2,000 for mercury lamps), and consistent output over that service life.

The tradeoff is the narrow spectral band. Unlike mercury arc, an LED system at 395nm delivers essentially no output at 365nm or 320nm. If the resin formulation’s photoinitiators don’t absorb efficiently at 395nm, the cure will be incomplete regardless of irradiance level or exposure time.

This is where the wavelength matching question becomes binary rather than a matter of optimization. Under mercury arc, a formulation mismatch often produces a degraded but functional cure. Under LED, a formulation mismatch can produce no meaningful cure at all.

The practical upshot for B2B buyers: if your production line uses LED curing equipment, you need a UV resin formulation that has been specifically validated for that LED wavelength. “UV resin” as a generic category is not sufficient specification. “UV resin validated for 395nm LED cure” is the correct specification.

Excimer Lamps and Specialty Sources

Excimer lamps produce narrow-band UV output at very short wavelengths — 172nm or 222nm — for specialty surface treatment applications. Not relevant to most epoxy resin curing scenarios, but worth knowing exist if you encounter references to them in equipment literature.


Cure Depth: Why Wavelength Isn’t the Only Variable

Wavelength matching is necessary but not sufficient for adequate through-cure in applications with meaningful thickness. The other critical variables are irradiance and exposure time — and they interact with resin formulation in ways that matter for industrial process design.

Irradiance

Irradiance is the intensity of UV light at the surface of the resin, measured in mW/cm². Higher irradiance produces more photons per unit time, which drives faster cure initiation. But there’s a ceiling: above a certain irradiance level, surface cure accelerates while depth cure doesn’t keep pace, producing a cured skin over an insufficiently crosslinked interior. This is particularly relevant for thick castings and potting applications.

The cure energy required to fully crosslink a given resin — measured in mJ/cm² — is a product of irradiance and exposure time. The same total energy delivered at high irradiance for a short time doesn’t always produce the same cure result as lower irradiance for longer time, because the kinetics of the crosslinking reaction have temporal as well as energy requirements.

A UV resin manufacturer who understands their formulation will specify not just the required wavelength range, but the minimum and maximum recommended irradiance, the minimum cure energy (mJ/cm²), and the recommended exposure time or conveyor speed for standard section thicknesses. If that level of specification isn’t in the TDS, it needs to be requested.

Photoinitiator Concentration and Cure Depth

Higher photoinitiator concentration improves surface cure sensitivity but reduces depth penetration — the photoinitiators near the surface absorb UV before it reaches the interior. For thick-section applications, formulators typically optimize photoinitiator type and concentration for depth cure at the expense of surface cure speed.

For B2B buyers specifying UV resin for casting or potting applications with section thicknesses above 5–10mm, the maximum recommended section thickness in a single cure pass is a critical spec — and it varies significantly between formulations. A product spec that says “suitable for thick sections” without a maximum thickness number isn’t a spec.


Selecting Equipment for Your Application: A Decision Framework

The right UV curing equipment for a given application is a function of resin formulation, section thickness, production throughput, and facility constraints. Here’s how to work through the decision.

Step 1: Start with the resin specification. Get the full cure specification from your UV resin manufacturer before selecting equipment — required wavelength range (not just “UV”), minimum irradiance, minimum cure energy, and maximum recommended section thickness. This document is the input specification for equipment selection, not the other way around.

Step 2: Match equipment type to throughput requirements. Conveyor-based UV curing systems — lamp or LED arrays mounted over a moving belt — are the standard for production line integration. Manual spot-cure guns or flood-cure benchtop units are appropriate for low-volume or repair applications. High-power LED arrays have largely replaced mercury arc in new conveyor installations for the operational reasons described above.

Step 3: Confirm wavelength match between equipment and formulation. If selecting LED equipment, confirm the LED peak wavelength and get validation data from the resin supplier showing adequate cure at that specific wavelength. Don’t accept “should be compatible” — get a cure validation test or reference data. If the resin supplier can’t provide wavelength-specific validation data, that’s a supplier qualification issue.

Step 4: Account for irradiance variability across the cure zone. In conveyor systems, irradiance at the substrate surface varies with lamp-to-substrate distance, reflector geometry, and — for mercury lamps — lamp age. Commission an irradiance map of the cure zone before finalizing process parameters. For LED systems, the irradiance map is more stable over time, but still needs to be established at commissioning.

Step 5: Validate with production samples before committing to volume. Run production-representative samples — same geometry, same section thickness, same substrate — through the proposed cure parameters before locking in the process. Measure cure completeness by hardness testing, cross-sectional examination, or solvent rub test as appropriate for the application. Don’t validate on flat coupons if your production parts have complex geometry.


Questions to Ask Your UV Resin Supplier Before Specifying Equipment

A UV resin manufacturer that knows their product should be able to answer these without hesitation:

  • What is the primary photoinitiator system in this formulation, and what are the absorption peaks?
  • What wavelength range is required for adequate cure? What is the minimum acceptable irradiance?
  • What is the minimum cure energy (mJ/cm²) for full crosslinking at standard section thickness?
  • Has this formulation been validated for LED cure? At which LED wavelengths?
  • What is the maximum recommended single-pass section thickness?
  • Is cure validation data available for specific equipment types or lamp configurations?

And the equipment supplier:

  • What is the peak emission wavelength (for LED) or emission spectrum (for mercury)?
  • What is the irradiance output at standard working distance, and how does it change with lamp age?
  • What is the service life and replacement interval for the light source?

Jinhua Resin (jinhuaresin.com) is a Guangdong-based epoxy resin manufacturer producing UV resin formulations for industrial and commercial applications. Full cure specification documentation — including photoinitiator wavelength data, irradiance requirements, and LED cure validation — is available for all UV resin product lines.


A Reference Summary: Light Source vs. Application Fit

Light SourcePeak Wavelength(s)ProsConsBest For
Mercury arc (standard)Broadband 254–405nmFormulation-flexible, established technologyHot, mercury disposal, aging outputGeneral industrial, legacy lines
Iron-doped mercuryEnhanced 350–400nmBetter surface cure for pigmented systemsSame drawbacks as standard mercuryPigmented coatings, thick sections
Gallium-doped mercuryEnhanced 403–417nmDeep cure capability, cationic systemsSame drawbacks as standard mercuryThick castings, cationic epoxy
UV LED365 / 385 / 395 / 405nm (narrow)Low heat, instant on/off, long life, stable outputNarrow band — formulation must matchNew installations, temperature-sensitive substrates

Get the Match Right Before Production Starts

UV resin curing problems that show up in production are almost always traceable to a specification gap that existed before production started. The resin was specified without knowing the curing equipment. The equipment was selected without confirming the resin’s photoinitiator requirements. The two suppliers were never in the same conversation.

The fix is straightforward but requires discipline: treat the resin specification and the equipment specification as a matched pair, validate the combination with production-representative samples before committing to volume, and ask both suppliers the wavelength questions before the purchase orders go out.

Getting this right the first time is cheaper than debugging it in production.


Sourcing UV resin for industrial or commercial applications? Jinhua Resin provides full cure specification documentation including photoinitiator wavelength data and LED cure validation for all UV resin product lines: jinhuaresin.com