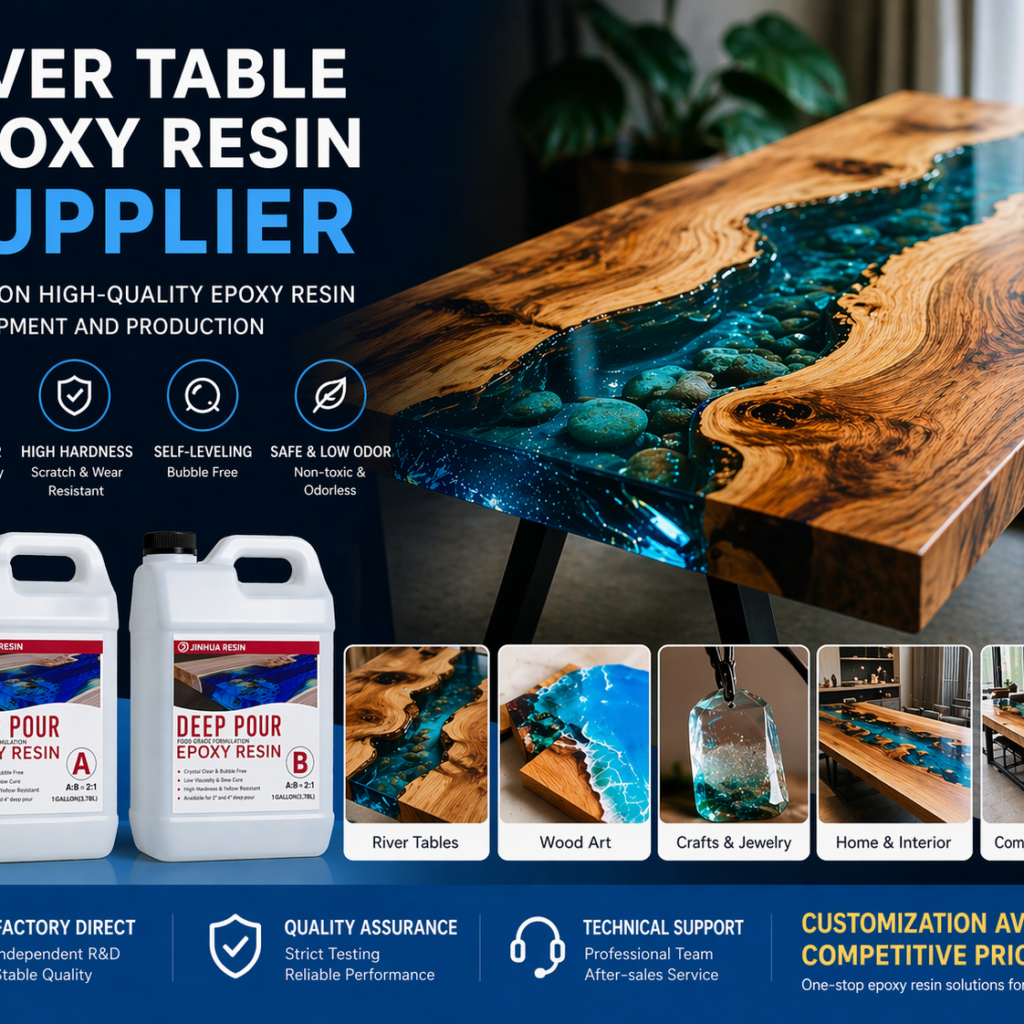


How To Prevent Deep Pour Epoxy Resin From Cracking?

How to Prevent Deep Pour Epoxy Resin from Cracking?

The most troublesome problem during the application of deep pour epoxy resin is cracking. Cracking not only affects the appearance of the entire project, but in serious cases, it can directly render the whole project or work unusable. For beginners who are just getting started, they follow the tutorial step by step, so why do cracks still appear?
Today, Jinhua will analyze the common causes of cracking in deep pour epoxy resin and how to effectively avoid it.

How To Prevent Deep Pour Epoxy Resin From Cracking?


First, the most common cause of cracking: inadequate sealing treatment of the substrate. For example, when making a river table, we use wood, which usually needs to be dried, cleaned, and then sealed. Wood contains a large number of internal pores; if it is poured directly without sealing, the wood will absorb the resin, resulting in uneven shrinkage, bubbles, internal voids, etc., all of which may lead to the appearance of cracks.
Second, the common mistake we often mention made by beginners: the single pouring thickness exceeds the product limit. Many people are eager for quick results (especially beginners), wanting to minimize the number of pours to shorten the project completion time. Each deep pour epoxy resin has a maximum pouring thickness limit. During pouring, we should try not to approach this limit to effectively prevent cracking. Sufficient interval time should be reserved between two pours, generally 6–12 hours, until the previous layer of resin is initially cured and the surface is dry and tack‑free before pouring the next layer.
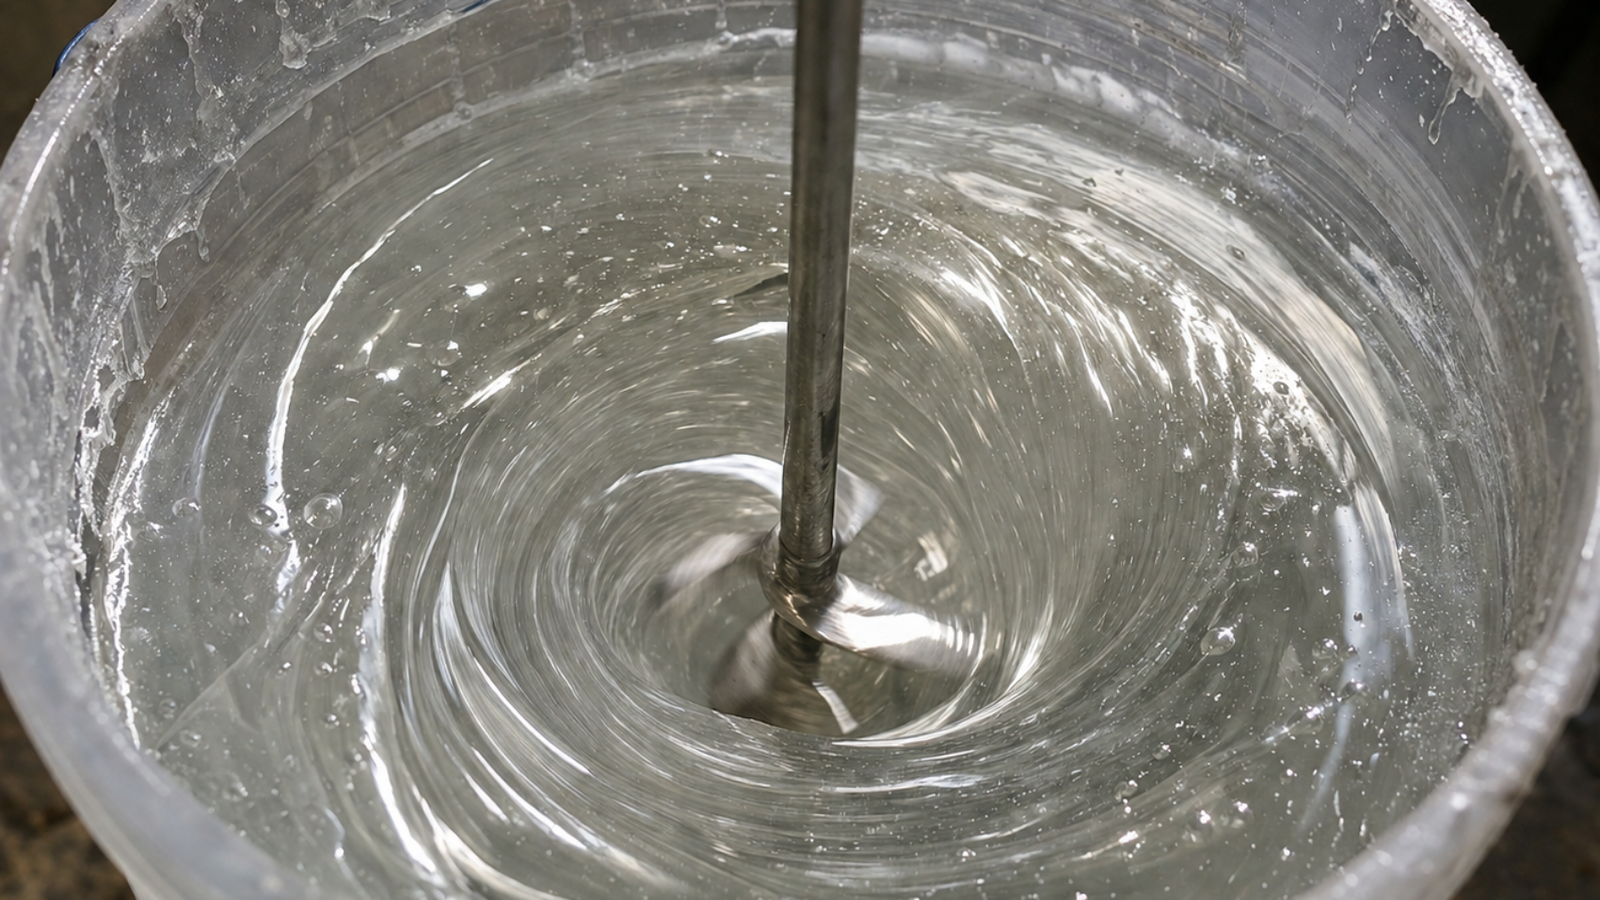
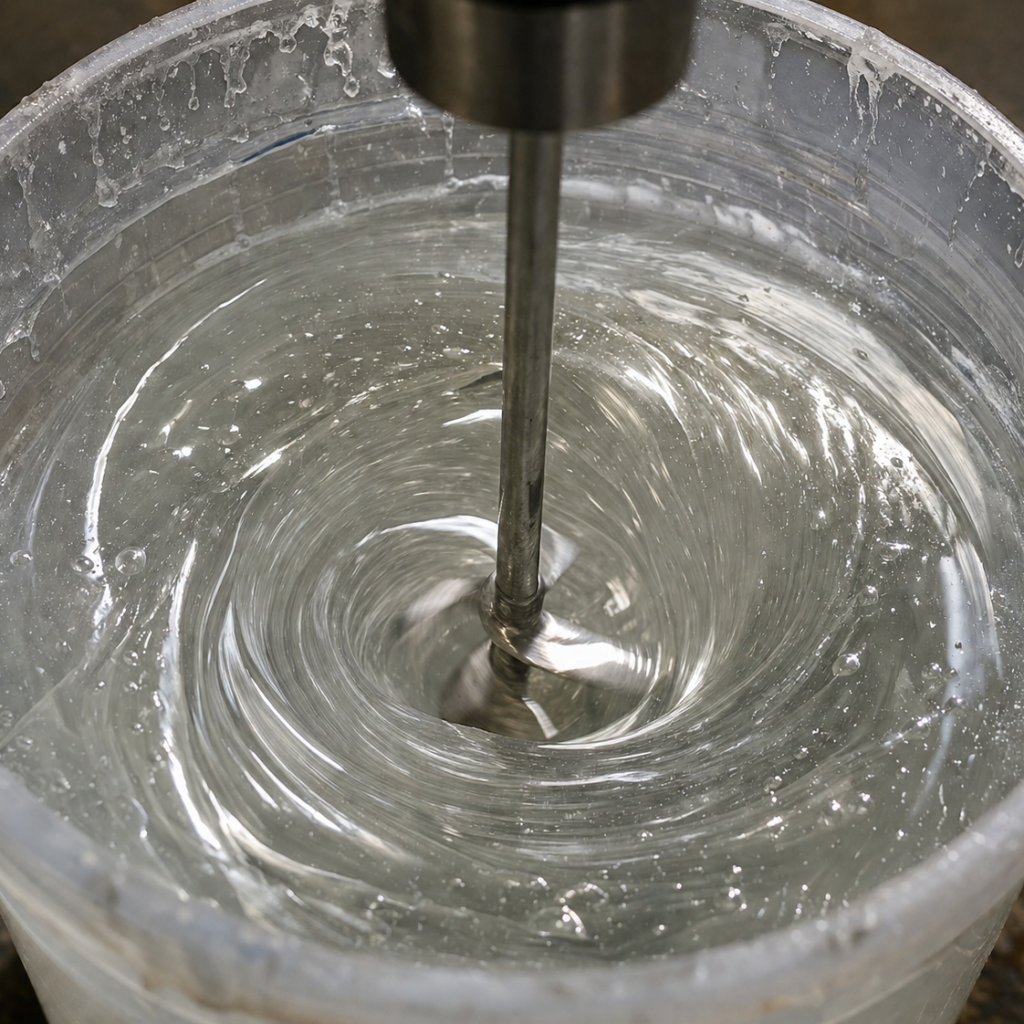
Third, the mixing ratio of epoxy resin and hardener. There are three points to note here: first, a precise digital scale must be used for weighing to ensure an absolutely accurate ratio; second, after mixing, stir slowly and thoroughly without dead corners to fully blend the epoxy resin and hardener; third, the amount of raw materials mixed at one time should not be too large — the larger the mixing volume, the faster the exothermic speed, and the more likely temperature runaway will occur.
Fourth, the issue we often mention: temperature and humidity. Temperature has a great impact on deep pour epoxy resin. Excessively high temperature accelerates the reaction and causes rapid temperature rise, resulting in cracking. Excessively low temperature prolongs curing time and causes incomplete curing. Excessively high humidity causes internal clouding and poor adhesion. The optimal temperature is between 20℃ and 25℃, with humidity controlled below 70%. A good working environment can greatly improve the success rate of the project.
Fifth, we need to allow sufficient curing time for the project. Many people are eager to demold, sand, or apply load once the resin surface is solidified, not knowing that the interior of the resin is not fully cured and the internal structure is still unstable. Premature operation will damage the internal structure and cause cracks. It is recommended to let it stand for more than 48 hours after pouring before demolding, continue curing after demolding, avoid heavy pressure, impact, and sanding within 7 days, and do not place it in a high‑temperature or direct‑sunlight environment to prevent repeated stress from thermal expansion and contraction. Full curing takes about 7 days. Only after full curing should subsequent operations such as sanding and polishing be carried out, so as to ensure the strength and integrity of the epoxy layer and avoid later cracking.
Frankly speaking, most problems encountered with deep pour epoxy resin, such as cracking, bubbles, yellowing, etc., are related to substrate treatment, single pouring, environmental factors, mixing ratio, etc. As long as we grasp the relevant step details, we can improve the success rate of the project.

What Are Common Deep Pour Epoxy Mistakes

What are common deep pour epoxy mistakes?

Deep pour epoxy is a core material for creating resin river tables, artistic tabletops, wood fillers, and large decorative pieces. Many people start with great confidence, but often encounter problems such as bubbles, cracking, overheating, and even curing failure. It’s not as simple as “pouring more resin”—the heat release during curing, internal stress, and bubble control are far more complex than with thin-layer applications. Today, Jinghua will guide you through common mistakes made during the application of deep-pour epoxy, helping us avoid many unnecessary losses.

What Are Common Deep Pour Epoxy Mistakes

First, we must understand that deep-pour epoxy is different from ordinary epoxy. Deep-pour products can typically be poured several centimeters or even thicker in one go, but at the same time, its curing time and heat release reaction are relatively longer and more intense. Many people try to save time by pouring a thickness exceeding the maximum single-pour thickness, completely ignoring the heat release limit. Heat accumulates extremely quickly inside a thick layer, with the center temperature far exceeding the edges, resulting in inconsistent curing speeds and generating enormous internal stress. Minor issues include uneven surface texture and inconsistent hardness; severe issues include cracking and warping. The correct approach is to strictly follow the product instructions, pouring no more than the maximum thickness allowed in a single application (refer to the product’s detailed specifications for specific thickness), such as 2-3cm per layer, with a 24-48 hour interval between each layer, allowing each layer to fully cure and dissipate heat before pouring the next. Layering not only controls temperature but also reduces air bubbles and improves overall strength.

The second common mistake is uneven mixing or incorrect proportions. Thick-layer epoxy resin pours are generally two-component materials: epoxy resin and hardener. Even a slight difference in the ratio of the main component to the hardener will cause curing problems. Some people pour the material by feel or roughly measure it using a regular cup, resulting in too much or too little hardener. Too little hardener will make the resin perpetually sticky and lack hardness; too much hardener will make the adhesive layer brittle and prone to cracking later. Care must be taken when mixing; many people only stir for 1-2 minutes, failing to scrape the resin off the sides and bottom of the container, resulting in uneven mixing. Thick-layer casting involves a large mixing volume, and areas that are not thoroughly mixed will remain uncured for a long time, forming soft spots and sticky surfaces. The correct method is to accurately weigh the mixture using an electronic scale, mix it according to the manufacturer’s ratio, stir for 3-5 minutes, and repeatedly scrape the sides and bottom of the container until the liquid is completely uniform and without any streaks.

The third and most easily overlooked problem is: inadequate substrate preparation and lack of a sealing primer. Thick-layer casting is often combined with wood and stone, such as river tables. Wood is a porous material, and directly pouring resin will continuously release air, forming numerous air bubbles inside the resin. More problematic, dust, oil, and moisture on the substrate surface will severely reduce adhesion, making the resin prone to blistering and delamination later. Before construction, the substrate must be thoroughly sanded, degreased, dust-free, and completely dried. A thin sealing coating must be applied to the wood first to seal the pores and prevent air release and bubble formation. At the same time, the moisture content of the substrate must be maintained; construction should never be carried out if it exceeds 8%, as moisture will cause the resin to turn white and foggy, significantly reducing adhesion.

The fourth common mistake is ignoring ambient temperature and humidity. The construction environment has a significant impact on epoxy resin. If the temperature is too low, the resin’s fluidity will decrease, making it difficult for air bubbles to escape and prolonging the curing time. If the temperature is too high, it may cause the reaction to be too rapid. Excessive humidity may affect the surface finish, leading to whitening or fogging. Normal construction temperature is generally maintained at around 20℃–25℃; humidity should be below 65%.

The fifth common problem is improper air bubble handling. Air bubbles are one of the most common problems in thick-layer casting. Air is introduced during resin mixing and pouring. If not addressed promptly, it will affect the transparency and appearance after curing. The correct approach is to stir slowly at a low speed to reduce air entrainment; after pouring, quickly sweep the surface with a heat gun or flame gun to allow air bubbles to rise and burst. Be careful not to get too close to avoid baking the resin yellow; air bubbles are difficult to rise in thick layers, and layered pouring helps air bubbles escape layer by layer. If possible, placing the resin in a vacuum chamber for degassing shortly after pouring will yield even better results.

The sixth common problem is neglecting the curing time; this is a mistake made by most beginners. Thick layers of epoxy resin require a long time to fully cure. Even if the surface appears dry and hard, the internal reaction may still be ongoing. Many beginners, seeing the surface harden, rush to sand, move, or apply heavy pressure, causing resin deformation, scratches, and even internal cracking. Thick layers should be cured for at least 7 days before light sanding, and full curing to reach maximum hardness typically takes 15-30 days. During curing, avoid exposure to direct sunlight, high temperatures, and heavy pressure. Sanding and polishing should be done gradually. Afterward, avoid scratching with sharp objects and direct contact with high temperatures. Proper maintenance is essential to maintain the translucent texture and prevent yellowing and aging.

The seventh common problem is using unsuitable pigments; when making large crafts, pigments, colorants, and color pastes are often added to adjust the color and achieve better results. However, adding too much or using unsuitable materials can affect resin curing. For example, some water-based pigments may affect the resin reaction, leading to abnormal local curing. Therefore, when adding colorants, it is best to choose pigments specifically designed for epoxy resins and control the addition ratio.

Thick-layer epoxy resin casting may seem simple, but to achieve the desired effect, we need to pay attention to the details of each step to create a piece that matches our expectations. If you are a beginner, we recommend starting with small-scale projects to gradually familiarize yourself with the material’s properties before moving on to larger crafts.

Finally, if you want to purchase the highest quality, most cost-effective thick-layer epoxy resin casting, please feel free to contact us at jinghua.

How Do I Make A River Table

How do I make a river table?

The river table is very popular in home furnishing and DIY circles due to its superb appearance. It is usually made of natural wood boards, deep cast epoxy resin, and table top epoxy resin. The middle of the table top looks like a flowing “river”, which not only retains the natural texture of the wood, but also adds a sense of modern art. Many people want to try to make a river table of their own, but they think it is very difficult to make. In fact, as long as we master the core steps, we can easily make our own exclusive river table, and we no longer need to spend a lot of money on finished products.

How Do I Make A River Table

So, today, Jinghua will introduce the entire production process in detail from material preparation, production steps to practical techniques.

First of all, you must have all the materials to make the river table. The main materials include solid wood boards, deep pouring epoxy resin, tabletop epoxy resin, resin-specific color paste, color essence, wood board edge sealing material (board or sealing tape), release agent or tape; live edge (natural edge) is preferred for wood, because the natural edge can create a more realistic “river bank effect” , Secondly, walnut and ash are suitable, with clear texture and strong stability; in terms of tools, prepare sandpaper (80-400 mesh), clamps, stirring rods, measuring cups, silicone molds, heat guns, as well as protective gloves and masks.

Before officially pouring resin, first check the moisture content of the wood. We need to control the moisture content of the wood between 8% and 12%. If the moisture content of the wood is too high, bubbles may easily occur during the resin curing process. If it is your first time to make a river table, it is recommended to buy dry and flat boards directly to avoid the trouble of drying and leveling, and to avoid cracking and deformation later.

The first step is to treat the wood, which is one of the key steps in determining the appearance of the river table. Cut the wood to a suitable size according to the storage space at home, then use a chisel to remove the bark on the surface of the wood, and then sand it with 80-grit coarse sandpaper to smooth out the burrs and uneven areas on the surface. Then change to 180-grit and 400-grit fine sandpaper and gradually polish until the wood surface is smooth and delicate, and there is no rough feeling to the touch. After sanding, be sure to wipe off the sawdust with a dry cloth to avoid resin being mixed in later and affecting the appearance. If the wood has cracks or knots, fill them with a small amount of resin and let them dry before sanding them smooth.

The second step is to build the mold to prevent resin leakage. Use MDF board or melamine board to build a mold that matches the size of the wood. Paste a layer of anti-stick tape on the inner wall of the mold, and then apply silicone sealant to the joints. This step must be done carefully, otherwise the resin will easily leak during pouring. Then put the two polished pieces of wood into the mold and fix them with clamps to keep the wood level. Leave a gap between the wood. This gap is the position of the “river”. The width of the gap can be adjusted according to your own preferences. The wider it is, the more visual impact it will have.

The third step is pouring the resin, which is the most fulfilling part for most people. We first mix the epoxy resin according to a fixed ratio, such as a 2:1 or 3:1 ratio of resin to curing agent (the ratio may be different for different brands, be sure to read the instructions). Pour it into a measuring cup and stir slowly. The stirring time is controlled at 2-3 minutes. Do not mix too fast to avoid excessive bubbles. If you want to make a colorful river, you can add a small amount of color paste, color essence, pearlescent powder and other toners to the mixed resin, and stir evenly. Beginners are advised to choose light blue or light cyan, which is close to the color of natural rivers and is not easy to fail.

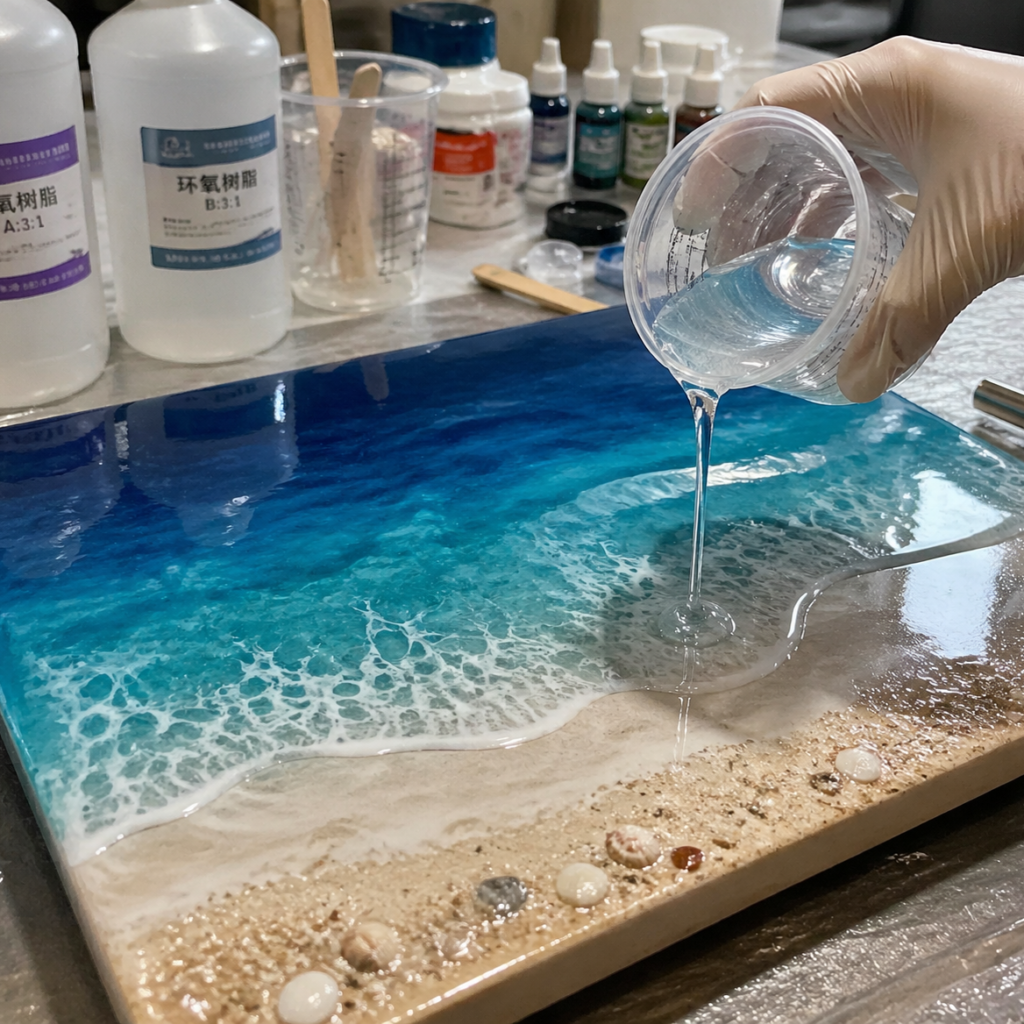
After mixing the resin, the formal pouring begins. Slowly pour the resin into the gaps in the wood. If you want the river table to be thicker, it is recommended to pour it in layers. For example, each layer is 1-2 inches. Waiting for the first layer to be semi-cured before pouring the next layer can effectively reduce problems such as bubbles and cracks. For each layer of pouring, use a hot air gun to gently blow the surface to remove bubbles, wait 4-6 hours to reach a semi-cured state, and then pour the next layer of resin. This can avoid cracks caused by shrinkage of the resin. After the pouring is completed, cover the mold with a dust-proof cloth and place it in a dry environment at about 20°C to allow the resin to solidify naturally. Wait for at least 24 hours. Do not rush to demould. Incomplete curing will cause the surface to become soft and deformed.

The fourth step is to polish and polish the river table to make it more textured. After the resin is completely cured, remove the mold and sand the tabletop with 80-grit sandpaper to smooth the connection between the resin and the wood. Then gradually sand it with fine sandpaper until the tabletop is smooth and traceless. Finally, wipe the tabletop with polishing paste, or apply a layer of wood wax oil, which can not only improve the gloss, but also protect the wood and resin and extend its service life. If you want to make the river table more stable, you can also install metal table legs, which is simple and elegant.

Generally speaking, making a river table is not as complicated as imagined. The key is to master the core details and have enough patience. Even a DIY novice can make a very beautiful river table.

Finally, if you need deep pouring epoxy resin to make a river table or have related questions during the production process, welcome to consult jinghua, we have the most professional engineers and salesmen to serve you.

What factors affect the price of deep pour epoxy resin?

What factors affect the price of deep pour epoxy resin?

Deep pour epoxy resin is shining brightly in woodworking river tables, artistic castings, and thick-layer crafts, gaining increasing popularity. However, why is there such a large price difference in deep pour epoxy resin on the market? Some are as cheap as tens of yuan per kilogram, while others can sell for hundreds of yuan. In reality, the price of deep pour epoxy resin is not arbitrarily set, but is influenced by various factors. Understanding these factors can help you judge product value and make more rational and appropriate choices when purchasing.

What factors affect the price of deep pour epoxy resin?

First, there is the core factor for deep pour epoxy resin: raw materials. This is the “cornerstone” directly affecting the price. The main raw materials for deep pour epoxy resin are bisphenol A and epichlorohydrin. Fluctuations in the prices of these two raw materials directly affect the price of the finished product. For example, in March of this year, due to the war, the cost of epoxy resin raw materials directly increased, resulting in a price increase of several yuan per kilogram at the end consumer. Besides the core raw materials, auxiliary materials such as curing agents and diluents also affect the cost. Moreover, high-quality raw materials are often 10%-15% more expensive than ordinary raw materials, but they make the epoxy resin clearer, less prone to yellowing, and more resilient after curing. The saying “you get what you pay for” is perfectly exemplified here.

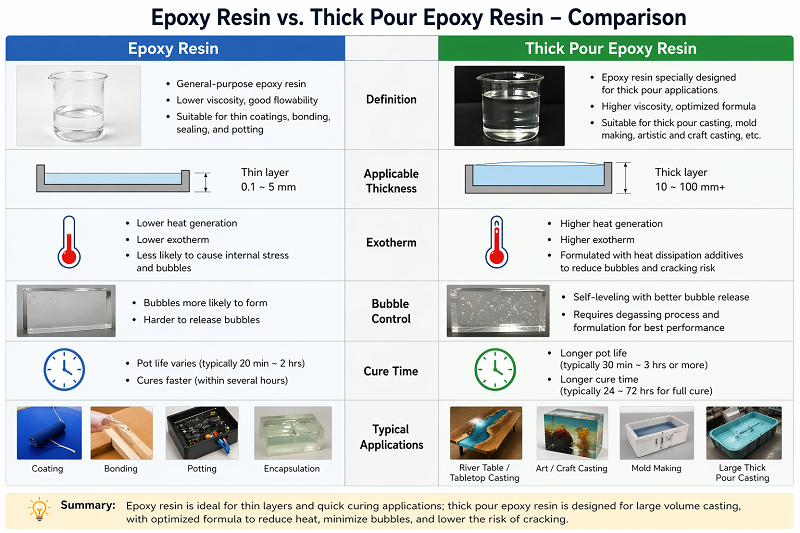
Secondly, product formulations and their differences lead to price fluctuations. Take deep pour epoxy resins and ordinary epoxy resins as examples. deep pour epoxy resins require slow curing and low heat release to avoid cracking and bubbling issues that occur during thick-layer casting. This places higher demands on production technology. Higher-priced products often have more sophisticated formulations, such as adding special additives to achieve natural degassing, UV resistance, and glass-like transparency after curing, making them suitable for high-end art pieces, precision industrial components, etc. Lower-priced products, on the other hand, have simpler formulations, potentially resulting in unstable curing speeds, yellowing, and cracking, making them more suitable for simpler filling projects with lower quality requirements.

Another factor determining the price of deep pour epoxy resins is the casting thickness. The biggest difference between deep pour epoxy resins and ordinary epoxy resins lies in the casting thickness. Ordinary coating-type epoxy resins can typically only be cast a few millimeters, while deep pour products can reach 8-12 inches. The greater the casting thickness, the higher the price. For example, a product capable of casting 2-4 inches in a single pass is typically 20% more expensive than one capable of casting less than 1 inch.

Market supply and demand also affect the price of deep pour epoxy resins. Like most chemical products, epoxy resin prices are influenced by market supply and demand. When downstream industry demand increases, such as in construction, electronics, electric vehicles, or wind power, the demand for epoxy resin increases, driving up prices; conversely, prices decrease.

Finally, brand influence matters. Well-known brands, having undergone long-term market testing, have mature formulas and stable quality, eliminating concerns about curing failures or substandard performance. Their prices are naturally higher than niche brands. Furthermore, these brands usually offer comprehensive after-sales service, such as specific mixing ratios, casting techniques, and solutions for curing abnormalities, which also contributes to the price. Conversely, while some niche brands may be cheaper, they lack comprehensive after-sales support. If problems arise, the customer has to bear the losses, potentially incurring higher costs. In summary, the price of deep pour epoxy resin is the final price resulting from the combined influence of various factors such as raw materials, quality, brand, and market supply and demand. We advise that when purchasing, you should not only consider the price, but also your own needs. A high price does not necessarily mean the best; “suitability” is “best.”

Jinghua has been engaged in the research and sales of epoxy resins for 20 years, offering stable quality, high cost-performance, and a strong after-sales team. If you have any related needs, please feel free to contact us.

How To Clean Epoxy Table Top?

how to clean epoxy table top?

Epoxy table top with their crystal-clear appearance, wear-resistant properties, and excellent water resistance, are increasingly used in our daily lives, such as dining tables, bar counters, and office desks. However, many people don’t know how to clean epoxy resin tabletops, fearing that using the wrong methods will scratch the surface and ruin its gloss. Actually, cleaning epoxy resin tabletops is not complicated. As long as you master the correct methods, you can easily remove stains and maintain the tabletop’s shine for a long time.

How To Clean Epoxy Table Top?

We all know that epoxy resin tabletops are very durable, but they are very susceptible to abrasion and strong corrosion. Therefore, the core principle for cleaning is “gentle and non-scratching, avoiding strong irritants.” Whether it’s daily dusting or stain removal, this principle should be followed to ensure the tabletop maintains its translucent texture for a long time.

First, let’s talk about daily cleaning. In daily use, the most common stains on epoxy resin tabletops are usually dust, fingerprints, or small amounts of water. These are very easy to clean; simply wipe with a soft microfiber cloth or ordinary cotton cloth to remove surface dust and debris. For minor water stains, sweat stains, or fingerprints, gently wipe with a damp cloth and then dry with a dry cloth. The methods described above can resolve most everyday stains without causing any damage to the epoxy resin surface. One important point to note is to avoid using abrasive cleaning cloths or steel wool, as these may leave scratches on the surface, causing it to lose its shine and become dull over time.

For oil stains, such as accidental spills of oil or sauce, a mild detergent can be used. Add a small amount of dish soap to warm water, then use a soft cloth dampened with the detergent to gently wipe the oily area. Rinse with clean water and dry with a dry cloth. This method effectively breaks down grease without damaging the epoxy resin’s gloss. Avoid using detergents containing strong acids or alkalis, as these products may affect the transparency of the resin surface.

For stubborn stains, such as paint or used glue residue, alcohol can be used for cleaning. Pour alcohol onto a soft cloth, gently wipe, then wipe again with a clean, damp cloth, and finally dry with a dry cloth.

Scratches are inevitable for epoxy resin tabletops in daily use. Minor scratches can be restored to their shine using polishing agents, polishing pastes, a soft cloth, or a polishing machine. Deeper scratches may require re-sanding and re-coating with a thin layer of epoxy resin.

Overall, cleaning epoxy resin tabletops isn’t as difficult as you might think. Daily cleaning with warm water and a mild detergent is sufficient to maintain their good condition. For stubborn stains, alcohol can be used appropriately. With proper maintenance, the tabletop can typically remain shiny and clear for many years.

For users who enjoy DIY river tables or resin tabletops, proper cleaning and maintenance not only extend their lifespan but also ensure their creations maintain a beautiful visual appearance.

How To Epoxy A Table Top And Edges​

how to epoxy atable top and edges​?

When making epoxy resin table top, many people focus on the casting process itself, neglecting the edge sealing. However, whether it’s a river table, a solid wood tabletop, or a DIY decorative tabletop, edge treatment directly affects the overall quality and aesthetics. Poor edge treatment can lead to resin drips, bubbles, rough edges, and even cracking.

How To Epoxy A Table Top And Edges​

So, how do you cast/seal epoxy resin onto the tabletop and its edges? Jinghua will explain the entire process in detail, covering preparation, specific construction steps, and practical tips.

Why seal the tabletop edges?

During the epoxy resin casting process, wood edges are usually quite rough, and wood itself has a certain degree of absorbency. Directly casting the resin can easily lead to the following problems: the wood absorbs the resin, causing bubbles; drips at the edges; uneven resin layer thickness; and an uneven final surface.

Therefore, a sealant layer is usually applied before the actual casting. This thin layer of resin seals the pores of the wood, making subsequent casting smoother.

How to seal the edges of a desktop?

Edge treatment is crucial for edge sealing. First, check if the desktop edges are flat. If there are gaps or cracks, fill them with wood putty, let it dry, and then sand it smooth. For a thicker and more aesthetically pleasing edge, you can install a wooden trim around the bottom edge of the desktop. This increases edge thickness and strengthens the surface, reducing the amount of epoxy resin needed and lowering costs. Next, wrap the desktop edges with masking tape, ideally two layers, extending 1-2 cm above the edge to prevent epoxy resin leakage during pouring. Make sure the masking tape is firmly attached without gaps.

The next step is mixing the epoxy resin. This is a critical step; an incorrect ratio will lead to incomplete curing, resulting in a sticky and wrinkled desktop. Different brands of epoxy resin have different resin-to-hardener ratios, commonly 1:1 or 2:1. Always carefully read the product instructions. It is recommended to weigh the epoxy resin using an electronic scale and pour it into a clean plastic container. Stir in one direction at a constant speed for at least 2-3 minutes until there are no streaks or air bubbles. While stirring, be sure to scrape the edges and bottom of the container to ensure the two materials are completely mixed, avoiding any unmixed resin residue that could lead to uneven curing.

After mixing, apply a top coat (a thin coat of epoxy resin) to the tabletop and edges. This step mainly seals the pores of the substrate, preventing air bubbles and pinholes during subsequent pouring. Apply evenly with a foam brush or scraper, following the grain of the resin. Apply more to the edges to ensure complete coverage. After application, let it stand for 5-10 minutes. Gently blow the surface with a heat gun or hairdryer to remove any small air bubbles. Be careful not to use too high a temperature to prevent the epoxy resin from curing too quickly.

After the top coat has dried (generally 1-2 hours, depending on ambient temperature and product formulation), you can proceed with the actual pouring and sealing. Slowly pour the prepared epoxy resin onto the tabletop, spreading it from the center outwards. Gently smooth it with a scraper, controlling the overall thickness to 1-2 mm. Ensure the edges are completely covered with epoxy resin, filling the gaps between the masking tape and the tabletop to form a seamless edge seal. For marble, wood grain, or other decorative effects, add a small amount of paint to the epoxy resin and gently create the texture with a stirring stick. Beginners are advised to test on a small area first before proceeding to a larger area.

After pouring, proper curing is crucial, as this step determines the final result. Place the tabletop in a well-ventilated, dust-free environment at a temperature of 20-25℃, avoiding direct sunlight. It’s best to cover it with a plastic sheet or cardboard box to prevent dust from settling on the surface. Curing time is generally 24-48 hours; refer to the product instructions for specific times. Do not touch or move the tabletop immediately, as this can easily leave fingerprints, scratches, or even cause surface deformation.

Finally, finish the finishing touches. After the epoxy resin has fully cured, peel off the masking tape from the edges, and gently sand the edges and the surface of the table to remove excess epoxy resin and burrs. After sanding, wipe it clean with a cloth, then apply a thin coat of epoxy resin for a glossy finish. Let it dry, and you’re done.

what is the best deep pour epoxy?​

what is the best deep pour epoxy?​

In the field of epoxy resin applications, deep pour epoxy resin is undoubtedly a very popular material. Whether it’s for resin crafts, creating trendy river tables, industrial mold casting, or filling wood gaps, it’s indispensable. Many people want to buy the “best deep pour epoxy resin,” but there’s no absolute “best,” only the choice that best suits your needs—after all, beginners and experienced users, home and industrial users, have completely different priorities. Today, we’ll use simple language to explain the worthwhile deep pour epoxy resins on the market, helping you avoid pitfalls and choose the right one.

艺术家倒树脂制作河流桌

What is deep pour epoxy resin?

Deep pour epoxy is a low-heat epoxy material specifically designed for thick-layer casting. Unlike ordinary epoxy, it achieves thicker casting layers while maintaining good transparency by extending the curing time and reducing the exothermic reaction. Typically, it can cast 2–4 inches (approximately 5–10 cm) in a single pass, and some products can even achieve thicker castings (4–8 inches).

What are the characteristics of high-quality deep pour epoxy resin?

High-quality deep pour epoxy resin will possess the following characteristics; recognizing these will ensure you make the right purchase.

Low viscosity: Good deep pour poxy resin typically has a low viscosity, allowing air bubbles to escape more easily. It also allows the resin to level naturally, resulting in a more transparent finished product.

Long curing time: One of the biggest differences between deep pour resin and ordinary resin is its longer curing time. By extending the curing time and reducing exothermic reactions, surface drying time is generally around 24 hours, with complete curing requiring 48-72 hours.

High transparency: High-quality deep pour epoxy resin generally has good transparency, especially important for projects like river tables and artistic encapsulation. High-quality deep pour epoxy resin can achieve a glass-like high-transparency effect after complete curing, and is less prone to fogging or air bubbles.

Resistance to yellowing: Resistance to yellowing is also a crucial factor for high-quality deep pour epoxy resin. During long-term use, epoxy resin is prone to yellowing due to ultraviolet radiation. Therefore, high-quality deep pour epoxy resins typically contain high UV resistance agents to improve their resistance to yellowing.

Is more expensive always better?

Many people choose the most expensive deep pour epoxy resins, but this isn’t necessarily true. There’s no single answer to “the best deep pour epoxy resin.” Different applications require different types of products, so there’s only what’s most suitable for your needs, not a single “best.”

For example, for common household items like river tables and large wooden tables, we can choose products with low heat release, 2-4 inch pour thickness, and high transparency to reduce bubbling and cracking.

Or, for small DIY pours, we can choose deep pour epoxy resins with slightly faster curing speeds and lower costs, offering better value for money.

Conclusion In general, high-quality deep pour epoxy resins have characteristics such as low viscosity, long curing time, high transparency, and strong resistance to yellowing. However, there is no single “best” deep pour epoxy resin; only what’s most suitable for your needs. Choose based on the size of your project, your experience, and your budget to achieve a satisfactory finished product.

what is the best epoxy resin for table tops?

what is the best epoxy resin for table tops?

Whether you’re making your own solid wood tabletop, renovating an old table, or creating a trendy river-themed table, epoxy resin is a core material for creating high-quality, durable desktops. However, the market offers a wide variety of epoxy resins, ranging from a few dollars per kilogram to hundreds of dollars per kilogram, leaving many people overwhelmed and unsure which one is right for them. Actually, choosing the right epoxy resin for your desktop isn’t about getting the most expensive; it’s about considering your specific needs, the pouring thickness, and resistance to yellowing. Below, we’ll explain in detail how to choose the right epoxy resin for your desktop, focusing on several key aspects.

Epoxy Table Resin 3

Selection of core performance

Many people only consider price and transparency when buying epoxy resin, neglecting other crucial properties. We must understand that desktops endure friction, sunlight, and daily bumps over extended periods, so material selection must balance practicality and durability. Therefore, these three properties are key when choosing epoxy resin for desktops:

First is resistance to yellowing, which is paramount. Ordinary epoxy resins with insufficient UV resistance will yellow and darken within just six months under direct sunlight and prolonged exposure to artificial light, turning a once-bright desktop gray and significantly diminishing its aesthetic appeal. Therefore, we should prioritize styles with high UV resistance or high resistance to yellowing, especially for desktops placed near windows or in well-lit areas, as this property directly determines the desktop’s lifespan and appearance.

Secondly, a balance between hardness and toughness is crucial. Many people blindly pursue high-hardness epoxy resins. While high-hardness epoxy resins achieve high hardness after curing, they become brittle, causing cracks and chipping even with minor impacts. Conversely, low hardness makes them easily scratched by keys and tableware, resulting in poor durability for everyday use. High-quality epoxy tabletops balance hardness and toughness, resisting everyday scratches and withstanding minor impacts, making them less prone to cracking and breakage. They are suitable for high-frequency use scenarios such as dining tables, desks, and coffee tables.

Finally, their self-leveling and defoaming properties make them extremely user-friendly for beginners. DIY tabletops are mostly constructed by hand. A good self-leveling resin will automatically spread across the surface, forming a smooth, even layer, eliminating the need for repeated smoothing. A resin with excellent defoaming properties will not leave behind numerous tiny air bubbles during application, preventing an unsightly, uneven surface after curing and saving the hassle of extensive sanding and rework.

Choices for different desktop scenarios

There is no absolutely “best” epoxy resin, only the style best suited to your desktop. Choosing the right epoxy resin based on the intended use of your desktop will achieve the desired effect.

For ordinary solid wood desktops or renovating old tables, where durability, waterproofing, and cost-effectiveness are key, a general-purpose high-transparency desktop epoxy resin is sufficient. This type of resin has moderate viscosity, achieves the required hardness after curing, and is waterproof and oil-resistant. Daily spills like tea and soup can be easily wiped clean. It’s suitable for desks, sideboards, and ordinary coffee tables. It’s easy to apply, even for beginners, and is affordable, so you won’t feel bad about using it on large areas.

For creating trendy river-themed tables or multi-panel solid wood tables, where ultimate transparency and deep casting are desired, a high-transparency deep-cast epoxy resin is essential. This type of resin boasts maximum transparency, perfectly showcasing wood grain, pebbles, dried flowers, and other inlaid decorations to create a dynamic river effect. It also supports thick-layer casting without collapsing or cracking. After curing, it has a transparent and high-end texture, resulting in a stunning desktop. It’s perfect for desktops that emphasize personalized decoration.

For commercial desktops and frequently used dining tables, where durability, wear resistance, and durability are paramount, high-strength wear-resistant epoxy resin is the preferred choice. This type of resin contains wear-resistant components, resulting in higher hardness, scratch and impact resistance. Even with frequent placement of tableware and movement of items, it is less prone to scratches, has a longer lifespan, and is suitable for high-intensity use scenarios such as restaurant dining tables and office desks.

Conclusion

In general, there’s no single “best” epoxy resin for desktops; it’s all about finding the one that best suits your needs. Purchase products with the appropriate characteristics based on your intended use, focus on key properties, and master the correct application methods to easily create a beautiful and durable epoxy desktop. Finally, Jinghua has been researching and developing desktop epoxy resins for 20 years. If you need related products, please contact us; we can provide you with the most cost-effective solutions.

How to Dissolve Cured Epoxy Resin?

How to Dissolve Cured Epoxy Resin?

Epoxy resins are a class of thermosetting materials characterized by epoxy groups. They exhibit good fluidity and adhesion during processing, and after film formation, they rapidly form a three-dimensional network structure through chemical reactions with curing agents, thereby transforming into thermosetting materials with high strength, heat resistance, chemical resistance, and excellent electrical insulation. They are widely used in construction, woodworking, flooring, marine, and craft manufacturing.

However, in certain cases, it is necessary to dissolve cured epoxy resin for repair or replacement. Below, Jinghua introduces several common methods to help those in need.

1.Thermal Dissolution

    Heating is one of the most effective ways to weaken cured epoxy resin. At high temperatures, the structure softens and strength decreases, making it easier to scrape off.Tools such as flame guns, heat guns, or torches can be used. Note that the melting point of epoxy adhesives is typically above 100°C (some may be higher), so ensure sufficient heating temperature. Use caution—excessive heat may damage the substrate, especially wood, plastic, or painted surfaces. Keep the heat gun moving continuously to avoid prolonged concentrated heating on one spot. Suitable for epoxy coatings, adhesive residues, or thin cured resin layers.

    2.Physical Removal

    Physical removal is a direct and robust method for epoxy elimination, using tools like scrapers, brushes, sandpaper, and angle grinders for mechanical stripping. Ideal for epoxy flooring where substrate damage is acceptable, offering fast removal. Do not use on delicate items.

    3.Solvent DissolutionSolvents are used to dissolve (or slightly soften) cured epoxy for easy removal. Common solvents include acetone, ethyl acetate, methanol, etc. Apply the solvent to the epoxy, allow penetration and dissolution, then wipe clean with a scraper or cloth. Suitable for semi-cured epoxy or thin resin layers.

    4.Chemical DissolutionMost common solvents cannot fully dissolve cured epoxy, but specific chemicals can break down its structure or soften it to a removable state. Typical options include methylene chloride (dichloromethane), acetone/toluene/xylene blends, etc. Apply the chemical to the epoxy, allow penetration to weaken the polymer network. After soaking, the softened epoxy can be scraped off. Suitable for removing epoxy coatings from concrete floors, tools, and various surfaces.

    Safety Note: Chemicals pose hazards. Always use proper protection: work in well-ventilated areas, wear gloves, and avoid skin contact. Commercial epoxy removers are available—slightly less potent than industrial chemicals but generally safer and more convenient.

    How to Choose the Right Removal Method?

    Different scenarios and substrates require different approaches. Below is a summary of common substrate treatments for epoxy removal:

    ScenarioPreferred MethodCombined Procedure
    Electronic Components / PCB ReworkSpecialized Dissolver + HeatingSoak / Degreaser → Heat Soften → Pick / Scrape
    Metal Molds / WorkpiecesChemical Soaking + Heat GunSoak to Swell → Heat Soften → Scraper Cleanup
    Large-Area Thick EpoxyPyrolysis + Mechanical GrindingHigh-Temp Heat → Shatter → Grind
    Plastic / Heat-Sensitive SubstratesLow-Temp Thermal Shock + Mechanical PeelingDry Ice Cooling → Embrittlement → Tap & Peel
    Thin Coatings / ResiduesSolvent Soak/Wipe + SandpaperSolvent Wipe → Fine Sandpaper Polish
    how to pour epoxy more than 2 inches deep?​

    how to pour epoxy more than 2 inches deep?​

    In the field of epoxy resin applications, deep pour technology has become increasingly popular, especially in projects such as river tables, art ornaments, wood encapsulation, industrial molds, and decorative structural parts. When the pouring thickness exceeds 2 inches (approximately 5 cm), the requirements for material properties, construction environment, and operating skills will increase significantly. Improper operation can easily lead to problems such as overheating, bubbles, cracking, or uneven curing. Therefore, mastering the correct method for thick-layer pouring is a very important matter. This article will detail how to safely and efficiently deep pour epoxy resin with a thickness exceeding 2 inches.

    Ec97ab46 Be1a 400d B9eb 22cc4fa763a7

    1. Choosing the Right Deep Pour Epoxy Resin

    Not all epoxy resins are suitable for deep pouring. For example, standard tabletop epoxy is typically only designed for thin coatings of 3–10 mm. Direct deep pouring will cause the resin to generate excessive heat during curing, resulting in rapid temperature rise and even cracking.

    For projects larger than 2 inches, we should prioritize deep-cast epoxy resin. Features of this resin include:

    Low exothermic reaction: generates less heat lduring curing

    Long pot life: facilitates application and bubble removal

    High clarity: ideal for artistic and decorative projects

    Superior anti-cracking performance

    High-quality deep pour epoxy usually allows a single pour depth of 2–4 inches or more.

    2. Controlling the Construction Environment

    Deep pour epoxy is highly sensitive to environmental conditions; temperature and humidity directly affect the final result.

    Mold & SealingHigh-density, heat-resistant molds (such as silicone, wood, etc.) are used.. Seal joints with heat-resistant sealant to prevent leakage. A mold release agent can be sprayed on the inner wall for easier demolding.

    Environmental ControlMaintain an ambient temperature of 20–25°C and humidity below 65%. Low temperatures slow curing and trap internal bubbles; high temperatures intensify exotherm, causing yellowing and cracking.

    Substrate PreparationPorous substrates such as wood and stone must first be sealed with a primer to prevent outgassing and pinholes. For substrates such as metal and glass, the surface needs to be degreased, cleaned of stains, and lightly sanded to increase the friction between the epoxy resin and the substrate.

    3. Properly Mixing the Epoxy Resin

    Epoxy resin generally consists of Part A (resin) and Part B (hardener), with mixing ratios varying by product (e.g., 2:1, 3:1, or 1:1).

    Mixing guidelines:

    Measure strictly by volume or weight ratio

    Stir slowly for 3–5 minutes

    Scrape the edges and bottom of the container

    When mixing the resin, it is recommended to use the “two-stage mixing method”: first mix it once in a container, then pour it into a clean container and mix it again to ensure thorough mixing.

    Degassing & Resting: Allow the mixture to rest for 5–10 minutes after stirring to let bubbles rise naturally. Vacuum degassing is optional and greatly improves clarity.

    4. Pouring Process: Layering & Temperature Control Are Key

    Single-step pouring is not recommended for thicknesses over 2 inches. The safe approach is layered pouring:

    First Layer: Pour 1–2 inches, slowly injecting along the edge to avoid bubble formation from impact.

    Surface Bubble Removal: Fifteen minutes after pouring, use a hot air gun to sweep across the surface at a uniform speed to eliminate air bubbles. It’s important to note that the hot air gun should be kept at least 15 cm away from the surface to prevent localized overheating and cracking.

    Layer Interval: After the first layer reaches initial cure (approx. 24 hours, tack-free), lightly sand and dust the surface before pouring the next layer. Total thickness can easily exceed 4 inches.

    Heat Dissipation: Due to concentrated exotherm during deep curing, provide ventilation around the mold to prevent excessive local temperatures.

    5. Bubble Reduction Methods

    Bubbles are common in deep pouring. They can be minimized by:

    1PreheatingBefore application, soak the epoxy resin in warm water (around 30℃) for a few minutes to reduce its viscosity, which can effectively reduce the formation of air bubbles during the application process.

    2Using a heat gun or torchGently heat the surface after pouring to quickly eliminate bubbles.

    3Vacuum or pressure equipmentFor high-end projects, use vacuum degassing or a pressure pot for further bubble reduction.

    6. Controlling the Curing Process

    Full cure time for deep pour resin is typically 48–72 hours, and some products require 5–7 days to reach maximum hardness.

    During curing:

    Do not move the mold

    Avoid direct sunlight

    Maintain stable temperature

    If a significant increase in resin temperature is observed during the pouring process, timely heat dissipation measures should be taken, such as increasing ventilation and lowering the temperature.

    Once the project is fully cured, it can be sanded and polished. If there is an outdoor requirement, a UV coating can be applied to the surface to increase its resistance to yellowing and ultraviolet radiation.

    Pouring epoxy resin over 2 inches thick is not simply increasing material volume. It requires comprehensive consideration of resin type, environmental conditions, mixing ratio, and application techniques. Only by selecting suitable deep pour epoxy, strictly controlling the construction environment, and properly using layered pouring and degassing methods can you achieve a transparent, stable, and defect-free result.

    With the continuous development of epoxy resin technology, deep pouring has become an important process in furniture making, art creation, and industrial manufacturing. With the right methods, even beginners can successfully complete high-quality deep pour epoxy projects.