

Epoxy Countertop Resin

Epoxy Countertop vs. Granite: Which One Actually Wins in a Modern Kitchen?

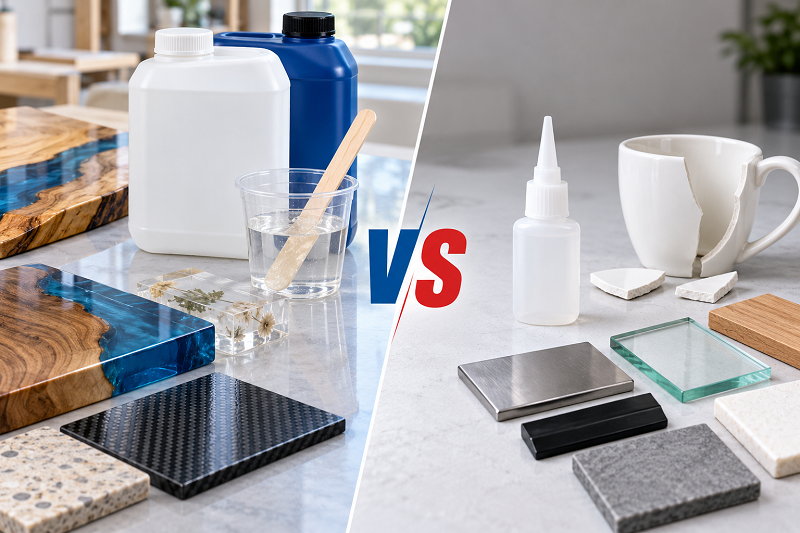
Granite has been the default “upscale kitchen” answer for thirty years, and for good reason — it’s hard, it’s natural, and it photographs well. But it’s not the only serious option anymore. Countertop epoxy resin has moved from a DIY novelty into a real commercial-grade surface, and a growing number of kitchen remodels are choosing it over stone. Here’s what actually changes when you pick one over the other — not the marketing version, the practical one.

Epoxy Countertop Resin

What “Countertop Epoxy” Actually Means

Countertop epoxy resin is a two-part system — resin and hardener — engineered specifically for horizontal surfaces. That matters more than it sounds: a formula built for countertops self-levels, resists UV yellowing, and cures to a hard, glass-like finish, unlike general-purpose casting or art resins that were never meant to take daily kitchen abuse. Once mixed and poured, it cures into a seamless, non-porous layer that can sit directly on top of laminate, wood, MDF, or concrete.

It shows up on kitchen islands, bathroom vanities, bar tops, and restaurant counters, and it’s become a go-to for anyone renovating on a budget who still wants a stone-look finish without a stone-sized invoice.

Looks: Nature’s Catalog vs. an Open One

A granite slab is what the quarry gives you. Every piece is genuinely one-of-a-kind, and that uniqueness is part of the appeal — but you’re choosing from existing inventory, not designing from scratch. Availability shifts by region, and the exact vein pattern you liked in a showroom sample may not be the slab that ships.

Epoxy flips that. Pigment, mica powder, and pour technique can replicate white marble veining, black granite speckle, metallic swirls, or a flat concrete look — or skip imitation altogether and go with a color no stone has ever produced. For a brand that wants a specific look across multiple locations, or a homeowner chasing one very particular shade of blue, that control is the whole draw.

Durability: Where Each One Actually Fails

Granite is genuinely tough — it sits around 6 to 7 on the Mohs hardness scale, which puts it above steel for scratch resistance, and a sealed slab shrugs off a hot pan without flinching. Its weak point is porosity. Left unsealed, or sealed and forgotten, it will drink up wine, oil, and coffee and stain. That upkeep is the trade-off for the natural material.

A properly cured countertop epoxy layer lands around 80-85 on the Shore D hardness scale and is completely non-porous, so staining from liquids isn’t really a failure mode the way it is for stone. Its weak point is heat and impact from the wrong angle — a dropped cast-iron pan can chip it, and setting a pot straight off the burner on a standard formula can leave a mark, unless the resin is specifically rated for high heat. Match the formula to how the surface will actually be used and this stops being a real concern.

Maintenance: The Difference Shows Up Over Years, Not Days

Both surfaces wipe clean with soap, water, and a soft cloth on a normal day — that part is a wash. The difference is what happens over time. Granite needs resealing on a schedule, typically every 12 to 24 months, or the porosity creeps back in. Epoxy doesn’t have that maintenance item on the calendar at all; the sealed, non-porous surface it cures into is the finished state, not a temporary one. Skip the resealing on granite for a few years and you’ll notice; skip it on epoxy because there’s nothing to skip.

Cost: Where the Number Actually Comes From

Granite pricing is driven by the slab — stone grade, thickness, how far it has to travel, and how much cutting the layout requires. Mid-range granite typically runs somewhere in the $50-$100 per square foot installed range, and premium colors or oversized islands push well past that.

Epoxy’s cost advantage comes from what it doesn’t require: no quarrying, no slab transport, and in a lot of renovation jobs, no tear-out. Coating over an existing laminate or wood countertop instead of replacing it is what keeps epoxy in the $35-$75 per square foot range for most residential jobs. The savings come from skipping steps, not from a cheaper material.

Installation: Slab Fabrication vs. On-Site Coating

Granite installation is a fabrication job. A template gets taken, the slab gets cut off-site with specialized equipment, and a crew sets and seals it in place — solid work, but it’s scheduled around a fabricator’s shop, not a weekend.

Epoxy is closer to a finishing trade than a stone trade. The rough sequence is straightforward: clean and prep the existing surface, prime it if the substrate calls for it, mix resin and hardener to spec, add pigment or decorative layers, pour and self-level, then let it cure fully before use — usually 24 to 72 hours depending on the formula and ambient temperature. That flexibility is why epoxy shows up so often in renovations where tearing out the old countertop isn’t on the table.

Side by Side

FactorEpoxy CountertopGranite
Design rangeOpen — any color, pattern, or effect a pigment can produceFixed by the quarry — you choose from what exists
Surface hardness~80-85 Shore D once fully cured~6-7 on the Mohs scale
PorosityNon-porous, no sealing neededPorous, needs sealing every 1-2 years
Heat toleranceHandles warm dishes; direct hot pans need a formula rated for itHandles a hot pan straight off the stove
Typical install cost$35-$75 per sq ft, coating over an existing base$50-$200+ per sq ft, slab plus fabrication
Install methodCoated on-site over laminate, wood, or concreteSlab cut, templated, and set by a fabricator

So Which One Should You Actually Pick

Go with granite if a hot pan straight off the stove without a trivet is a real, frequent scenario in your kitchen, or if the look you want is specifically “unrepeatable natural stone” rather than anything a pigment could match.

Go with epoxy countertop resin if you’re renovating over an existing surface rather than gutting it, want a color or finish that stone doesn’t naturally produce, or are outfitting multiple units — a rental portfolio, a restaurant chain, a hotel — where matching the exact same finish across locations matters more than any single slab’s uniqueness.

Commercial buyers and private-label brands increasingly land on epoxy for a simpler reason: it scales. A stone supplier can’t guarantee two identical slabs; a formulated countertop epoxy resin, batch to batch, can be built to.

Sourcing the Resin Actually Matters

Not every epoxy sold as “clear resin” is built for a countertop. A formula meant for jewelry or river tables can yellow under UV, self-level poorly on a large surface, or trap bubbles that show up as defects once cured. A resin engineered specifically as a countertop epoxy manufacturer product should hold up to UV without ambering, self-level cleanly across a full slab, and cure to a consistent hardness batch after batch — which is the difference between a finish that photographs well on day one and one that still looks that way three years in.

Granite isn’t going anywhere, and it shouldn’t — it’s proven and it looks the part. But for kitchens, renovations, and commercial spaces where design flexibility, renovation speed, or consistent output across multiple units matters more than natural stone’s pedigree, countertop epoxy has become the more practical bet, not just the cheaper one.

Epoxy Resin Manufacturer (2)

Epoxy Resin Manufacturer vs. Trading Company: How to Tell Them Apart

A surprising number of “epoxy resin manufacturer” websites aren’t manufacturers at all. Somewhere behind that polished homepage is a trading company sourcing from two or three actual factories, marking up the price, and adding a layer of communication that slows everything down when something goes wrong. That’s not automatically a dealbreaker — some trading companies do a genuinely good job — but if you’re placing a bulk or OEM order, you want to know which one you’re actually talking to before you commit, not after a quality issue traces back to a factory you’ve never heard of.

Epoxy Resin Manufacturer (2)

Why the Difference Actually Matters

Price is the obvious one. A trading company adds a margin on top of factory cost, and that markup can run anywhere from 10% to 40% depending on the product and the relationship. But price isn’t the only thing at stake. Quality control depends on proximity — a manufacturer can catch a bad batch on the production floor; a trading company finds out when the container’s already at sea. Lead time works the same way: a manufacturer controls their own schedule, while a trading company is stacking your order on top of whatever priority the actual factory gives them.

Then there’s customization. OEM and private label buyers need direct access to formulation, packaging, and labeling decisions — the kind of thing that gets lost or delayed when there’s a middleman relaying requests back and forth.

Signs You Might Be Talking to a Trading Company

Vague answers to specific technical questions are usually the first tell. Ask about the exact hardener chemistry, cure exotherm behavior, or production capacity per month, and a trading company rep often has to “check with the factory” — sometimes repeatedly, for questions a real manufacturer would answer on the spot.

A catalog that reads suspiciously broad is another sign — table top epoxy, deep pour epoxy, UV resin, floor coatings, and three unrelated product categories, all under one brand, all claimed as “our factory.” Very few manufacturers actually run production across that many unrelated chemistries.

Reluctance to arrange a factory visit or a live video walkthrough is a strong signal too. A real manufacturer generally has no reason to say no, assuming reasonable notice and normal business hours. Stalling, redirecting to a showroom instead of the actual production floor, or offering only pre-recorded footage are all worth noting.

And pricing that’s noticeably lower than the rest of the market for the same specification, with no clear explanation, often means there’s a chain of resellers between you and the actual production source, each one shaving margin to stay competitive.

Signs You’re Likely Talking to a Real Manufacturer

Specific, immediate answers to production questions — batch sizes, raw material sourcing, in-house lab testing procedures — without needing to check with anyone else.

A factory address that actually matches an industrial or manufacturing zone, not a general trading district or an office building, and one they’re willing to have verified through a video call or in-person visit.

Consistent SDS and TDS documentation tied to specific batches, not a generic sheet reused across every product line.

The ability to accommodate real OEM customization — adjusting formulation within a reasonable range, private label packaging, and label content — rather than just relabeling an existing stock item.

Manufacturer vs. Trading Company at a Glance

 Epoxy Resin ManufacturerTrading Company
Technical questionsAnswered directly, in detailOften deferred to “the factory”
Factory visit / video callGenerally availableOften delayed or avoided
PricingReflects actual production costIncludes reseller margin
Quality controlOn the production floorAfter the fact, once shipped
OEM customizationFormulation and packaging both flexibleLimited to relabeling

How to Verify Before You Commit

Start with the business registration. In China, this means checking the company’s listing on the National Enterprise Credit Information Publicity System , which shows registered business scope — manufacturing versus trading is usually stated plainly there.

Ask for a live video call of the actual production line, not a pre-shot promotional video. A legitimate epoxy resin manufacturer can usually arrange this within a few days; persistent delays are worth taking seriously.

Request a sample order before committing to volume, and pay attention to how consistent the batch documentation is — a manufacturer tends to have this dialed in; a trading company sometimes has to track it down from whoever actually made the product.

And ask pointed technical questions early, before pricing negotiations start. How suppliers respond to specifics — cure chemistry, batch testing, customization limits — tends to say more than anything on their website.

FAQ

Is it always bad to buy from a trading company?

Not necessarily. Some trading companies manage supplier relationships well and add real value, especially for smaller orders where a factory’s MOQ doesn’t make sense. The risk shows up mainly at bulk or OEM volume, where quality consistency and direct customization matter more.

Can a company be both a manufacturer and export through a trading arm?

Yes, and that’s common. Larger manufacturers sometimes route smaller orders through a trading subsidiary while handling bulk and OEM directly. Ask which arm you’re actually dealing with for your specific order.

What’s the fastest way to check if a supplier is really a factory?

A live, unscheduled-feeling video walkthrough of the actual production floor is usually the quickest confirmation — trading companies struggle to arrange this convincingly on short notice.

Does a lower price always mean a trading company?

Not always, but it’s a reasonable flag worth checking. Compare the price against your other quotes for the same specification, and if it’s an outlier with no clear explanation, dig deeper before ordering.

We manufacture every resin line in-house — table top, deep pour, and UV — and are glad to arrange a live production walkthrough or provide registration documentation before you place a bulk or OEM order.

Epoxy Resin Sds

How to Read an Epoxy Resin SDS and TDS?

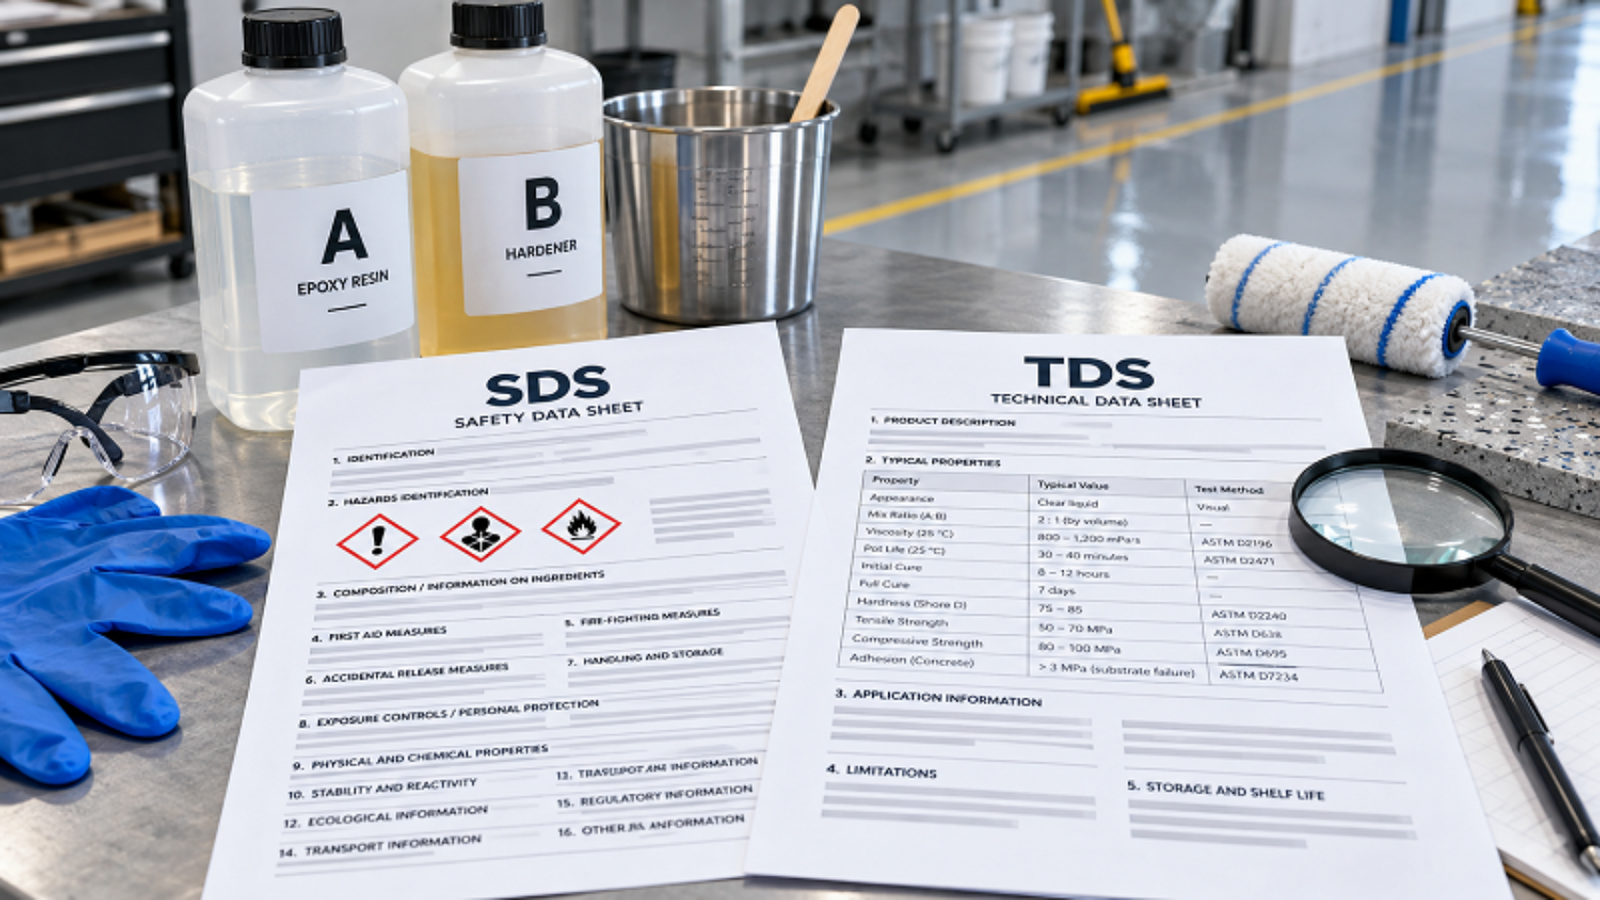
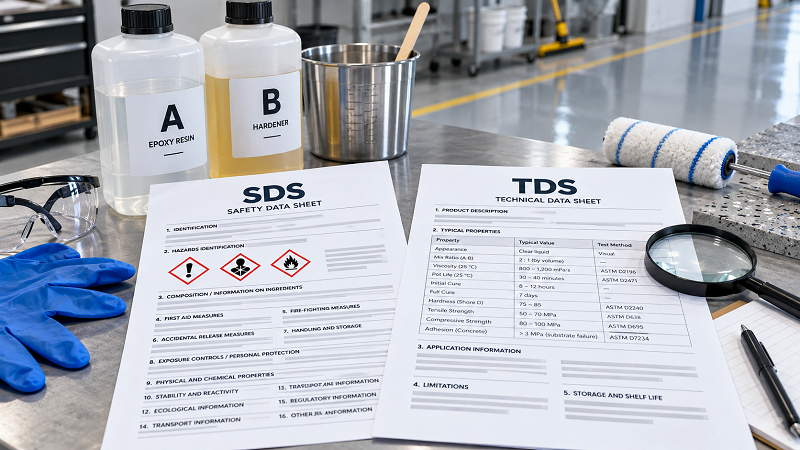
Ask a buyer what’s in their supplier’s SDS and most describe the TDS instead — the two get mixed up constantly, even though they answer completely different questions. A Safety Data Sheet tells you whether the resin is dangerous to handle, ship, and store. A Technical Data Sheet tells you whether it’ll actually perform the way you need it to. Mixing them up isn’t just a vocabulary slip; it means buyers sometimes clear customs on the wrong document, or approve a resin for production without ever checking whether it cures the way their process requires. Here’s what’s actually inside each one, and which questions each is built to answer.

Epoxy Resin Sds

What an SDS Actually Covers

A Safety Data Sheet follows a standardized 16-section format under the Globally Harmonized System (GHS), so once you know the structure, any SDS from any epoxy resin manufacturer reads roughly the same way. A few sections matter more than the rest for buyers.

Section 2, hazard identification, is where the signal words live (Warning or Danger), along with hazard statements and pictograms. This is where you’ll see whether a resin counts as a skin sensitizer, an irritant, or something worse.

Section 3 covers composition: the chemical ingredients and their CAS numbers. Some manufacturers give exact percentages; others use concentration ranges instead to protect a proprietary formula.

Section 7, handling and storage, lists ventilation requirements, an acceptable storage temperature range, and materials the resin shouldn’t be stored near.

Section 8 is exposure controls and PPE — gloves, eye protection, respiratory gear if needed, and exposure limits for anyone mixing or applying the resin day to day.

Physical and chemical properties show up in Section 9: flash point, viscosity, specific gravity, pH, solubility. Some of these numbers overlap with what you’d find on a TDS, but here they’re framed around hazard rather than performance.

Then there’s Section 14, transport information, which says whether the resin counts as a dangerous good for shipping and under which UN number if so. This one section can move freight cost quite a bit and determine which carriers will even take the shipment.

Section 15 is regulatory information — REACH, TSCA, Prop 65, and similar frameworks, whichever apply. Importing into the U.S., EU, or Australia, this is usually the first thing a customs broker asks to see.

What a TDS Actually Covers

A Technical Data Sheet has no standardized format — every epoxy resin manufacturer lays it out a little differently — but it exists to answer one question: how does this resin actually perform? A few things you’ll almost always find on one.

Mixing ratio and method come first, usually by volume or weight, with the exact number spelled out (1:1, 2:1, whatever applies).

Pot life is how long you’ve got to work with the mixed resin before it starts to gel. It’s normally given at a specific ambient temperature, since heat shortens it noticeably.

Cure schedule breaks down into touch-dry time, tack-free time, and full cure time — often listed separately, because a resin can feel safe to touch well before it’s actually reached full hardness.

Viscosity, given in cP for the mixed resin, tells you how self-leveling it’ll be and how prone it is to trapping bubbles.

Physical properties after cure round things out: Shore D hardness, tensile strength, heat deflection temperature, and yellowing resistance, sometimes rated against ASTM D4212 or a comparable standard.

Shelf life and storage conditions tell you how long an unopened container stays usable and what temperature range keeps it stable in the meantime.

And recommended application thickness matters a lot for deep pour products specifically — go past the rated depth and you’re into the cracking and overheating territory we’ve covered elsewhere.

None of it is standardized across suppliers, which is exactly why comparing two manufacturers’ TDS sheets takes more than a quick glance. The same property might get tested under different conditions, or reported in different units entirely.

SDS vs TDS at a Glance

 SDS (Safety Data Sheet)TDS (Technical Data Sheet)
AnswersIs it safe to handle, ship, store?Will it perform the way I need?
FormatStandardized 16-section GHS layoutVaries by manufacturer
Used byCompliance, customs, EHS teamsProduction, R&D, QC teams
Key contentHazards, PPE, transport class, regulatory statusMixing ratio, cure time, hardness, viscosity
Required forImport/export, workplace safety complianceProcess planning, formulation matching

Why Buyers Need Both, Not Just One

Compliance teams usually reach for the SDS first, since that’s the document customs brokers and OSHA inspectors ask for. It settles whether a shipment needs special handling and whether workers need specific PPE on the floor. But an SDS won’t tell you a thing about whether the resin cures clear, holds up under UV, or sets inside your production window — that’s the TDS’s job entirely. Skip it, and this is exactly how OEM buyers end up with a resin that sails through customs but doesn’t match the working properties their process was built around.

It goes the other way too. Buyers who lock in on cure time and hardness numbers from the TDS and never open the SDS sometimes get blindsided by shipping restrictions or PPE requirements they hadn’t budgeted for — occasionally after the order’s already gone through.

Common Mistakes When Reading These Sheets

Confusing “hazardous for shipping” with “hazardous to use” trips people up more than almost anything else. A resin flagged as a dangerous good under transport regulations (Section 14 of the SDS) can still be perfectly fine to handle with basic gloves in a well-ventilated shop. That classification is about the concentrated, undiluted product moving in bulk — not about the risk level during normal, everyday use.

Skipping the revision date is another one. SDS and TDS documents both get updated as formulations or regulations shift, and an old SDS might list a hazard classification that’s no longer accurate, or leave out one that’s been added since. Ask for the current revision before placing a large order — not whatever version turned up in a search last year.

What to Check Before You Order

On the SDS side, confirm the transport classification lines up with what your freight forwarder can actually ship, then check Section 15 against whatever regulations your destination market enforces — REACH for the EU, Prop 65 for California, TSCA for general U.S. import.

On the TDS side, weigh the pot life against your real working conditions. A 45-minute pot life means something different in a 90°F warehouse than it did in whatever lab conditions it was tested under. Confirm the cure schedule actually fits your production timeline before you commit to volume.

FAQ

Is an SDS required by law?

In most markets, yes. Suppliers are legally required to provide one for hazardous chemical products, and it typically has to accompany shipments or stay available to any worker handling the material.

Does a TDS have any legal requirement behind it?

Not really — it’s a manufacturer’s technical claim about performance rather than a regulatory document, so there’s no mandated format and nothing forcing consistency. Which is exactly why it’s worth comparing carefully across suppliers instead of assuming they’re all measuring the same thing.

Can the same resin have different SDS sheets in different countries?

Sometimes, yes. Regulatory classification can shift by jurisdiction even for an identical formulation, so a manufacturer selling into the U.S., EU, and Australia might issue a separate SDS for each market.

How often should I request updated sheets from a supplier?

Before every large or repeat order is the safest habit — formulations and regulatory status can both change without much warning reaching the buyer’s side.

We provide current SDS and TDS documentation for every resin line — table top, deep pour, and UV — and can walk through both with your compliance or production team before you commit to a bulk or OEM order.

Epoxy Resin Vs Super Glue

Epoxy Resin vs Super Glue: Which Adhesive Actually Holds Up?

Something breaks, and two tubes get pulled out of the drawer: epoxy and super glue. Both claim to bond almost anything. Both are cheap and sold everywhere. And both, used on the wrong job, will let you down within a week.

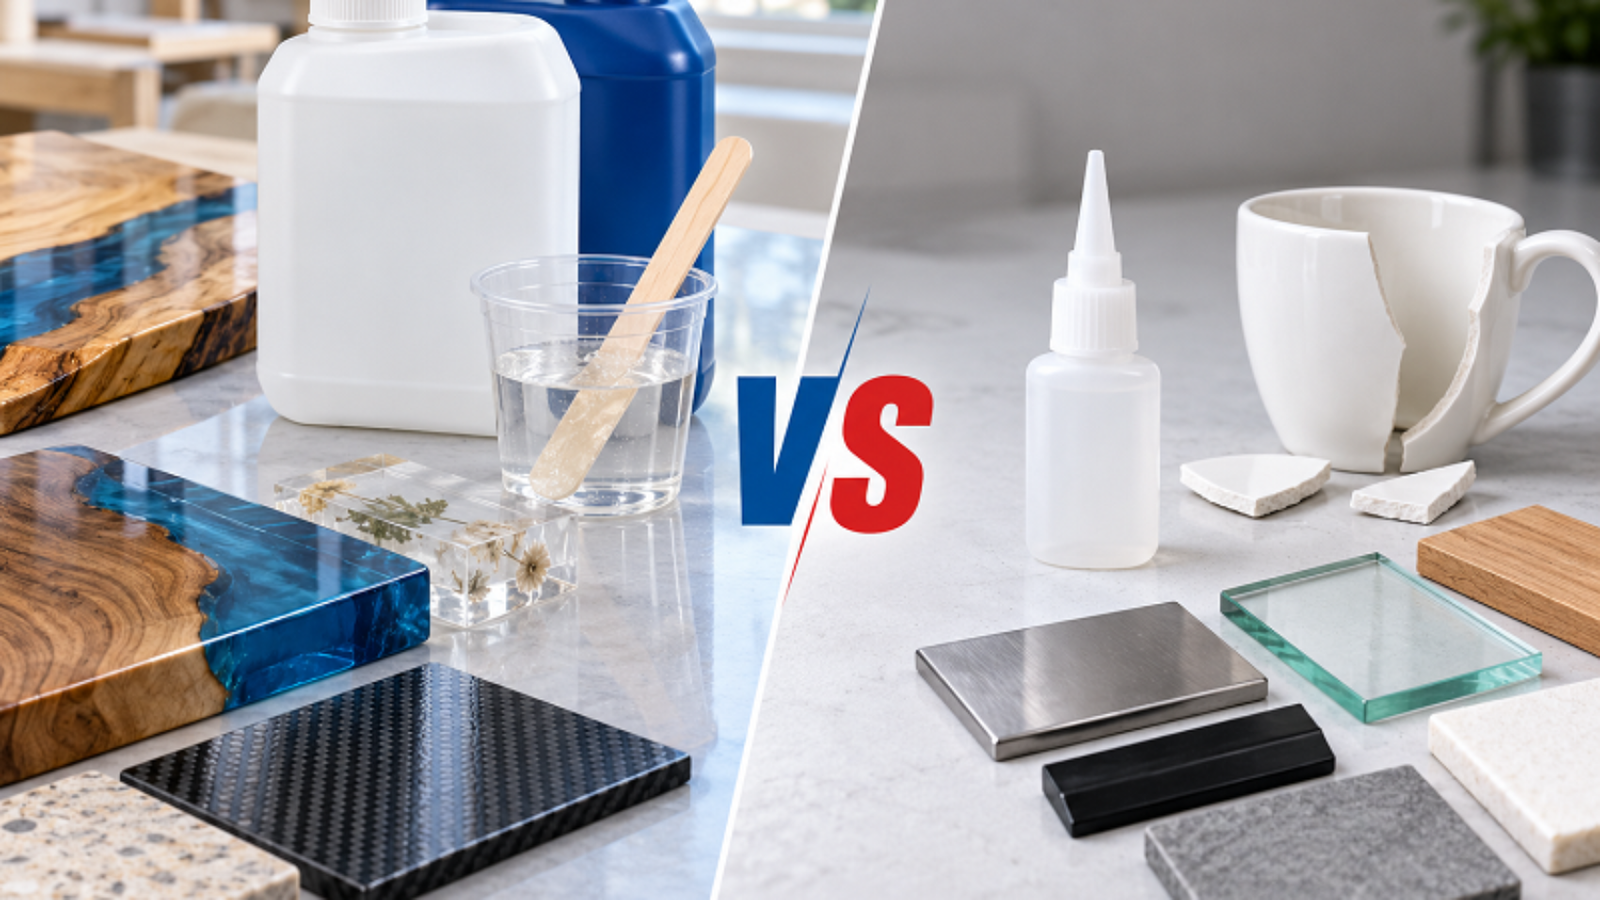
The epoxy resin vs super glue question isn’t really about which adhesive is “stronger” — it’s about which one matches the material, the gap between the parts, how much time you need to position things, and what the joint will have to survive afterward. Pick based on the label alone and you’re gambling.

This guide walks through wood, metal, plastic, glass, ceramic, and stone, plus the handful of variables — working time, gap-filling, cure speed, outdoor exposure — that actually decide the outcome.

Epoxy Resin Vs Super Glue

What Epoxy Resin Actually Is

Most epoxy is a two-part system: resin (Part A) and hardener (Part B). Mix them at the ratio on the label and a chemical reaction kicks off, slowly turning a liquid into a solid, crosslinked material.

That word “slowly” matters. A river-table epoxy, a flooring epoxy, and a structural metal adhesive can all technically be called “epoxy resin,” but they’re engineered for completely different jobs. One prioritizes optical clarity and self-leveling. Another prioritizes shear strength on steel. Assuming they’re interchangeable is where a lot of DIY repairs — and a few OEM production runs — go wrong.

What tends to hold true across most epoxy formulations:

  • Bonds well to a wide range of substrates
  • Fills gaps instead of just skimming a thin film
  • Gives you real working time before it sets
  • Handles moisture and many chemicals reasonably well
  • Cures fine in thicker pours, not just thin lines

That working time is the whole point in a lot of applications — it’s the difference between rushing a bond and actually aligning it.

What Super Glue Actually Is

“Super glue” is the everyday name for cyanoacrylate, or CA glue. Unlike epoxy, it’s a one-part adhesive that cures when it meets trace moisture — on the surface you’re bonding, or just in the air around it.

Speed is the entire appeal. Depending on the formula, the substrate, and how humid the room is, initial grab can happen in seconds, not minutes.

What that trade-off buys you, and costs you:

  • Extremely fast bonding, no mixing required
  • Great for small, tight-fitting repairs
  • Needs close, flush surfaces — it isn’t built to span a gap
  • Strong on rigid materials, but conventional formulas can go brittle under impact

Convenient, yes. The best choice for every job? No — and that’s really the whole point of this comparison.

Epoxy vs Super Glue at a Glance

 Epoxy ResinSuper Glue (CA)
ComponentsTwo-partOne-part
Initial bondSlowerSeconds
Working timeMinutes to hoursSeconds to a couple minutes
Gap fillingStrongWeak, unless specially formulated
Large surfacesPracticalAwkward — cures before you finish spreading it
Small precision jointsWorkable, but slowerIdeal
Thick applicationYesNo
Repositioning partsRealisticBarely any window
Moisture resistanceOften very goodFormula-dependent
Impact resistanceCan be engineered inConventional CA is often brittle
Casting or coatingYes, with the right epoxyNot applicable

Neither column is the “winner” — the job decides that.

Is Epoxy Actually Stronger Than Super Glue?

There’s no clean answer to this without naming the materials and the type of load, because an adhesive that performs beautifully in shear can fail fast in peel or impact.

Super glue can produce a genuinely strong bond on two small, rigid, tightly matched surfaces. But that bond is often brittle, especially with off-the-shelf cyanoacrylate — a sharp knock can crack it where a more flexible epoxy joint would just flex.

Epoxy tends to pull ahead when there’s a visible gap, a larger surface to cover, an irregular joint, or a load that includes impact rather than pure tension. So instead of asking which glue is “stronger” in the abstract, ask what the joint actually has to survive day to day.

Wood

Wood is porous, uneven, and full of small surprises — knots, hairline cracks, gaps left by a missing sliver of material. That irregularity is where epoxy earns its keep: it flows into the void and fills it rather than just sitting on top.

That’s why it shows up so often in furniture repair, crack stabilization, and — on the decorative end — river tables and live-edge tabletops, where the resin isn’t just holding wood together but becoming part of the piece.

Super glue still has a place here. For two small, cleanly cut pieces that need to be fixed in place fast, it’s often the quicker and less messy option. But for anything with a gap or an irregular break, reach for epoxy first.

Metal

Surface prep decides more than the adhesive choice does on metal. Oil film, oxidation, old paint, or a factory coating can all sit between the adhesive and the actual substrate — and neither epoxy nor super glue bonds well to a layer of grease.

Once the surface is genuinely clean, epoxy handles larger bonding areas and gapped joints better, and it buys time to align parts before the bond locks in. Super glue is the better call on small, tight-fitting metal components where speed matters more than gap tolerance.

Either way, vibration, heat cycling, and chemical exposure will test the bond long after the glue has cured — worth thinking through before you commit to one adhesive.

Plastic

Plastic is the material where “epoxy or super glue” is the wrong first question. The right one is: what kind of plastic?

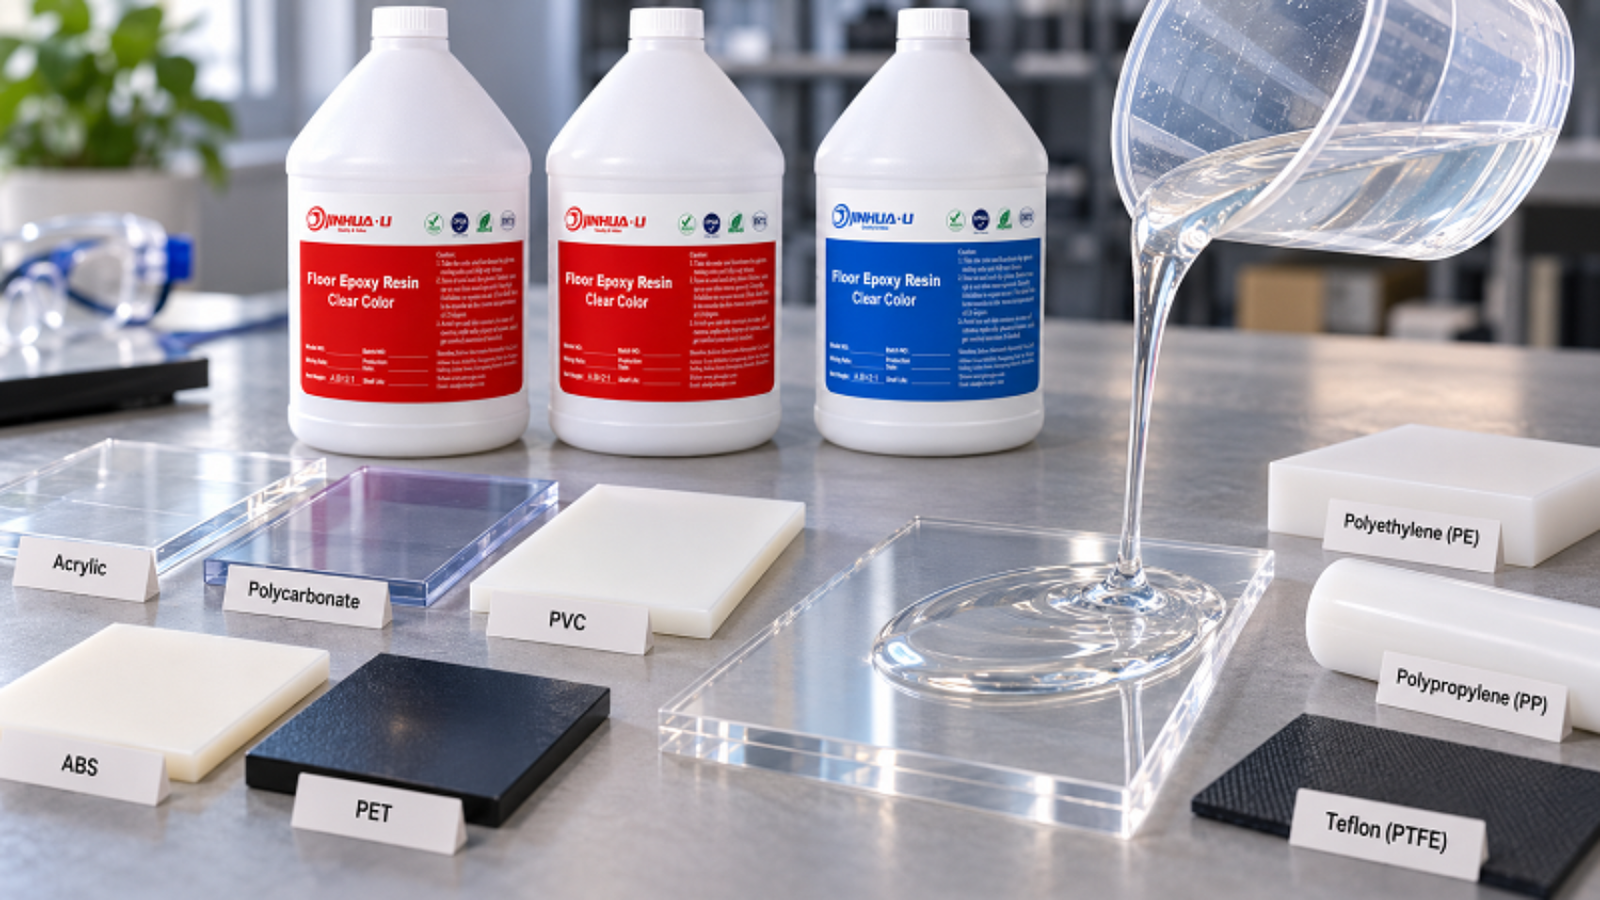
ABS and rigid PVC generally cooperate with both adhesive families, given decent surface prep. Polyethylene, HDPE, polypropylene, and PTFE are a different story — their low surface energy makes them notoriously hard to bond with standard epoxy or plain cyanoacrylate, primer or no primer.

If the plastic is compatible and there’s a gap to fill, epoxy is the more forgiving option. For tiny, precisely fitting plastic parts, super glue is faster. Either way, test on a scrap piece first — some plastics whiten, haze, or stress-crack on contact with certain adhesives, and you don’t want to discover that on the visible side of the part.

Glass

A clean glass break with tightly matching edges is textbook super glue territory — thin bond line, fast set, done.

Epoxy takes over once there’s a gap to fill, a larger area to cover, or you need more than a few seconds to position the piece. It also shows up in decorative work where glass is embedded or layered with other materials. Just don’t assume “clear epoxy” means invisible forever — UV exposure, thickness, and age all affect long-term clarity, so test before committing to a piece you care about.

Ceramic

Broken ceramic rarely breaks clean. The fracture edges are usually irregular, sometimes with small chips missing, and epoxy’s slower set gives you room to line up several fragments before it locks.

For a clean break with no missing material — a mug handle snapped in two, for instance — super glue is often faster and plenty strong. Once the break gets complicated, epoxy is the more forgiving choice.

Stone and Concrete

Porous, rough, and usually bonded over a fairly wide area — stone and concrete favor epoxy almost by default. A thin film of cyanoacrylate just doesn’t have the volume to fill irregular mineral surfaces the way epoxy formulated for the job can.

One caveat worth repeating: structural concrete repair needs a product actually engineered and certified for that use. A decorative casting epoxy is not a substitute for a construction-grade adhesive, no matter how well it performs on a tabletop.

Gap Filling, Cure Speed, and Coverage

Three variables decide more repairs than material type alone.

Gap filling has a clear winner: epoxy. Super glue is built to bridge a thin, tight seam, not stand in for missing material. A few specialty CA products are marketed as “gap-filling,” but don’t expect ordinary super glue to behave like a two-part system.

Cure speed goes the other way — super glue wins outright. Epoxy needs time for resin and hardener to crosslink, though that window varies a lot by formulation; some cure in minutes, deep-pour systems are designed to stay workable far longer.

That slower cure isn’t a downside once you’re working a larger surface. Spreading resin evenly, aligning a big component, popping bubbles, clamping the assembly — all of that takes time super glue simply doesn’t give you.

Outdoor Durability

Neither adhesive is automatically outdoor-rated. UV exposure, rain, freeze-thaw cycling, and temperature swings are hard on both families unless the formulation was built for it. Some epoxies resist water and chemicals well but yellow under sustained UV; cyanoacrylate performance swings widely by brand and formula.

Skip the assumption that “epoxy” or “super glue” as a category tells you anything about outdoor performance. Check the actual product specification for the environment you’re bonding in.

Getting the Surface Ready

Adhesive strength is capped by surface prep, full stop. A few things worth doing before either product goes on: clean off oil, wax, dust, and any release agent, since a contaminated surface won’t bond no matter what you apply. Light sanding adds mechanical grip on many materials, though not every finish — transparent or decorative surfaces especially — should be aggressively abraded. And test unfamiliar material combinations before committing to the real piece.

For epoxy specifically, the mixing ratio on the label isn’t a suggestion. Off-ratio mixing shows up as a tacky surface, soft cure, or reduced strength — and adding extra hardener doesn’t speed things up or improve the result. It’s also worth remembering that an epoxy can feel hard to the touch well before it reaches its full mechanical properties; give it the full cure window before loading the joint.

Can You Combine Them?

Sometimes, yes — a small dab of fast-setting adhesive tacks a part in place while a slower epoxy cures around it. It works, but it’s easy to overdo: if the CA covers too much of the surface meant for the epoxy, you’ve just reduced the contact area the epoxy needed to actually bond. For anything load-bearing, proper clamping or fixturing beats improvising with two adhesives at once.

Epoxy Resin Isn’t Only an Adhesive

Worth flagging, especially if you’re sourcing epoxy rather than just repairing something at home: a lot of epoxy resin isn’t sold as an adhesive at all. River tables, countertops, resin art, jewelry, wood coatings, and industrial flooring all run on epoxy systems optimized for very different things than bond strength — clarity, self-leveling, low exotherm in a thick pour, surface hardness.

A deep pour formulation built for a thick, bubble-free cast is not the same product as a tabletop epoxy chasing gloss and clarity, and neither is the same as a structural adhesive engineered for shear and peel performance on metal. As an epoxy resin manufacturer, we’d rather see a buyer pick the formulation that matches the actual application than assume “epoxy resin” is one interchangeable product — that mismatch is where most disappointing results come from.

Quick Answers

Is epoxy stronger than super glue?

Depends on the load. Epoxy tends to win on large or gap-filled joints; super glue can be extremely strong on small, tight-fitting surfaces but is often more brittle under impact.

Which is better for plastic?

Depends on the plastic. ABS and rigid PVC generally work with either; low-surface-energy plastics like PE and PP resist both without specialized treatment.

Which is better for metal?

Super glue for small, close-fitting parts; epoxy for larger areas, irregular joints, or anything that needs gap filling.

Which is better for wood?

Epoxy for cracks, voids, and larger repairs; super glue for small, precisely fitting pieces that need fast fixation.

Which is better for ceramic?

Super glue on a clean break; epoxy once the fracture is irregular or material is missing.

Can super glue replace epoxy resin?

Not for casting, coating, or most gap-filling work. Super glue is strictly an adhesive; epoxy resin systems cover bonding, coating, casting, encapsulation, and lamination.

The Bottom Line

There’s no universal winner in epoxy resin vs super glue — only a better fit for the job in front of you.

Reach for super glue when the parts are small, closely fitting, and speed matters more than gap tolerance. Reach for epoxy when you need working time, gap-filling, coverage over a larger or irregular surface, or mechanical properties tuned to a harder application.

For anything beyond a household fix — OEM production, bulk sourcing, private-label projects — the deciding factors multiply: substrate compatibility, bond geometry, cure conditions, operating temperature, moisture, UV exposure, mechanical load. Jinhua Resin manufactures epoxy systems across tabletop coating, deep pour casting, flooring, and craft applications, with viscosity, working time, hardness, and clarity all tuned to the application rather than sold as one-size-fits-all.

Does Epoxy Stick To Plastic

Does Epoxy Stick to Plastic? Which Plastics It Bonds To — and Which It Doesn’t

Epoxy is a reliable adhesive on wood, concrete, metal, and fiberglass. Plastic is a different story — the answer changes depending on which plastic you’re holding.

Short answer: it depends on the plastic’s surface energy, how it was prepared, and which epoxy system you’re using. Some plastics take a strong bond after a bit of prep work. Others resist epoxy no matter how much you apply — and piling on more resin never fixes a low-adhesion substrate.

This matters whether you’re gluing a broken part, casting around plastic inserts, coating a plastic surface, or specifying materials for OEM production. Get the plastic type wrong and the bond fails later — sometimes weeks after it looked fine.

Does Epoxy Stick To Plastic

Why Some Plastics Reject Epoxy

Adhesion isn’t just about sticking two things together. The resin has to wet the surface — spread across it at a molecular level — before it can grip anything as it cures.

That wetting depends on surface energy. Materials like ABS or polycarbonate sit around 38–42 dyn/cm, comfortably above the ~35–38 dyn/cm threshold epoxy generally needs to wet properly. Polyethylene and polypropylene sit closer to 29–31 dyn/cm — low enough that epoxy beads up rather than spreading, the same way water beads on a waxed car hood. This is exactly why PE and PP containers are a go-to choice for mixing cups and resin molds: the cured epoxy pops right off.

Surface texture is the second variable. A glass-smooth plastic gives epoxy almost nothing to grip mechanically. Sanding roughens that surface at a microscopic level and multiplies the contact area — which is why light abrasion shows up in nearly every adhesion-prep guide for a reason.

Then there’s contamination. Mold-release agents, fingerprint oils, silicone, wax, dust — any of these sitting between the resin and the plastic will undercut a bond that would otherwise hold fine. When a bond fails, the resin usually isn’t the culprit. The substrate or the prep is.


Plastics That Bond Well With Epoxy

ABS — common in enclosures, automotive trim, prototypes, and molded housings — takes epoxy reasonably well once it’s degreased and lightly sanded. Different ABS blends carry different additive packages, though, so a quick test bond on your actual material is worth the five minutes it takes.

Rigid PVC, used across pipe, sheet stock, signage, and construction products, bonds solidly after cleaning and light abrasion. Flexible PVC is another matter — plasticizers migrate to the surface over time and can weaken a bond that looked strong on day one.

Polycarbonate takes epoxy well after light sanding, but check chemical compatibility first. Some resin-hardener systems can cause stress cracking or hazing in sensitive PC grades, so testing the actual system on the actual grade beats assuming it’ll be fine.

Acrylic (PMMA) bonds moderately to well, especially sanded. If the piece needs to stay optically clear, though, sanding marks and interface haze become a real concern — run a small sample first if appearance matters as much as strength.

PlasticTypical AdhesionNotes
ABSGoodSand and degrease first
Rigid PVCGoodLight abrasion recommended
PolycarbonateGoodVerify chemical compatibility
Acrylic (PMMA)Moderate–GoodWatch for optical clarity issues
Nylon (PA)ModerateMoisture content affects results
PETModerateSurface treatment helps
Polyethylene (PE)PoorLow surface energy
HDPEVery poorReleases easily even when cured
Polypropylene (PP)Very poorNeeds specialized treatment
PTFEExtremely poorAmong the hardest surfaces to bond

These are tendencies, not guarantees — fillers, pigments, and processing aids shift results between batches of the “same” plastic. For production runs, test the exact substrate.


Plastics That Fight Back: PE, PP, and PTFE

Polyethylene — LDPE, HDPE, UHMWPE — is the one to watch for. Standard epoxy struggles here because of that low surface energy we mentioned earlier, and HDPE is the worst of the three. It’s the same reason polyethylene sheeting shows up as a protective work-surface liner around resin projects: cured epoxy lifts off it far more easily than it would off wood or MDF.

Polypropylene behaves similarly. It shows up everywhere — containers, auto parts, packaging, molded housings — and standard epoxy can look bonded right after cure, then peel away weeks later with surprisingly little force. If PP has to hold structurally, you’re looking at plasma treatment, corona treatment, flame treatment, or a primer built specifically for low-surface-energy substrates.

PTFE is non-stick by design, so it shouldn’t surprise anyone that conventional epoxy barely holds to it at all. Bonding PTFE reliably takes specialized surface chemistry — treat it as an edge case, not a standard substrate.


Getting a Better Bond: Six Steps That Actually Matter

1. Identify the plastic first. Check for a resin ID code — PET, HDPE, PVC, LDPE, PP, PS, ABS — molded into the part. If it reads PE, PP, or PTFE, standard epoxy probably isn’t your answer.

2. Clean it properly. Strip off grease, mold-release residue, wax, and dust using a solvent the plastic can actually tolerate — some solvents will craze or cloud sensitive plastics, so check compatibility before wiping down a finished part.

3. Sand it. Light, even abrasion knocks down the glossy skin and gives the resin something to grab onto mechanically. You’re not trying to remove material — just break the surface. Clear off the dust afterward.

4. Keep your hands off the prepped area. Skin oil undoes steps 2 and 3 in about two seconds. Handle the part by its edges from here on.

5. Mix it right. Off-ratio epoxy stays soft, tacky, or under-cured no matter how well you prepped the plastic underneath. Follow the resin-to-hardener ratio exactly, and scrape the sides and bottom of the mixing cup — that’s where under-mixed resin hides.

6. Test before you commit. For OEM runs or anything load-bearing, cure a sample on the exact plastic grade you’ll use in production, then check peel strength, delamination, cracking, and how it holds up after a heat cycle or water exposure. A ten-minute test sample is cheaper than a failed batch.


Can You Treat PE and PP to Improve the Bond?

Yes — sanding alone usually won’t get you there, but surface treatment can change the outcome substantially:

  • Flame treatment briefly raises surface energy and improves wetting.
  • Corona treatment uses electrical discharge to boost surface energy — standard in film and packaging production.
  • Plasma treatment cleans and modifies the surface without touching the plastic’s bulk properties.
  • Primers built for low-surface-energy substrates create a bonding layer between the plastic and the adhesive.

Results still depend on the exact material, the treatment settings, and how much time passes between treatment and bonding — so test the pairing before scaling it up.


One More Distinction: Coating Epoxy vs. Structural Adhesive

“Epoxy” isn’t one product — it’s a category. A clear casting resin built for river tables isn’t the right choice for bonding a plastic bracket, and a glossy tabletop coating behaves nothing like a structural adhesive under load.

Viscosity, flexibility, cure speed, hardness, filler content, and chemical resistance all shift between formulations. If plastic bonding is the actual job, pick a system evaluated for structural adhesion — not one chosen because it happened to cure clear.

What About Casting Epoxy Into Plastic Molds?

Different problem entirely. If you want the finished piece to come out of the mold, strong adhesion is the last thing you want. That’s why silicone molds dominate resin casting — they release cleanly almost every time.

Some PP and PE containers work as molds for the same reason resin struggles to bond to them. But don’t assume every plastic mold is non-stick: acrylic, PVC, and ABS can grip a casting tightly enough to make demolding a fight. Match the mold material — or release agent — to what you’re actually pouring.


For Manufacturers: Testing Beyond “Does It Stick”

A pass/fail adhesion check tells you almost nothing about how a bond performs after six months in a warehouse or a shipping container. Production testing should cover initial adhesion, adhesion after full cure, peel or shear strength, heat aging, thermal cycling, water exposure, chemical exposure, UV exposure, impact resistance, and long-term delamination risk.

Record the plastic grade too. Two parts labeled “PP” or “ABS” can carry different fillers, pigments, or processing aids — any of which can shift adhesion results between suppliers or even between production lots from the same supplier.


FAQ

Does epoxy stick to PVC? Generally yes on rigid PVC, after cleaning and light abrasion. Flexible PVC needs extra testing — plasticizer migration can weaken the bond over time.

Does epoxy stick to ABS? Usually yes, and more reliably than PE or PP. Sand it, degrease it, and it holds well.

Does epoxy stick to polypropylene? Not without help. Untreated PP resists standard epoxy — plan on a primer or a surface treatment step.

Does epoxy stick to HDPE? Poorly. HDPE’s low surface energy makes it one of the hardest common plastics to bond structurally without treatment.

Can epoxy repair plastic parts? Sometimes — it depends on the plastic. ABS and rigid PVC repair well; PE and PP need pretreatment to hold.

Should plastic be sanded before applying epoxy? For compatible plastics, yes. Light sanding plus a clean, dry surface is the fastest way to improve mechanical adhesion.


The Short Version

ABS, rigid PVC, polycarbonate, and acrylic bond well with epoxy once they’re clean and lightly sanded. PE, HDPE, PP, and PTFE fight back because of low surface energy, and usually need specialized treatment to hold structurally.

The process that actually works: identify the plastic, prep the surface, match the epoxy system to the job, then test before you commit to a full run.

For manufacturers sourcing at volume, Jinhua Resin formulates casting, coating, and craft-grade systems — including deep pour epoxy and table top epoxy — with OEM and private-label options for buyers who need a resin system matched to a specific plastic substrate. Send over the plastic type, application method, and cure conditions, and it’s straightforward to recommend a system before you commit to bulk production.

Epoxy Resin Mixing Ratio

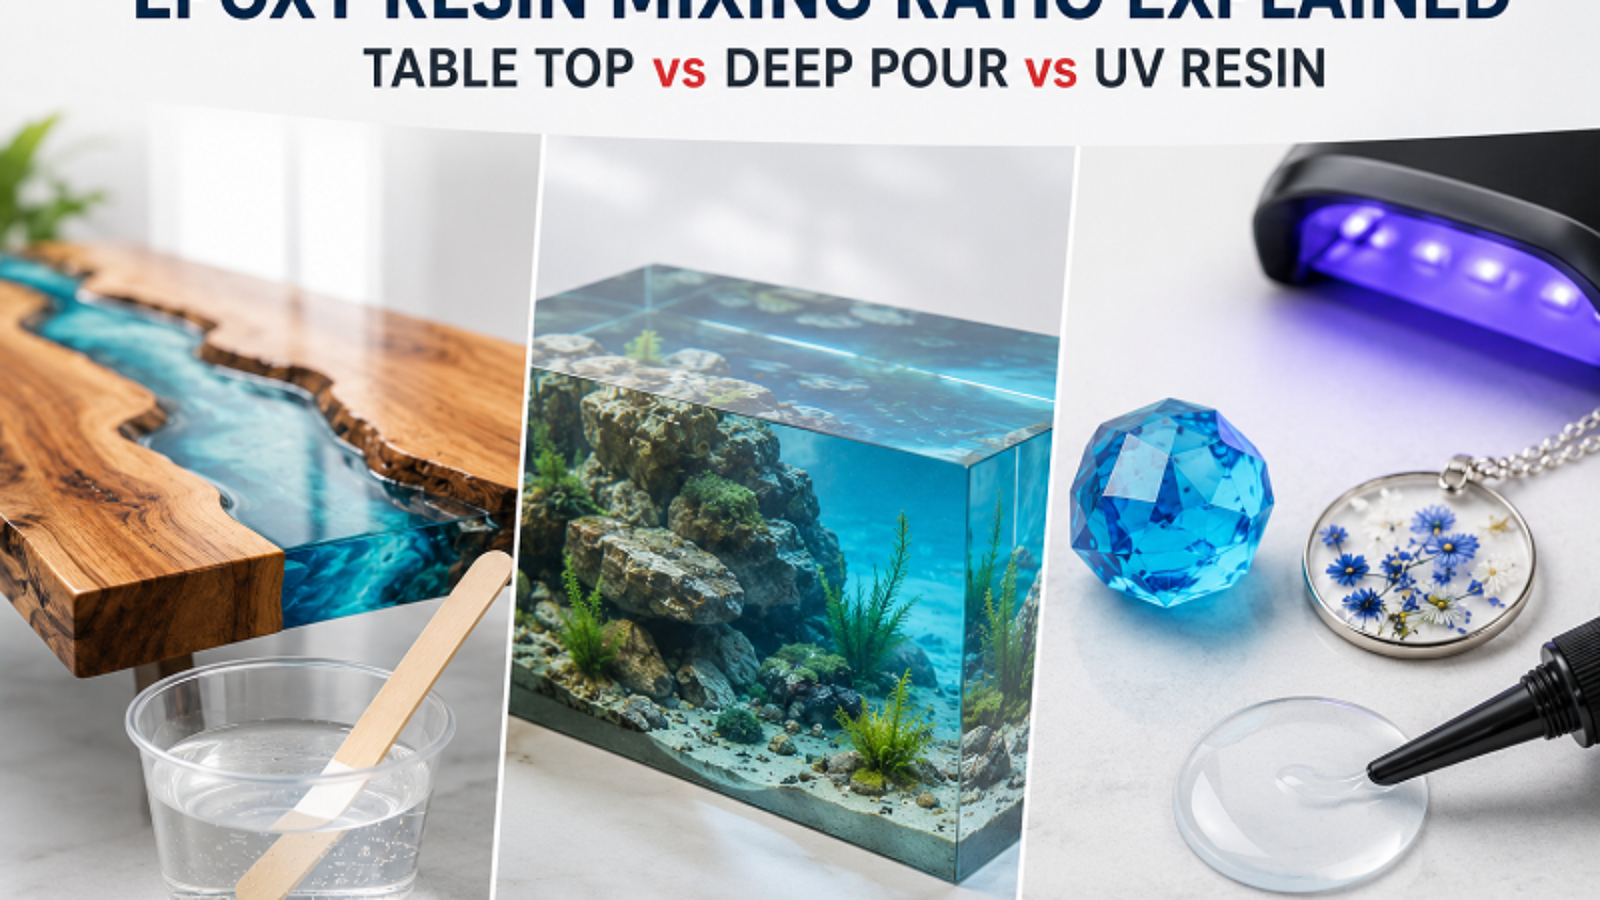
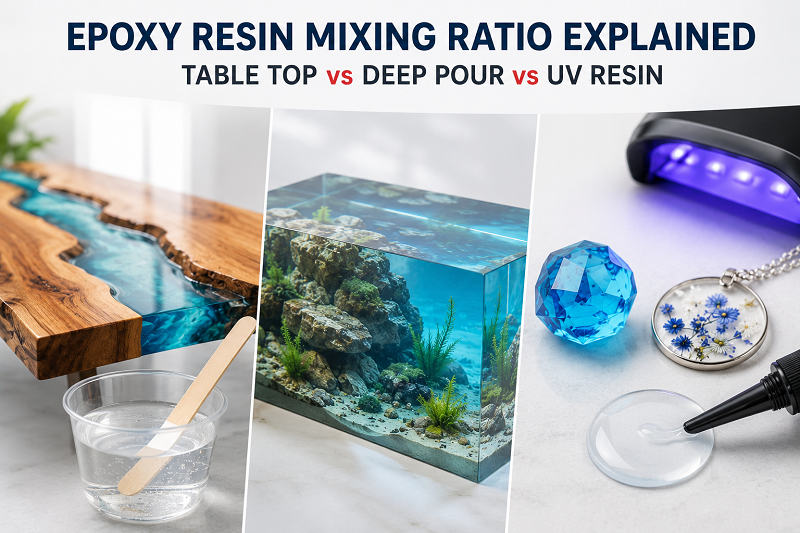
Epoxy Resin Mixing Ratio Explained: Table Top vs Deep Pour vs UV Resin

Get the ratio wrong and no amount of finishing skill saves the pour. Table top epoxy, deep pour epoxy, and UV resin are each built around a specific resin-to-hardener balance, and you can’t swap one for another. Buyers who assume “epoxy is epoxy” end up with tacky surfaces, cloudy pours, or resin that just won’t cure. Here’s what the actual epoxy resin mixing ratio looks like for each type, why the numbers aren’t the same, and what changes once you go from a small test cup to a full drum.

Epoxy Resin Mixing Ratio

Why Mixing Ratio Isn’t a Suggestion

Epoxy cures through a chemical reaction, not by drying out. Resin (part A) and hardener (part B) react in fixed proportions set by their molecular structure — stoichiometry, not guesswork. Skimp on hardener and unreacted resin molecules stay soft and sticky, sometimes for good. Add too much and the leftover hardener has nothing to bond with, so you get a brittle, cloudy, occasionally rubbery surface instead.

An epoxy resin manufacturer publishes a separate mixing ratio for each formulation for exactly this reason — there isn’t one universal number. Table top, deep pour, and UV systems use different resin chemistries, cure at different speeds, and generate heat differently, so a ratio that’s correct for one will wreck the results on another.

Table Top Epoxy Mixing Ratio

Most table top epoxy runs 1:1 by volume — equal parts resin and hardener. A handful of fast-cure or bar-top formulas use 2:1 instead. Nothing arbitrary about the 1:1 design: this resin is meant to self-level in thin layers, usually 1/8″ to 1/4″ per coat, so the chemistry is built for low viscosity and a quicker gel time. There’s a practical side to the simple ratio too — DIYers and small shops make up a big share of this market, and a 1:1 mix is just harder to mess up.

One thing buyers often miss: 1:1 by volume isn’t the same as 1:1 by weight. Resin and hardener have different densities, so weighing out “equal amounts” can throw off the cure even when the label says 1:1. Mix to whatever method the manufacturer states — volume or weight — not whichever happens to be easier in your shop.

Deep Pour Epoxy Mixing Ratio

Deep pour epoxy is almost always 2:1 by volume, and some low-exotherm formulas go up to 3:1. It comes down to heat. Curing is exothermic — the reaction itself releases heat — and in a thin table top layer that heat escapes fast. Pour something 1″–4″ deep, though, and heat gets trapped in the center of the mass. Try running a 1:1 ratio at that thickness and internal temperatures can climb high enough to crack the resin, yellow it, or even trigger a runaway cure that basically boils.

Deep pour formulas dilute the reactive load — more hardener relative to catalyst, slower-reacting chemistry — which stretches the cure to 24–72 hours instead of the 6–8 hours you’d see on a table top pour. Slower reaction, heat spread over a longer window, clearer result with no cracking. It’s also why you can’t just “pour it thicker” with a table top formula — the ratio and chemistry are matched to a specific depth, and going past that depth is asking for trouble.

UV Resin: No Mixing Ratio at All

UV resin skips the resin-hardener reaction altogether. It cures through photoinitiators reacting to UV light rather than a two-part chemical process, so there’s no ratio to measure and nothing to get wrong on that front. What you control instead: layer thickness (usually capped around 2–3mm per pass) and exposure time. For OEM buyers casting thin pieces — jewelry, name tags, small decorative parts — that removes a whole failure point from the line, though now your results depend on the UV lamp’s output staying consistent.

Mixing Ratio Comparison

Resin TypeTypical RatioMeasured ByTypical Cure WindowBest For
Table Top Epoxy1:1 (some 2:1)Volume6–8 hrs to touch, 24 hrs to handleCountertops, bar tops, thin coatings
Deep Pour Epoxy2:1 (up to 3:1)Volume24–72 hrsRiver tables, molds, thick castings
UV ResinNo mixing — single componentN/ASeconds to minutes under UVJewelry, small parts, thin castings

What Happens When the Ratio Is Off

Too little hardener and the resin just stays soft and tacky — sometimes it never fully hardens at all, and that’s not always obvious until days after the pour. Go the other way, add too much hardener, and you get excess heat during cure, visible cloudiness, a surface that’s brittle instead of tough, and in deep pours, cracking as the mass expands and contracts unevenly.

Even eyeballing it can cause problems most people wouldn’t expect. A 5–10% deviation from the stated ratio is often enough to shift cure time, clarity, and hardness — fail an entire batch, in other words — and at deep-pour volumes that error compounds fast across gallons. None of it is reversible once curing starts, either. There’s no “add more hardener later” fix. An off-ratio batch gets sanded down and recoated, or it gets tossed.

Measuring Accurately for Bulk and OEM Orders

Graduated mixing cups are fine for hobbyist-scale pours. At production or OEM volume the margin for error shrinks, because a small percentage mistake stops being a nuisance and becomes a full-drum failure. A few things we tell private label and bulk buyers to watch for:

  • Weigh it — don’t eyeball, even on volume-rated resins. Once you know a batch’s specific gravity, a calibrated scale beats reading a cup line for speed and accuracy both.
  • Metered pumps for repeat runs. A calibrated dispensing pump holds ratio accuracy to roughly 1%, which starts to matter once you’re running the same formula across dozens of batches and need OEM output to look consistent every time.
  • Account for climate, not just chemistry. The ratio itself doesn’t shift with temperature, but working time does — a hot, humid production floor shortens pot life, so batch size and mixing speed need to adjust.
  • Ask your supplier for batch-specific documentation. Formulas get refined over time. A supplier worth using will confirm the current ratio — and flag any recent change — before a large order ships.

FAQ

Can I mix table top epoxy and deep pour epoxy together?

You shouldn’t. The two are tuned for different chemistries and reaction speeds, and combining them tends to give unpredictable results that aren’t usable.

What if I already poured the wrong ratio?

Once curing has started there’s no reliable fix. A small error might still cure, just softer than intended — a larger one usually means sanding it off and starting over.

Does ambient temperature change the mixing ratio?

It doesn’t. Temperature changes cure speed and working time, not the ratio. Mix to the stated numbers regardless of how warm or cold the shop is.

Why does UV resin skip mixing entirely?

Because it cures through light-triggered polymerization rather than a two-part chemical reaction — there’s simply nothing to combine.

Every resin we make — table top, deep pour, UV — ships with a fixed, tested ratio and batch documentation. That matters most to OEM and private label buyers running production at scale. If you’re sourcing in bulk and want ratio consistency checked across batches before committing, our team can walk you through the spec sheet first.

Custom Epoxy Resin Manufacturing

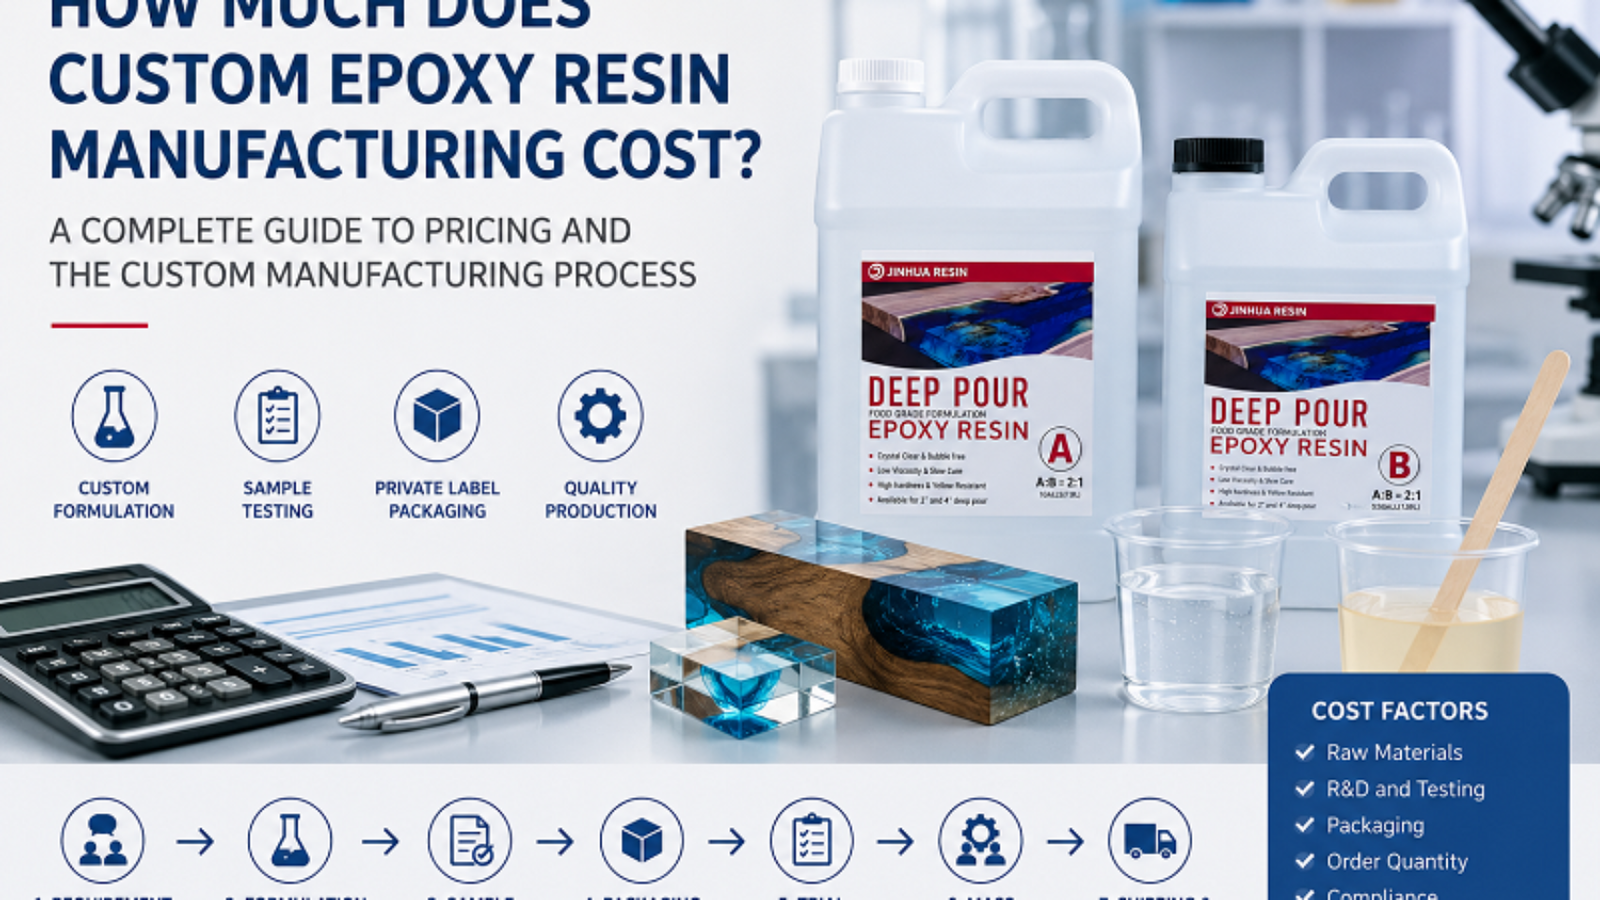
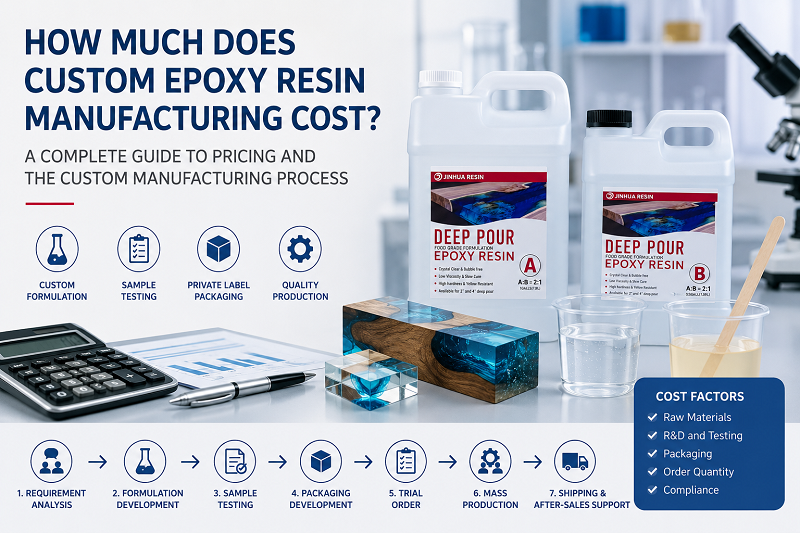
How Much Does Custom Epoxy Resin Manufacturing Cost?

Buyers usually open with the same question when they contact an epoxy resin factory: how much will this cost?

There’s rarely a clean answer.

Two containers of resin can look identical on a shelf and come from completely different cost structures. One might be an existing clear epoxy formula with a new label slapped on. The other might need a lower-viscosity resin, a longer working window, better UV resistance, a different mix ratio, custom bottles, printed boxes, compliance testing, and three or four rounds of sampling before anyone signs off.

Both get called “custom epoxy resin.” They’re not the same project, and they shouldn’t carry the same price expectation.

A manufacturer worth working with will ask about the product, the application, the target market, the packaging, the order size, and the performance targets before quoting anything meaningful. This article walks through where the cost actually comes from — from first inquiry through full production.

Custom Epoxy Resin Manufacturing

1. Start by Defining What “Custom” Means

Customization covers a wide range in this industry.

On the simple end, a buyer takes an existing factory formula and puts it into their own branded packaging. That’s usually the fastest, cheapest path.

On the far end, a buyer shows up with a performance spec and asks the manufacturer to build a formula around it from scratch.

Most projects land somewhere in between — an existing formula with private labeling, a different bottle size, a modified mix ratio, adjusted viscosity, faster or slower curing, better bubble release, less yellowing over time, a different hardness or flex profile, custom colors, retail kits, printed cartons, or market-specific paperwork.

Before comparing quotes from different suppliers, make sure they’re quoting the same scope. A low number for “an existing formula, repackaged” isn’t comparable to a number that includes new formulation work, testing rounds, custom tooling, and compliance support.

2. What Actually Drives the Cost

There’s no fixed price list for custom epoxy resin production. Several layers stack on top of each other.

Formula and raw materials

Raw materials typically make up a large share of the product cost, and a general-purpose clear epoxy doesn’t pull from the same material list as a specialized deep-pour formula.

Performance requests shift the formulation. Better UV stability, lower viscosity, higher clarity, a longer working time, faster demolding, more heat resistance, better chemical resistance, more flexibility — each one nudges the raw material selection and the development cost.

Chasing several targets at once gets harder, not easier. A faster cure and a longer working time pull in opposite directions. The lab has to balance the formula around how the product will actually be used, not just pile on additives until a spec sheet looks good.

Development and testing

If an existing formula already covers what the buyer needs, development stays light.

A genuinely new formula is a different project. The lab may run through several versions, test each one, gather feedback, and adjust again — sometimes more than once.

Testing typically covers viscosity, gel time, working time, cure speed, hardness, transparency, bubble release, exothermic behavior, surface finish, yellowing resistance, adhesion, and chemical resistance.

A sample that doesn’t pass isn’t a failure — it usually tells the lab exactly what to change next. That back-and-forth is where a lot of the real cost sits.

Packaging

This one gets underestimated constantly.

Filling resin into a standard factory pail and building a retail-ready branded kit are two very different cost categories. Packaging can include bottles, pails, drums, caps, pumps, measuring cups, labels, printed cartons, inserts, instructions, protective wrapping, and export cartons.

A custom bottle shape or a specially printed box often comes with its own tooling cost or minimum order from the packaging supplier — which matters a lot more on a small run than a large one.

Order volume

Bigger runs spread setup, filling, labeling, packaging, and procurement costs across more units. Smaller custom orders carry a heavier per-unit cost because the factory still has to prep the line, source materials, run inspections, and clean equipment for a much smaller batch.

Don’t just chase the lowest MOQ — think about the quantity that actually makes sense for both production efficiency and testing the market.

Compliance and documentation

Different destination markets ask for different paperwork — TDS, SDS/MSDS, COA, and depending on the market, REACH, RoHS, Prop 65, or other testing.

Some of this can be pulled from existing product data. Some needs outside lab testing, which adds cost and time. Bring up compliance requirements early — ideally before packaging is locked in, not after.

3. Step One: Requirement Analysis

A real custom project starts with questions, not a quote.

The manufacturer needs to understand what the resin is actually supposed to do: the application, the target customer, the target country, desired viscosity, working time, cure time, mix ratio, transparency, pour depth, hardness, UV exposure, packaging size, and expected order volume.

Take a river table brand as an example. “Clear epoxy resin” alone tells the manufacturer almost nothing. They need the casting depth, the workshop temperature, typical project size, and how much working time and cure behavior the customer expects.

A floor coating distributor cares about a completely different set of things — adhesion, abrasion resistance, chemical exposure, recoat timing, jobsite conditions. Getting this right upfront cuts down on wasted sampling rounds later.

4. Step Two: Existing Formula or New Formula

Not every project needs to start from zero.

Existing formula + private label. The buyer picks an established product and customizes the branding and packaging. Fastest and cheapest.

Modified existing formula. An existing system becomes the starting point, with one or two characteristics adjusted — lower viscosity, different cure speed, modified hardness, better UV resistance. This shortens development time while still producing something tailored to the buyer’s market.

Fully custom formula. Built from specific performance requirements. This makes sense when the buyer has a genuinely differentiated product idea, or when nothing on the shelf meets the application. It takes more time, more testing, and more sample rounds.

5. Step Three: Lab Formulation and Sample Development

Once the spec is locked, formulation starts. The technical team picks raw materials and adjusts the resin-hardener system toward the target performance.

The first lab sample almost never becomes the final product without changes.

For a deep-pour system, the team is watching viscosity, bubble release, peak exothermic temperature, working time, cure time, post-cure clarity, and how it performs at real casting depth. For a table top system, self-leveling, surface hardness, gloss, and bubble release matter more. For a floor coating, adhesion and mechanical or chemical resistance take priority.

The sample needs to be judged against the real application — not how it looks sitting in a bottle.

6. Step Four: Customer Sample Testing

Factory testing only covers half the picture. The buyer needs to test the sample under conditions that resemble how it’ll actually be used.

This matters even more for overseas buyers, since climate, working methods, substrates, pigments, molds, and application habits often differ from the manufacturer’s own lab.

Buyers commonly come back wanting longer working time, a thinner viscosity, better bubble release, faster cure, or a harder surface finish.

Vague feedback doesn’t help anyone. “The sample isn’t good” tells the lab nothing. “Viscosity is fine, but we need about 20 more minutes of working time at our normal shop temperature” gives the team something they can act on. Good custom development runs on specifics like that.

7. Step Five: Formula Adjustment and Final Sign-Off

After feedback comes in, the manufacturer adjusts the formula and, if needed, prepares another sample. Some products get approved after one round. Others take three or four — that’s normal for a genuinely custom product.

What matters is locking a clear final spec before mass production starts: mix ratio, viscosity range, working time, cure conditions, appearance, hardness, and packaging configuration. That approved version becomes the reference point for every production run and quality check that follows.

8. Step Six: Packaging and Private Label Development

Packaging work can move forward while the formula gets finalized. The buyer decides between small bottles, A+B kits, pails, drums, or bulk industrial packaging, and — for retail products — works out brand labels, product naming, mixing instructions, safety info, carton artwork, barcodes, and batch coding.

One common mistake: locking in nice-looking packaging before the technical spec is confirmed. If the mix ratio, working time, or application instructions change later, printed packaging may need a reprint or a full scrap. Formula confirmation and packaging development need to move together, not packaging racing ahead.

9. Step Seven: Trial Order Before Full Production

Jumping straight from a lab sample to a large commercial order is a risk that’s easy to avoid. A trial order bridges the gap — it lets both sides check production consistency, filling accuracy, label placement, packaging durability, shipping performance, and how customers actually respond.

For a new private label brand, a trial run can also reveal whether the package size and positioning actually work in the market. Fixing problems here is far cheaper than fixing them after thousands of finished units are already boxed.

10. Step Eight: Mass Production and Quality Control

Once the formula, packaging, and trial run are all approved, the project moves into regular production. This is where manufacturing discipline shows up.

A typical control flow: raw material inspection → batch prep → mixing → in-process checks → filling → packaging → final inspection.

The goal is simple — the product shipped six months from now should behave exactly like the sample the customer approved. For long-term OEM buyers, consistent batches matter more than one perfect-looking sample. A manufacturer worth keeping should maintain production records and defined quality criteria for repeat orders.

11. Step Nine: Shipping and Ongoing Support

Manufacturing isn’t over when the cartons leave the dock. Long-term customers eventually need updated technical documents, new packaging sizes, formula tweaks, additional product variants, troubleshooting help, or production planning for bigger volumes.

Markets shift too. A brand might start with a standard clear casting resin and later add deep pour epoxy, table top epoxy, UV resin, or floor coating. Working with a manufacturer that can grow with those additions saves you from rebuilding your supply chain every time you launch something new.

So What Does It Actually Cost?

The honest answer: it depends entirely on how much customization is involved.

A private label project built on an established formula stays relatively simple. A project that needs a new formula, specialized materials, repeated sampling, custom packaging, outside compliance testing, and a low initial volume will cost more — and should.

Instead of asking only “what’s your price per kilogram,” ask “what’s included in that price.” A useful quote spells out the formula, the spec, the packaging, the quantity, the testing, the documentation, and the lead time. The cheapest quote on paper can turn expensive fast if it leads to reformulation, repackaging, returns, or a redo.

Total project cost matters more than the number on the first quote.

Final Thoughts

Custom epoxy resin manufacturing isn’t one production step — it’s a chain of decisions. The final cost gets shaped long before mass production starts, during spec development, formula selection, sampling, testing, packaging, and compliance planning.

Buyers who nail down these requirements early tend to move faster and hit fewer surprises down the line.

The better question to ask a potential manufacturing partner isn’t “how cheap can you make this.” It’s “how will you take this from an idea to repeatable mass production.” The answer tells you more about the manufacturer than any price list ever will.

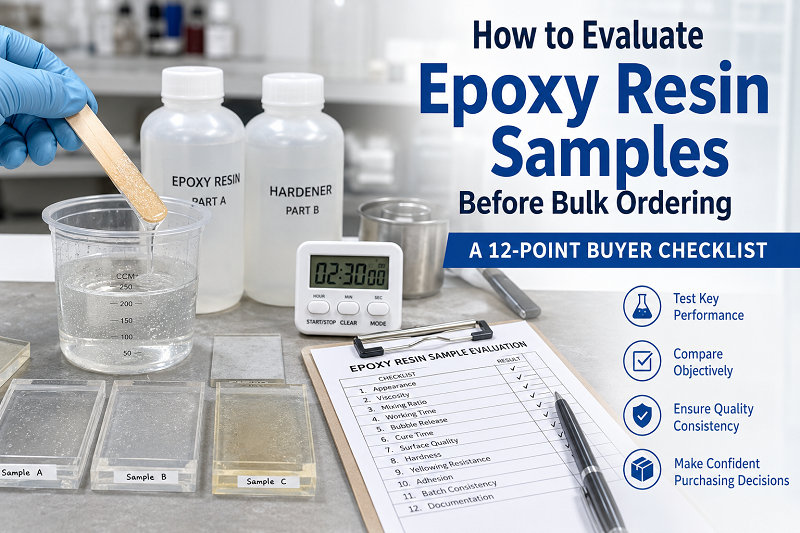
Epoxy Resin Sample Evaluation

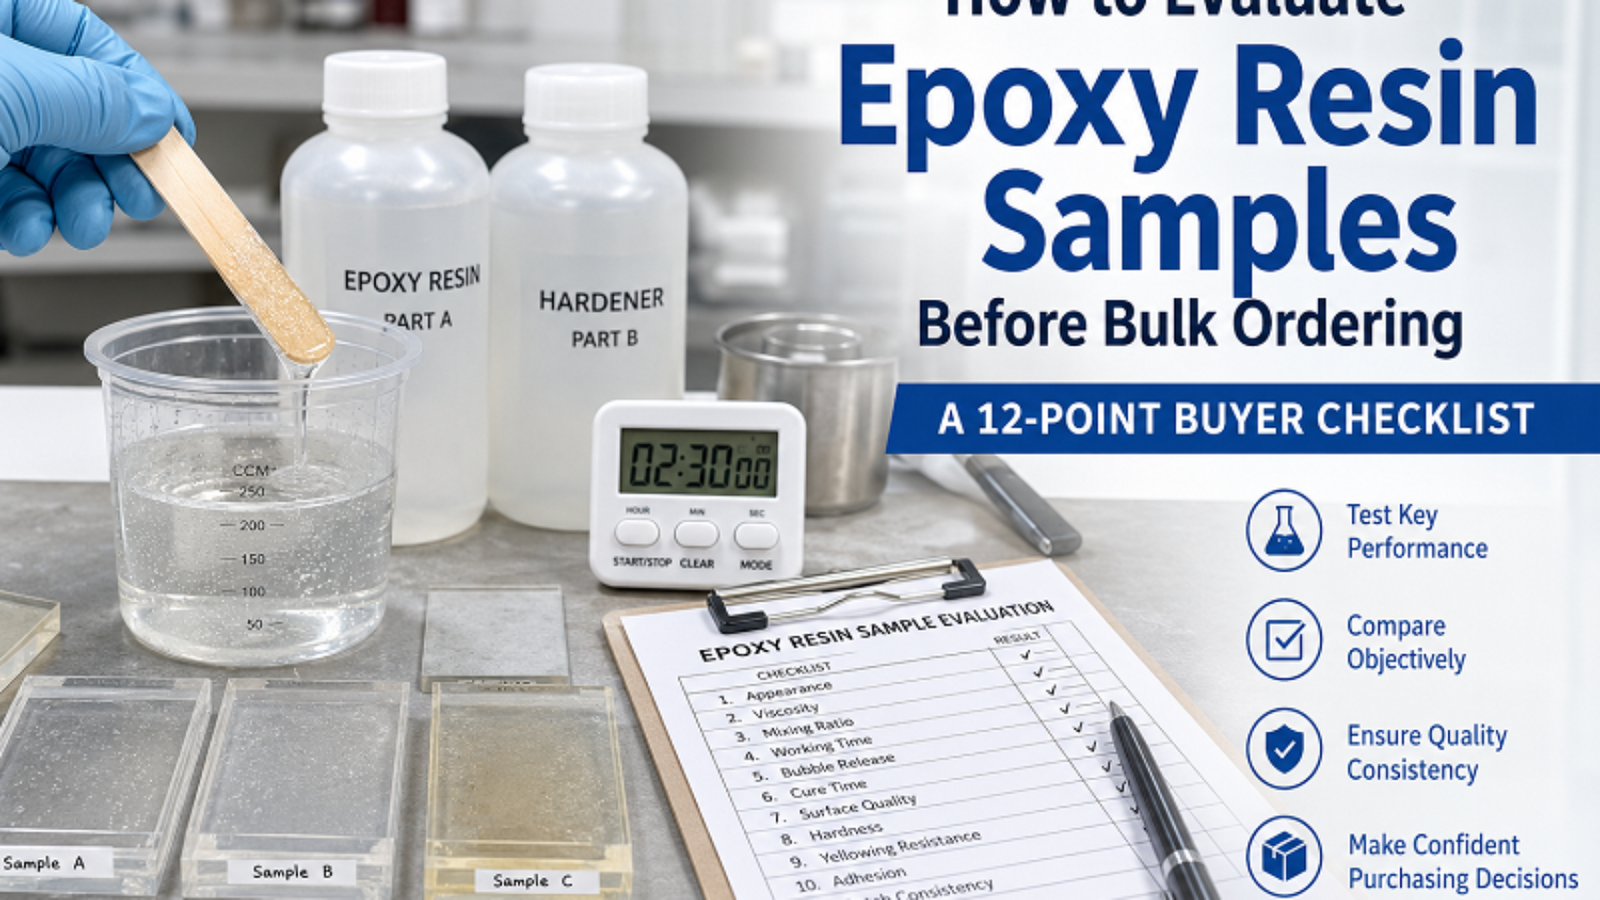
Epoxy Resin Sample Evaluation: A 12-Point Checklist Before Bulk Ordering

Ordering a resin sample takes five minutes. Deciding whether that sample can represent thousands of kilograms of future production takes a lot more discipline.

For distributors, private-label brands, flooring contractors, furniture manufacturers, and industrial buyers, sample testing isn’t a glance-and-approve step — it’s a qualification process. A resin can sit in a small bottle looking flawless and still fall apart on your production floor. Viscosity that doesn’t match your application. Working time that runs shorter than the data sheet promises. Bubbles that won’t release. A cured surface softer than what your spec calls for. Color that drifts after a few weeks of heat or UV exposure.

This is exactly why epoxy resin sample evaluation needs a structure behind it — not just an eyeball check — before you sign off on a supplier or place a bulk order.

Below is a 12-point checklist for comparing samples, documenting what you find, and locking in a reference standard before you move into commercial-scale production.

Epoxy Resin Sample Evaluation

1. Confirm the Sample Actually Matches What You’re Buying

Before you test anything, verify what’s in front of you.

The sample should represent the exact formulation you plan to purchase in bulk. Ask the supplier for the product code, the resin-to-hardener ratio, the batch number, the intended application, and the relevant spec sheet.

This matters more than most buyers assume once customization enters the picture. If a manufacturer tweaks viscosity, cure speed, UV resistance, or hardness specifically for your project, get that final formulation clearly labeled and documented. Don’t approve a generic sample and assume a later, customized production run will behave the same way — that assumption causes more disputes than almost anything else in this process.

What to record:

  • Product/formulation code
  • Batch number
  • Mixing ratio
  • Manufacturing date
  • Intended application
  • TDS or relevant technical specs

Traceability is where a proper epoxy resin sample evaluation starts, not an afterthought you add later.


2. Look Closely at Clarity, Color, and Overall Appearance

This is the simplest test on the list, but it only works if conditions stay consistent.

For clear systems, pour identical amounts into matching transparent containers and compare them against a white background, under the same lighting. Check for tinting, cloudiness, floating particles, crystallization, or separation. These differences hide easily when you’re staring into a bottle — a thin, controlled layer makes them obvious.

For river tables, decorative casting, jewelry, and countertops, even a faint tint that’s invisible in a small sample can show up clearly once the resin is poured thick or cured for real. So don’t stop at the liquid. Photograph and record appearance both before and after cure.


3. Check Whether Viscosity Actually Fits Your Process

There’s no such thing as the “best” viscosity in the abstract — only the right viscosity for what you’re building.

A low-viscosity resin releases bubbles more easily and penetrates better; it suits thin coatings and certain deep pour epoxy casting work. A higher-viscosity resin gives you more control over flow and build. The real question isn’t “is this thick or thin” — it’s whether the flow behavior matches how you actually work.

Temperature swings viscosity more than most buyers expect, so test at a controlled temperature and keep every variable identical across suppliers:

  • Same room temperature
  • Same quantity
  • Same mixing container
  • Same mixing method
  • Same application thickness

Change any of these between Supplier A and Supplier B and you’re no longer comparing resin — you’re comparing conditions.


4. Verify Mixing Ratio and How Easy the Mix Actually Is

A resin can perform beautifully in a lab and still be a headache on a production line.

Mix at the exact ratio the manufacturer specifies. Common systems run 1:1, 2:1, 3:1, or other formulation-specific proportions by weight or volume — never assume two resins with similar applications share a ratio.

While mixing, watch for streaking, unmixed material clinging to the container wall, sudden heat buildup, unexpected thickening, or excess air getting whipped in. For commercial buyers, mixing tolerance matters just as much as the ratio itself. A formulation that goes unusable after a tiny measuring error demands tighter process control than some production floors can realistically deliver.


5. Test Working Time Under Real Conditions, Not Lab Conditions

Every TDS lists a pot-life range. Treat it as a starting point, not gospel.

Pot life shifts with ambient temperature, mixed volume, container shape, and formulation. A 100-gram test batch in a lab beaker behaves nothing like several kilograms mixed in a production bucket — the exotherm alone changes the math.

Track these during testing:

  • Mixing start time
  • Initial viscosity
  • Point where viscosity noticeably climbs
  • Practical working-time cutoff
  • Gel time
  • Ambient temperature

The number on the data sheet isn’t really the question. In any serious epoxy resin sample evaluation, the real question is: does this give your operators enough time to finish the job safely and consistently?


6. Watch How Bubbles Release — and How Much Air Gets Trapped

This one matters most for clear casting resin, table top epoxy, river tables, and transparent coatings.

Mix each candidate the same way and watch how much air enters during mixing. Then time how quickly bubbles rise and clear.

Resist the urge to reach for a heat gun, torch, vacuum chamber, or pressure pot on the first pass — those tools can mask real differences between formulations. Run the first comparison under your normal working conditions.

Look for microbubbles that linger after mixing, surface bubbles, air trapped around embedded objects, foaming, or bubbles still visible after cure. If your actual process uses vacuum or pressure equipment, run a second test with that equipment in play. What you’re really measuring is how well the resin fits your existing workflow — not how it performs in ideal lab conditions.


7. Track Cure Time Through Every Stage, Not Just One

“Cures in 24 hours” tells you almost nothing on its own.

A resin can go tack-free in a day and still need several more days before it hits its intended mechanical strength. Record multiple stages instead of one snapshot:

Initial set → Tack-free → Handling cure → Functional cure → Full cure

Line these up against your actual production schedule. A resin that cures a bit slower might be fine for a small workshop and become a bottleneck on a commercial coating line. A resin that cures very fast might speed up your line while leaving operators too little time to work. The right cure profile is whichever one fits your schedule — not the fastest number on a spec sheet.


8. Inspect the Cured Surface Under Consistent Lighting

Once samples are fully cured, check them side by side, under the same light source.

Look for gloss level, smoothness, craters, pinholes, fish eyes, cloudiness, uneven cure, tacky spots, or any surface defect. For self-leveling products, watch how well the resin levels on its own, without you nudging it into place.

For transparent systems, view the cured sample from multiple angles and against both white and dark backgrounds. A flaw that seems minor in a small test cup becomes very obvious spread across a countertop or a full floor.


9. Test Hardness, Adhesion, and Mechanical Performance

Looking good is not the same as performing well.

Mechanical testing needs to reflect the actual application. Flooring buyers usually care most about adhesion and abrasion resistance. Tabletop buyers care more about scratch resistance and surface hardness. Casting resin buyers need to weigh hardness, brittleness, impact behavior, and how the material machines.

Depending on your application, consider testing:

  • Shore hardness
  • Adhesion
  • Abrasion resistance
  • Scratch resistance
  • Impact resistance
  • Flexural behavior

Ask for the test method or standard behind any technical claim — not just a marketing phrase like “high hardness” or “heavy duty.” Those phrases mean nothing without a number attached, and no epoxy resin sample evaluation should accept them at face value.


10. Check Yellowing and Real-World Environmental Resistance

A sample that’s crystal clear today won’t necessarily stay that way.

This matters most when the finished product will face sunlight, heat, chemicals, moisture, or outdoor conditions — a big reason buyers sourcing UV resin treat this step as non-negotiable. Prepare identical cured samples, keep one untouched as a control, and expose the rest to conditions that match your real-world use — UV, elevated temperature, water, chemical contact, cleaning agents, oils, or solvents.

Then compare each exposed piece against the untouched control. For clear or decorative products, photograph everything under identical lighting so you can track change over time. If UV stability or chemical resistance is a major buying factor, ask the supplier for their own test data before you rely on your own.


11. Run the Test Twice — Consistency Matters as Much as the First Result

One great sample proves the formulation can work. It doesn’t prove the supplier can reproduce it — which is exactly why a one-round epoxy resin sample evaluation is never enough on its own.

For any serious bulk order, request samples from more than one production batch, or run a second qualification test before committing. Compare Batch A against Batch B against your approved reference, and pay close attention to shifts in viscosity, color, working time, cure speed, hardness, and finished appearance.

This step carries extra weight for distributors and private-label brands. Your customers expect the same product in six months that they’re buying today. A supplier’s quality system needs to hold that line — not just produce one great sample under ideal conditions.


12. Lock In a Golden Sample Before You Place the Bulk Order

Once a sample clears your requirements, don’t toss it in a drawer and forget it.

Keep it as your approved reference — often called a “golden sample” — and document everything around it:

ItemRecord
SupplierManufacturer name
Product codeExact formulation
Batch numberSample production batch
Mixing ratioResin : Hardener
Test temperature°C / °F
ViscosityTest result
Working timeTest result
Cure timeTest result
HardnessTest result
AppearancePass / Fail
Application testPass / Fail
Approval dateDate
Approved byBuyer / QC

Hold onto photographs, test records, technical documentation, and a physical cured sample wherever possible. When the bulk shipment finally arrives, your QC team has something real to compare it against — not memory, not impressions.

Instead of asking “does this batch look okay,” you get to ask a much sharper question: does this production batch match the approved sample and the agreed spec? That’s a stronger position to negotiate from.


A Simple Scorecard for Comparing Suppliers

Don’t rely on memory when you’re comparing several manufacturers. Score them the same way, side by side — this is where an epoxy resin sample evaluation earns its keep as a buying tool, not just a lab exercise.

Evaluation ItemSupplier ASupplier BSupplier C
Clarity & Color/10/10/10
Viscosity/10/10/10
Mixing Performance/10/10/10
Working Time/10/10/10
Bubble Release/10/10/10
Cure Performance/10/10/10
Surface Quality/10/10/10
Hardness / Mechanical Properties/10/10/10
Yellowing Resistance/10/10/10
Batch Consistency/10/10/10
Documentation/10/10/10
Application Fit/10/10/10

The highest total score doesn’t automatically win. Some rows should carry more weight than others — a river-table manufacturer probably weighs clarity, bubble release, low exotherm, and yellowing resistance heavily, while a flooring contractor cares more about adhesion, hardness, cure speed, and chemical resistance. Build the weighting around your own application, not a generic idea of “good resin.”


Where Buyers Usually Get This Wrong

The most common mistake: testing samples from different suppliers under different conditions. Test Supplier A at 20°C and Supplier B at 28°C, and any gap in viscosity, working time, or cure speed might just be temperature — not formulation.

Another common one — approving resin on looks alone. A glossy, clear cured sample can still have poor working time, weak adhesion, excessive brittleness, or thin chemical resistance underneath that shine.

Buyers also tend to commit to bulk orders off a single small test. If the order size is significant, repeat the critical tests and keep the records — don’t treat one good pour as proof.

And don’t separate the product from the supplier. A strong formulation from a supplier with weak batch control or spotty documentation can still cause real damage once you’re buying at scale.


Sample Approval Is the Starting Line, Not the Finish

The point of epoxy resin sample evaluation isn’t just deciding whether you like how a resin looks or feels. It’s building measurable expectations before your money, your inventory, and your customer relationships depend on the outcome.

A structured process lets you compare suppliers on equal footing, catch application-specific risks early, and set a documented reference for every future shipment. Before you sign a bulk PO, you should be able to answer four questions without hesitating:

  1. Does the resin actually perform in our real application?
  2. Do the measured properties meet our requirements?
  3. Can the manufacturer reproduce the approved formulation consistently?
  4. Do we have a documented reference to inspect future batches against?

If all four check out, you’re in a much stronger position moving from sample to bulk order.

For distributors, OEM/private-label brands, contractors, and manufacturers, these extra steps are cheap compared to what they prevent — production delays, rejected batches, customer complaints, and returns you never see coming until it’s too late.

Test the sample like it’s already a production batch. Approve the bulk order only once the results are repeatable, documented, and proven for the real application.

Fda Food Contact Compliance 1

FDA Food Contact Compliance for Epoxy Resin: What It Does and Doesn’t Cover

“Is this food safe?” is one of the most common questions buyers ask an epoxy resin manufacturer — and one of the most frequently misunderstood. The phrase “FDA compliant” gets tossed around loosely in marketing copy across the resin industry, often in ways that don’t match what FDA regulations actually require or cover. If you’re sourcing a food-safe epoxy resin for a dining table, cutting board, coaster, or any surface that might touch food, it’s worth understanding what FDA Food Contact Compliance actually means before you pass that claim on to your own customers.

Fda Food Contact Compliance 1

The Regulation Buyers Are Usually Asking About

When people say “FDA approved for food contact,” they’re almost always referring to 21 CFR 175.300 — the FDA regulation covering resinous and polymeric coatings intended for food contact surfaces. This regulation sets requirements for coatings used as the food-contact surface of articles like containers, closures, and food-processing equipment.

One distinction buyers often miss: the FDA doesn’t “approve” or “certify” specific products or brands the way some marketing language implies. There’s no FDA seal, registration number, or certificate issued to a specific epoxy resin product. Instead, a manufacturer evaluates their formulation against the regulation’s requirements and testing standards, and — if it meets them — can state that the resin is formulated to comply with 21 CFR 175.300. That’s a meaningfully different claim than “FDA approved,” and the difference matters once you’re making compliance claims of your own.

What FDA Food Contact Compliance Actually Covers

The regulation specifies extraction testing limits — how much of the coating’s components are allowed to migrate into food simulants (substances that mimic different food types: water, alcohol, oil, acidic solutions) under specified test conditions. It also restricts which raw materials and additives can go into a compliant formulation.

Compliance here is about migration and composition — not about the resin being edible, not about it being safe to cut directly on with a knife indefinitely, and not about it covering every possible food-contact scenario. A resin can be compliant for occasional, indirect food contact (a charcuterie board’s edges, a coaster, a serving tray) without being intended for direct, repeated, high-abrasion contact like a cutting surface.

What This Compliance Does Not Cover

This is where a lot of buyer confusion — and a few questionable marketing claims — tend to come from.

It’s not a cutting-surface certification. Food-contact compliance addresses chemical migration, not mechanical durability. A resin surface can be fully compliant with 21 CFR 175.300 and still be a poor choice for a cutting board’s actual cutting surface, since repeated knife contact carves grooves that can harbor bacteria regardless of the resin’s chemical safety profile. Most manufacturers specifically recommend against resin as a direct cutting surface for this reason, even on formulations that are otherwise compliant.

It doesn’t automatically extend across every formulation a supplier makes. A supplier may have one specific formulation tested and compliant, while their other products — different color systems, different hardener pairings — aren’t automatically covered by the same status. Compliance is formulation-specific, not brand-wide. If a supplier tells you their resin is “FDA compliant” without naming the formulation and batch, that’s worth a follow-up question.

It doesn’t mean heat-resistant or dishwasher-safe. Food contact compliance says nothing about how the resin holds up under hot dishes, dishwasher cycles, or prolonged hot-liquid contact. Those are separate performance properties, tested entirely differently.

It’s not third-party verified by default. Some manufacturers self-certify based on their own testing and formulation review; others send migration testing to third-party labs. Ask which applies to your supplier — third-party verification carries more weight if your downstream customers or retail partners ever ask for documentation.

What Documentation to Actually Ask For

If you’re sourcing epoxy resin for food contact for any application where food contact is possible, ask for more than a verbal claim of FDA Food Contact Compliance:

A statement of compliance specific to the formulation and color you’re ordering — not a general company-wide claim, but the exact product code or batch you’re purchasing.

Test data or a summary of the migration testing performed, where available, particularly if you’re selling into a market or through a retail partner that might ask for backup documentation.

Clarity on intended use. Ask specifically whether the compliance claim covers your actual application — a tabletop with occasional food contact is a different use case than a cutting surface or a container meant for prolonged food storage.

Regional Differences Worth Knowing

FDA regulations apply to the US market specifically. Selling into the EU, UK, Canada, or Australia means food-contact compliance is governed by a different framework in each — EU Regulation 1935/2004 and related measures in Europe, for instance, run on a different testing and compliance structure than the FDA’s. A resin compliant under 21 CFR 175.300 isn’t automatically compliant under EU food-contact rules, and vice versa. Selling into multiple markets means confirming market by market — one compliance claim rarely covers all of them.

How to Talk About This With Your Own Customers

For buyers building a brand around resin furniture, coasters, or serving pieces, precision beats broad marketing language every time. Instead of a blanket “food safe” statement, something closer to “formulated with a food-safe epoxy resin that complies with FDA 21 CFR 175.300 for food-contact surfaces” holds up better — paired with specifics on intended use: occasional contact, not a cutting surface, not for prolonged food storage, heat limits where applicable.

That kind of specificity builds more buyer trust than a vague “FDA approved” claim, and it protects you from the liability that comes with overstating what your product’s compliance actually covers.

Questions Worth Asking Your Manufacturer

  1. Is this specific formulation and color tested and compliant with 21 CFR 175.300, or is that a general claim across your product line?
  2. Is the compliance based on your own testing, or third-party verified?
  3. What intended food-contact use does this compliance cover — occasional contact, direct contact, prolonged contact?
  4. Do you have documentation I can share with my own retail partners or customers if asked?
  5. If I’m selling into the EU, UK, or another market, does this same compliance carry over, or do I need separate documentation?

The Bottom Line

FDA Food Contact Compliance is a real, meaningful claim — but only when it’s specific to the exact formulation, tested against the right regulation, and scoped accurately to the intended use. It’s not a blanket safety certification, and it doesn’t replace common-sense cautions like avoiding resin as a direct cutting surface. Get documentation specific to what you’re actually buying from your epoxy resin manufacturer, and stay precise about intended use when you pass that claim along to your own customers.

Epoxy Resin Manufacturer Buyer Guide

Epoxy Resin Manufacturer Buyer Guide: How to Select the Right Supplier for Your Business

1. Why Choosing the Right Epoxy Resin Manufacturer Matters

Talk to any buyer who’s been importing epoxy resin for a while and the complaints start sounding the same. Sample looked perfect. Bulk order didn’t match it. First order was priced to win the account, and the next two came back with a “raw material cost increase” attached. Technical questions sit unanswered for days. An OEM project quoted at three weeks turns into three months. Certification paperwork shows up half-finished, if it shows up at all.

None of that is bad luck. It’s what happens when someone picks an epoxy resin manufacturer the same way they’d pick a phone case — cheapest price, fastest reply, move on. Resin doesn’t work that way. It’s a formulated chemical product, and batch 1 has to perform the same as batch 100, survive international shipping without drifting off-spec, and hold up in whatever climate it lands in. Choosing an epoxy resin manufacturer isn’t really a purchasing decision at all. It’s picking a production partner you’ll be stuck depending on for years, for better or worse.

Epoxy Resin Manufacturer Buyer Guide

2. Understanding the Different Types of Epoxy Resin Suppliers

Not every company that replies to your inquiry is actually the one making the resin.

Trading companies are easy to deal with, and their catalogs tend to be broad, since they’re pulling from several factories instead of running one themselves. That convenience has a downside — they can’t touch the formula, can’t force through a rush change, and every reorder carries a hidden risk: the actual factory behind them, the one you’ve never seen or spoken to, may have changed something without telling anyone.

Standard epoxy resin factories run their own lines and sell established, catalog-grade products at scale. Fine choice for distributors, or anyone who just needs steady, repeatable supply without customization.

Custom epoxy resin manufacturers exist for formulation and OEM work. If you’re building a private label line or launching something new, this is the type you actually need — everything else downstream depends on whether the supplier controls its own formula.

Figuring out which type you’re actually talking to changes the whole next round of questions. It’s the first real filter for telling a genuine epoxy resin manufacturer apart from a middleman wearing one’s branding.

3. What to Check Before Choosing an Epoxy Resin Manufacturer

3.1 Factory Capability

Skip past the sales deck and ask for numbers instead: factory size, what equipment they’re running, monthly output, actual years of export history. If a manufacturer can’t rattle off their monthly capacity without checking, they probably don’t know it precisely enough to commit to a delivery date either. Jinhua Resin, for what it’s worth, runs a 20,000㎡ facility with 1,000 tons/month capacity and ships to more than 40 countries — that’s roughly the level of specificity a buyer should expect from any epoxy resin manufacturer worth working with.

3.2 Research & Development Capability

This is where most suppliers fall short, and the gap usually doesn’t show up until months after the order’s already shipped. Plenty of factories can’t adjust viscosity, tune cure speed, or hit a custom color — a lot of them can only run whatever’s already sitting on the shelf. Deep pour epoxy is a decent stress test for this: it needs low exotherm, real deep-casting ability, and working time long enough to actually finish pouring a river table before the resin starts kicking off. If a supplier can’t explain, specifically, how they control those variables, they’re not doing formulation work. They’re relabeling someone else’s product.

3.3 Quality Control System

Ask the supplier to walk through their process end to end — raw materials coming in, mixing, testing, packaging, final inspection before it leaves. Every stage should have a checkpoint attached to it, and testing should routinely cover viscosity, hardness, transparency, yellowing resistance, and cure time — not something they scramble to set up because a buyer happened to ask.

4. How to Evaluate Epoxy Resin Quality

Three things tell you almost everything worth knowing before an order ships, and they’re a fast way to tell a genuine epoxy resin manufacturer from a repackager.

Transparency matters most for river tables and crystal-clear casting, where even a slight haze ruins the whole piece. Viscosity decides how easily bubbles escape during pour and how the resin self-levels — go too thick and you’ll spend days fighting trapped air. Curing performance covers cure time plus final surface hardness, and it’s worth testing under actual working conditions rather than just trusting the supplier’s lab numbers. Yellowing resistance is the one buyers tend to underweight, and it’s the one that generates the most complaints six months down the line — especially on clear epoxy sitting under UV exposure, where something that looked flawless on day one has gone amber by month four.

5. Epoxy Resin Product Categories Buyers Should Know

A supplier with real formulation depth usually covers several of these categories, not just one.

Deep pour epoxy resin goes into river tables, wood casting, and large molds. Priorities: pour depth, exothermic control, working time.

Table top epoxy resin covers countertops, furniture coating, bar tops. What separates a good batch from a mediocre one: self-leveling behavior, gloss, surface hardness.

UV resin is built for jewelry and small craft projects — fast cure, clarity, and yellowing resistance matter most here, since these pieces get worn and photographed constantly.

Epoxy floor coating is for industrial floors, warehouses, garages, where chemical resistance, abrasion resistance, and adhesion outweigh anything cosmetic.

6. OEM and Private Label Epoxy Resin: What Buyers Need to Know

This is the section where the relationship with an epoxy resin manufacturer either pays off or falls apart — OEM work is the clearest test of whether a supplier genuinely controls its own formulas or is just relabeling stock product.

Real OEM ability means the factory can adjust viscosity, cure speed, and hardener ratio to spec, not just slap your label on something already sitting in inventory. For a private label epoxy resin program specifically, packaging customization needs to cover labels, bottles, buckets, and instructions written for your target market — not translated secondhand from someone else’s copy. And compliance support — REACH, RoHS, Prop 65, SDS, TDS — should be something the supplier handles proactively, not something you’re chasing down after customs already flagged the shipment.

7. What Does It Cost to Work With an Epoxy Resin Manufacturer?

Price is usually the first question buyers ask, which makes sense, but it only means something once you know what’s actually driving it.

Formula complexity moves the needle the most. Custom viscosity or a custom cure profile costs more than a stock product, because it eats R&D hours and testing runs. Packaging format matters too — bottles, kits, and drums carry different per-unit economics. And a lower MOQ isn’t automatically the better deal; suppliers who push MOQ very low are often cutting corners somewhere else, usually formulation support, and it shows up later as weaker technical response. Certification for specific markets — California’s Prop 65 is the classic example — adds another layer of cost on top of all of it.

8. MOQ, Lead Time, and Production Planning

A responsible epoxy resin manufacturer walks buyers through three stages instead of jumping straight to mass production. Sample stage: confirm the formula, run performance tests. Trial order stage: test market response and packaging at small scale before committing real volume. Only after that does mass production actually make sense — and that’s when capacity and inventory planning become the real conversation, not price.

This staged approach also tells you something about maturity. An epoxy resin manufacturer that skips straight to a mass-production quote is optimizing for winning the first order, not for the relationship that follows it. Jumping straight to a big first order because the price looked good is exactly how buyers end up back at the “great sample, inconsistent bulk order” problem from section one.

9. Documents You Should Request From an Epoxy Resin Supplier

Any epoxy resin manufacturer worth ordering from should hand these over without friction. Before placing a real order, ask for the technical documents — TDS, SDS/MSDS, COA — plus the business side: company profile, factory audit results, export track record. If the product’s headed for a regulated market, get REACH, RoHS, and Prop 65 documentation in writing before the shipment leaves, not after.

10. Common Mistakes When Selecting an Epoxy Resin Manufacturer

Choosing purely on price is the most common mistake, and the most expensive one — it rarely shows up until the second or third reorder. Skipping sample testing, or testing the sample but not the bulk batch behind it, comes in a close second. Not checking real production capability, not discussing future volume upfront, working with a supplier that has no actual technical support — different paths, same ending: fine on the first order, falling apart on the next.

11. Why Choose Jinhua Resin as Your Epoxy Resin Manufacturing Partner

Jinhua Resin runs on manufacturing capability, not middleman markup — a 20,000㎡ factory, 1,000 tons/month capacity, export experience across 40+ countries. The product range spans deep pour epoxy resin, table top epoxy resin, UV resin, epoxy floor coating, and casting resin, backed by genuine OEM service: formula customization, packaging, and private label epoxy resin support from the first conversation, not after months of back-and-forth. Every batch goes through testing, documentation, and technical assistance before it ships, because for an epoxy resin manufacturer, that isn’t an add-on. It’s the job.