Working with DIY epoxy resin opens up a world of creative possibility — that glass-clear finish, the way it suspends color and texture like a moment frozen in amber. But start a project on a sweltering July afternoon, and things can go sideways fast. The liquid heats up almost the moment it hits the mixing cup. A milky haze creeps across what should be a mirror-clear surface. Or you come back the next morning expecting a hard, glossy piece, only to find it still tacky to the touch.
The culprit, more often than not, is the season itself. Summer heat and humidity don’t just make you uncomfortable — they actively interfere with the chemistry your resin depends on.
DIY epoxy resin cures through an exothermic reaction: the resin and hardener combine, generate heat, and gradually solidify. That process is finely tuned. Push the ambient temperature even a few degrees higher than intended, and the reaction accelerates in ways that are hard to control — trapping bubbles, causing uneven curing, or triggering excessive heat buildup that cracks or yellows the finished piece. Humidity adds another layer of trouble, introducing moisture that clouds the surface or prevents a clean bond.
This guide cuts through the guesswork. Whether you’re new to resin or running into summer-specific problems for the first time, you’ll find clear explanations of what’s actually happening — and practical fixes that work.
1. The Heat Factor: Why Your Resin is Curing Too Fast
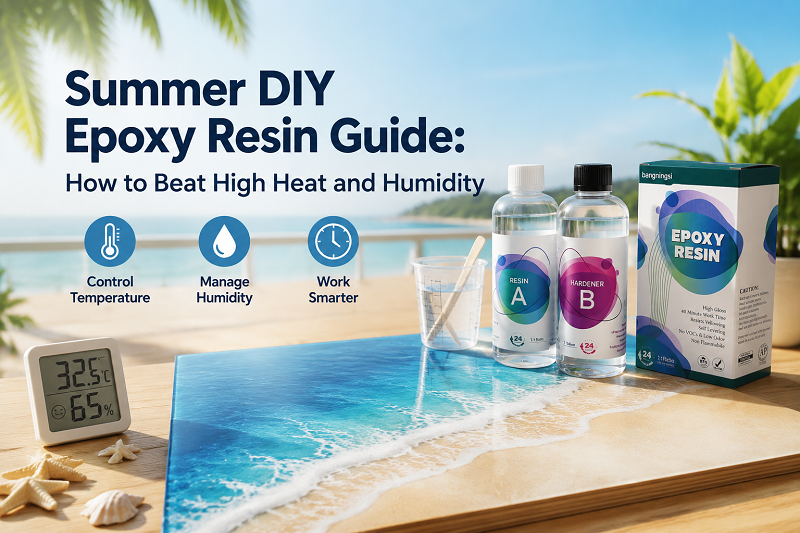
When it comes to polymer chemistry, temperature dictates speed. Typically, the sweet spot for pouring DIY epoxy resin sits between 21°C and 25°C (70°F – 77°F). Once your workspace climbs past 30°C (86°F), the chemical kinetics shift into overdrive.
Shorter Working Windows
The “pot life”—the golden window you have to mix, tint, pour, and pop bubbles—shrinks drastically in the summer. A standard 45-minute working time can easily drop to 15 minutes or less. If you aren’t careful, the liquid will begin to gel right in your mixing cup before you even finish adding pigments.
The Danger of Flash Curing
This is the ultimate summer nightmare for makers. When resin and hardener are mixed in large quantities, they generate natural internal heat. If the ambient air is already hot, that heat cannot escape. The mixture spirals into a runaway thermal reaction known as flash curing. The resin becomes intensely hot, smokes, cracks, turns yellow, and can even melt plastic mixing cups.
2. The Humidity Trap: Banishing Sticky Surfaces and Blush
While high heat accelerates the process, heavy summer humidity (anything above 70% relative humidity) sabotages the chemical structure itself. Epoxy hardeners are highly hygroscopic, meaning they actively draw moisture directly out of the air.
Amine Blush (The Cloudy Film)
When moisture reacts with un固化 (uncured) hardener on the surface of your project, it creates a chemical byproduct known as amine blush. This manifests as a dull, greasy, or waxy white film over your cured piece. Instead of a high-gloss finish, your artwork ends up looking foggy and dirty.
Sticky or Flexible Cures
Moisture disrupts the precise ratio needed for the polymer chains to cross-link properly. Areas contaminated by airborne water vapor will fail to polymerize completely. As a result, your piece may remain tacky to the touch, easily pick up fingerprints, or bend like rubber days after pouring.
3. Pro-Tips to Control Temperature and Moisture
You don’t have to put your hobby on pause until autumn. By implementing these workspace hacks used by professional resin studios, you can master DIY epoxy resin even in July.
Cooling Strategies
- Mix in Smaller Batches: Deep containers trap heat. Keep your pours small and spread out, or use wide, shallow silicone bowls to mix your components. This allows the heat to dissipate into the air rather than building up internally.
- The Pre-Pour Ice Bath: Before mixing your A and B parts together, submerge the sealed, individual bottles in a cold-water bath for 5 to 10 minutes. Lowering the initial temperature of the raw liquids buys you valuable extra working time.
- Time-Shifting Your Workspace: If your studio lacks air conditioning, run your projects during the coolest parts of the day—either in the early morning or late at night.
- Switch to a Slow Hardener: Swap out your standard casting formula for a “Deep Pour” or slow-curing resin. These formulas are engineered to release heat at a much slower rate, making them inherently more forgiving in hot weather.
Moisture-Defying Tactics
- Check the Room Humidity: Keep a digital hygrometer near your workspace. If the relative humidity climbs past 65%–70%, it’s best to hold off on final clear topcoats.
- Run a Dehumidifier: Setting up a dedicated dehumidifier in a closed room is the single most effective way to guarantee a mirror-like, glossy finish on your DIY epoxy resin projects.
- The Protective Box Shield: Immediately after torching your fresh pour, invert a clean cardboard box or plastic container over the mold. This keeps dust out and traps a micro-climate of drier air directly above the curing surface.
4. Troubleshooting Summer Failures: Can You Save It?
If you’ve already ended up with a sticky or foggy mess, don’t throw it in the trash just yet. Try these restoration steps:
- For Sticky, Cloudy Surfaces: Wipe down the tacky layer vigorously with a microfiber cloth soaked in high-grade isopropyl alcohol to strip away the amine blush. If the underlying resin is hard but dull, sand the surface with progressive grits (400 to 1500) and pour a fresh, thin topcoat under controlled, dry conditions.
- For Gummy, Soft Projects: If the piece remains rubbery after 48 hours due to severe moisture contamination, it cannot be salvaged internally. You will need to scrape away the unpolymerized gooey sections, clean the substrate, and pour a fresh batch.
By keeping an eye on your room’s climate and adjusting your mixing habits, you can easily conquer the challenges of summer and create flawless resin art all year round.