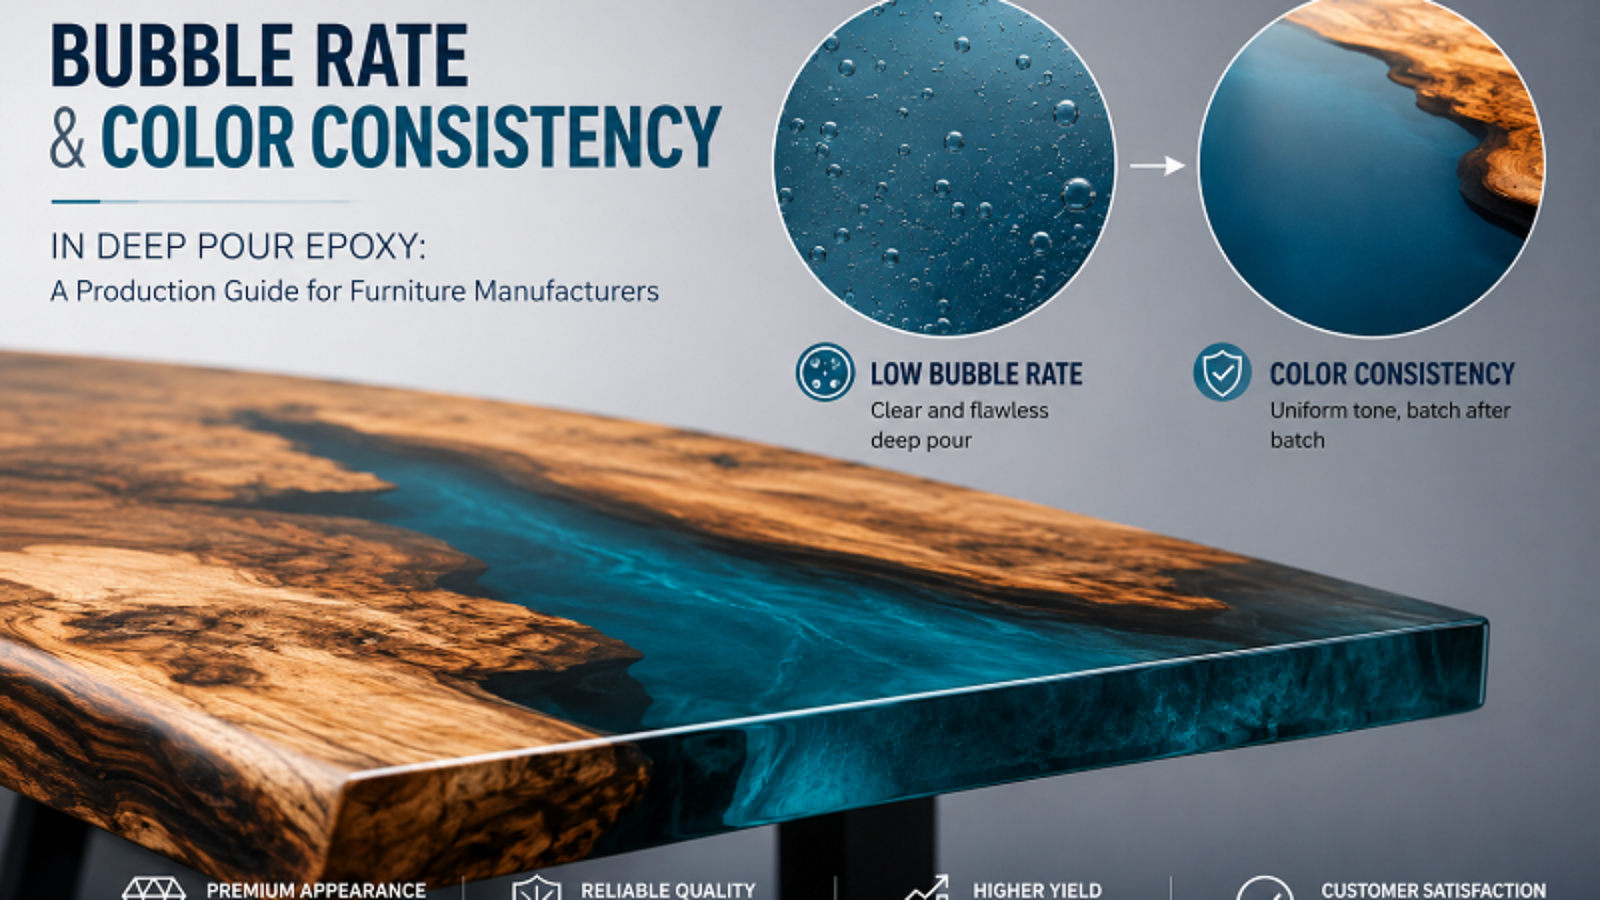
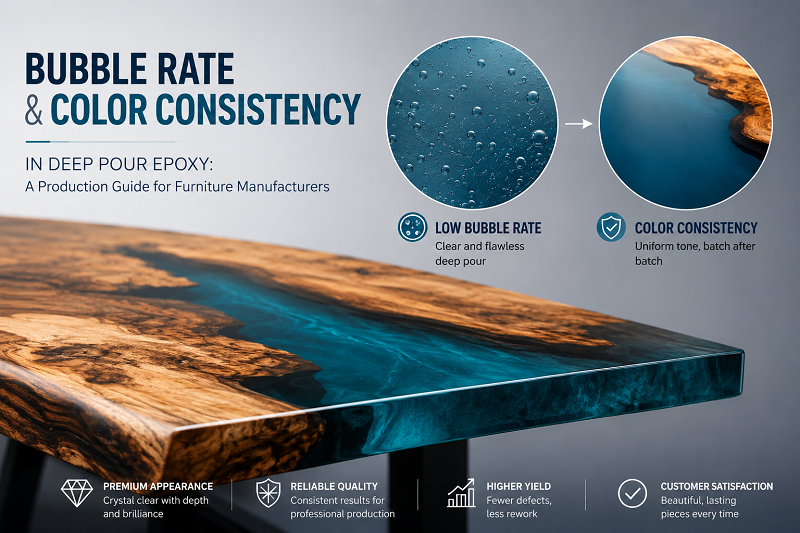
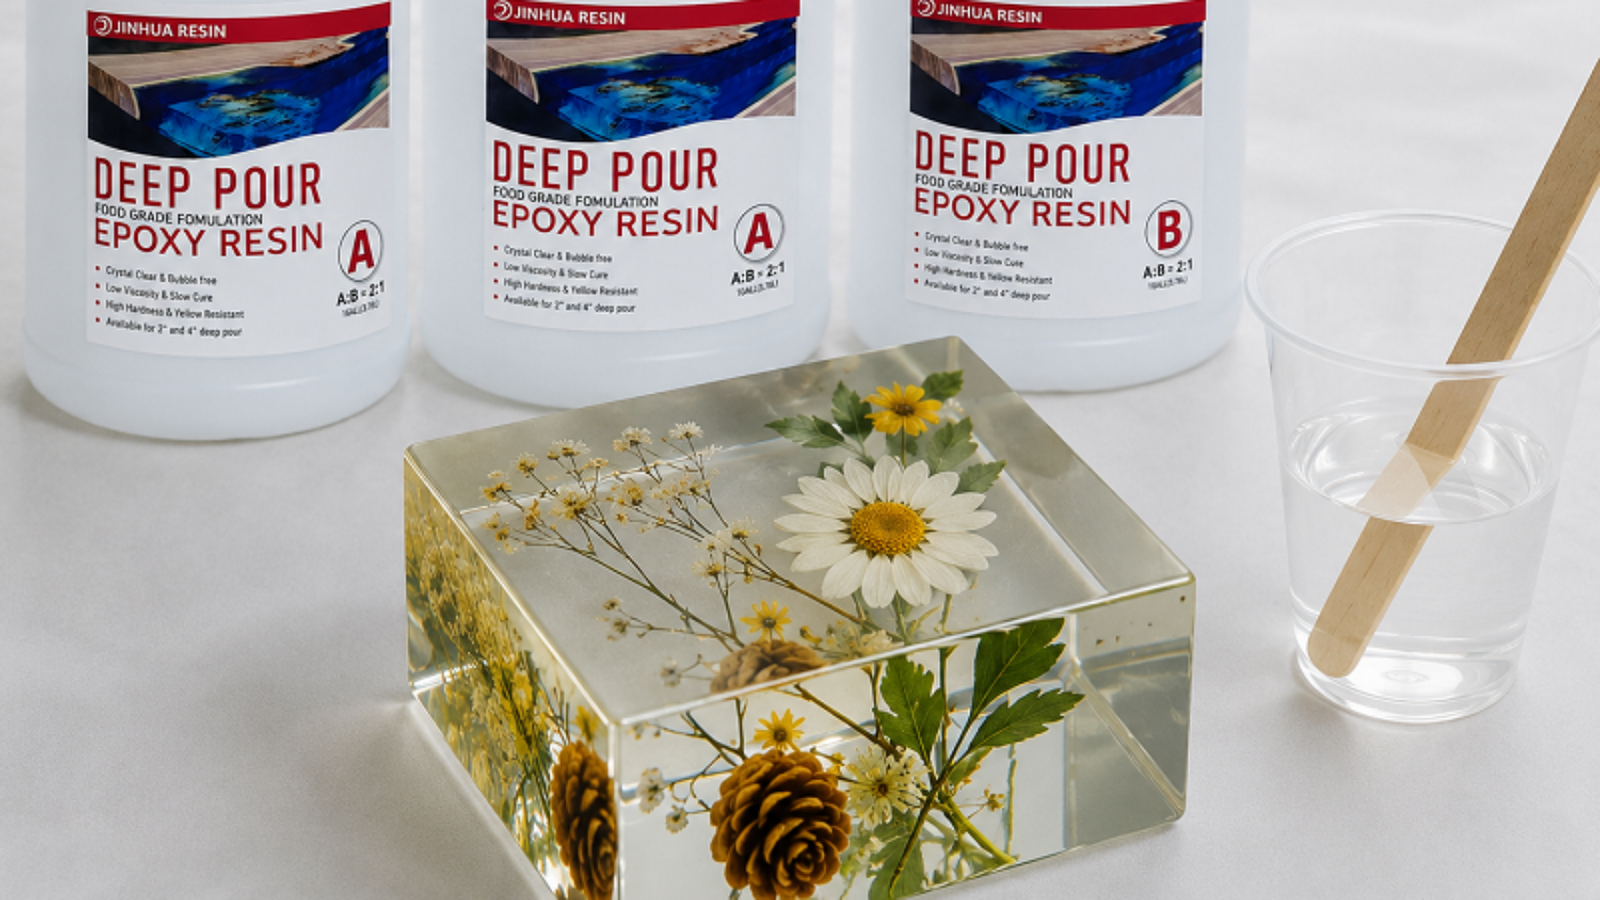
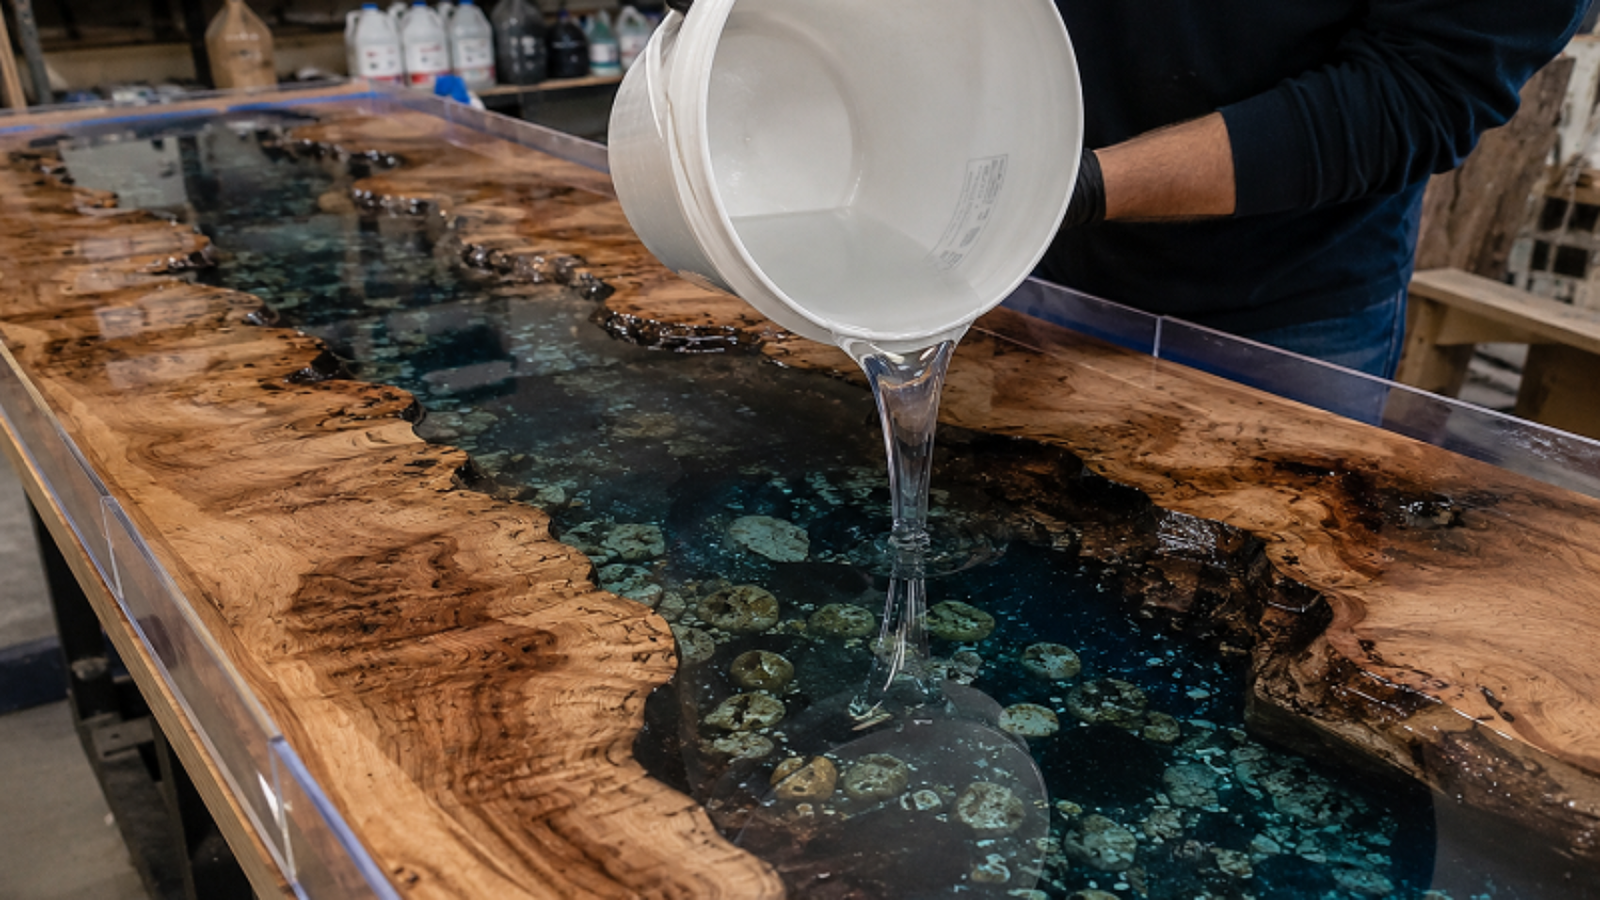
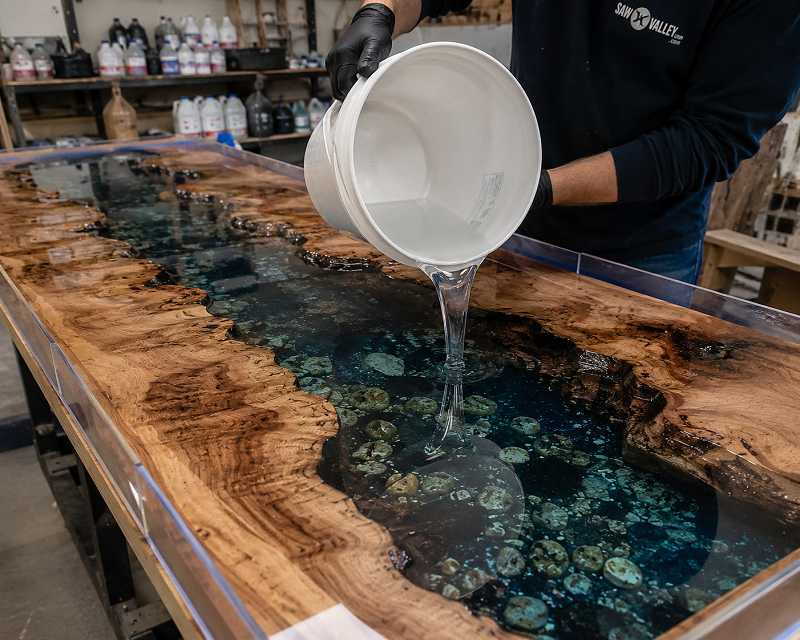
The reject shelf in a river table factory tends to tell the same story twice. First version: a finished slab with bubbles caught mid-pour, visible through the resin like insects in amber. Second version: a piece that poured clean but came out two shades lighter than the last batch, making the order unfulfillable to spec.
Neither problem announces itself loudly. Both bleed margin quietly — through rework, through scrapped blanks, through client calls that start with “this doesn’t match what we ordered.” For shops running deep pour epoxy as a production material rather than a one-off studio exercise, the difference between a profitable river table line and a chaotic one often comes down to whether these two variables are being actively managed or just tolerated.
Here’s how to manage them.
Where Bubbles Actually Come From
Three mechanisms produce bubbles in cured epoxy. Understanding which one is active in a given defect tells you exactly where in the process to intervene.
Air Pulled In During Mixing
This is the most frequent culprit and the easiest to address. The act of combining Part A and Part B introduces air — more so when mixing is fast, when the container is undersized for the batch volume, or when the paddle geometry creates turbulence rather than laminar flow.
Shops that scale up from hand-mixing to drill-powered mixing often make the problem worse before they make it better. A high-speed drill mixer is fast, but the vortex it generates draws air into the batch continuously. The fix is counterintuitive: go slower. A paddle running under 300 RPM — jiffy-style, not propeller — with deliberate scraping of the container walls and base, run for four to five minutes, followed by a three-to-five minute rest before the pour. That rest window is where the larger bubbles surface and break. Don’t skip it.
For batches in the five-to-twenty liter range, a vacuum degassing chamber changes the output quality meaningfully. Three to five minutes under vacuum after mixing pulls entrained air out before the deep pour epoxy reaches the mold. The equipment pays for itself in reject reduction faster than most shops expect.
Gas Coming Out of the Wood
Walnut, oak, elm — the porous hardwoods that define most river table work — hold air and moisture in their grain structure. Warm resin hitting a cold or unsealed slab draws that gas out. If it migrates upward while the resin is still fluid, it escapes. If the resin has started to gel first, the bubble stays.
Two controls, used together, close this off. The first is a seal coat — a thin layer of deep pour epoxy or dedicated wood sealer, applied twelve to twenty-four hours before the structural pour. It closes the surface pores and lets any remaining outgassing happen in a layer that gets sanded away rather than trapped in the final piece. The second is temperature: bringing slabs up to shop ambient temperature before pouring eliminates the thermal gradient that accelerates outgassing. Cold stock pulled straight from outdoor storage and immediately poured is a reliable way to generate substrate bubbles.
Moisture Reacting with the Hardener
Amine hardeners — standard in most deep pour epoxy systems — react with atmospheric moisture to release CO₂. The resulting bubbles are small, uniformly distributed through the pour, and resistant to torch treatment. When a shop sees this pattern, it’s almost never a mixing issue. It’s a storage or environment issue.
The controls are basic: hardener in sealed containers, away from humidity. Workshop RH held below 60% during active pours. Any component that’s been stored open or through temperature swings should be treated as suspect. And at the procurement level — deep pour epoxy has a shelf life of roughly twelve months under correct storage conditions. Bulk buying beyond what you’ll turn in that window isn’t actually a savings.
Standardizing the Torch Step
Some surface bubbles will appear after every pour regardless of process quality. This is normal. The question at production scale isn’t how to eliminate them — it’s how to handle them consistently when you have three operators running four pours simultaneously.
A propane torch at fifteen to twenty centimeters above the surface, moved in slow, overlapping passes, temporarily thins the surface viscosity enough to let bubbles pop. The hard limit is dwell time: more than two seconds in one spot and you’re scorching the resin, introducing yellowing, or leaving heat texture in the surface.
At production scale, the torch step needs a physical standard — a marked working height at a dedicated station — not just verbal training. Once you’ve standardized the motion, use rejected pieces to classify whether bubble defects are surface-type (torch-correctable) or internal (mixing or substrate origin). The two categories need different interventions, and conflating them wastes diagnostic time.
Color Consistency: The Variable That Doesn’t Announce Itself
Bubble defects are visible immediately after demolding. Color drift often isn’t caught until pieces from two different production runs are placed side by side — sometimes at the client’s site.
Pigment Measurement Is the First Thing to Lock Down
Batch-to-batch color variation almost always originates in how pigment is added, not in the pigment formula itself. Eyeballing colorant additions across a production run introduces drift that compounds over time. The fix is a calibrated scale and a documented ratio — grams of pigment per kilogram of mixed resin, recorded for every pour.
Beyond measurement, the type of colorant affects how manageable this is. Alcohol inks and dye concentrates are sensitive to small quantity changes — a few drops off and the hue shifts visibly. Pigment pastes and epoxy-compatible dispersions are denser and more forgiving at scale; the color-per-gram output is more consistent. For any production run requiring color matching across multiple batches, pastes are the professional choice.
Sequence also matters. Adding pigment to Part A and mixing it in before combining with Part B produces more even dispersion than adding it after the two components are blended. One procedure, applied consistently across the whole team.
Base Resin Color Is a Supplier Problem You Can Measure
Clear deep pour epoxy isn’t perfectly colorless — it runs from water-clear to a faint straw tone depending on the raw material inputs that went into that particular production batch. On heavily pigmented pours, this doesn’t matter. On natural-color or lightly tinted work, a shift in base resin color between supplier batches shows up in the finished piece.
This is partly a production problem and partly a sourcing problem. A supplier with tight raw material controls holds their base resin color consistent across batches. One with variable inputs doesn’t. When qualifying suppliers for volume production, ask for APHA color values across multiple production runs — not just a single sample. APHA below 30 is a workable threshold for high-clarity applications. A supplier who can’t provide multi-batch APHA data is telling you something about their process controls.
Temperature Windows Affect Cure Color
The same deep pour epoxy poured at 18°C and at 28°C will cure to slightly different optical results. Higher temperatures accelerate the exothermic reaction, raise internal mass temperature, and increase the chance of thermal-driven color shift in the cured piece.
Production color consistency doesn’t require climate control — it requires consistent temperature windows. Know the range your shop operates in seasonally, test your deep pour epoxy at both ends, and adjust pigment ratios to compensate if the base color shifts. Document those adjustments so seasonal transitions aren’t relearned from scratch each year.
A Minimal QC Framework That Actually Gets Used
Documentation systems fail in production shops when they’re too complex to maintain under pressure. These four records cover the variables that matter, without requiring a quality manager to run:
Pour log — batch number of the deep pour epoxy used, ambient temperature, RH, pigment type and weight, operator name. When a defect appears, the log tells you which batch and which conditions to investigate.
Color reference panels — one cured panel per approved color, kept from the first accepted production run. Every subsequent batch gets physically compared before shipping. Color drift caught at QC doesn’t become a client conversation.
Supplier batch records — batch number and APHA value from the supplier with every delivery, cross-referenced against your internal color output. If base resin variation is causing color drift in your pieces, the pattern shows up in this data before it surfaces as a complaint.
Defect log by type — surface bubble, mid-pour bubble, color drift, haze, other. Thirty days of entries reveals where the process pressure is. A run of mid-pour bubbles points to mixing or humidity. Persistent color drift points to base resin or pigment measurement. Surface bubbles in isolation point to torch protocol.
What to Look for in a Supplier
Process controls only go so far when the deep pour epoxy itself is inconsistent. Three product characteristics have direct bearing on how well the defects above can be controlled:
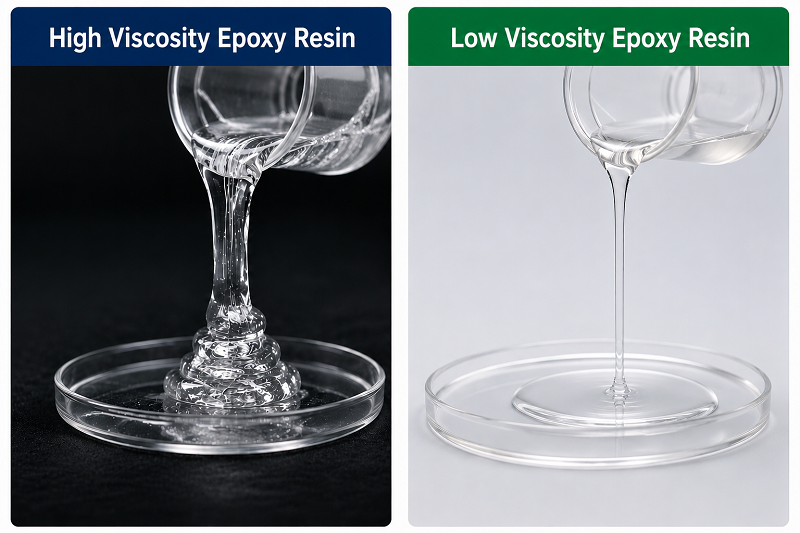
Viscosity at working temperature — lower initial viscosity means the mixed resin self-degasses more readily after mixing and releases bubbles more easily before gel. Ask for viscosity data at your actual production temperature range, not just the 25°C standard. A product that behaves very differently at 20°C versus 30°C will introduce seasonal variability that your process controls can’t fully compensate for.
Exotherm curve by pour depth — deep pour epoxy is formulated to cure slowly, but the actual heat profile varies by product and by the depth of the pour mass. At 50mm depth, a product with a poorly managed exotherm will generate enough internal heat to yellow the center of the pour regardless of ambient conditions. Ask for exotherm data at your working depths.
Multi-batch APHA records — as described above, this is the supplier-side variable with the most direct impact on your color output. A manufacturer who holds tight raw material controls can produce this data without difficulty. One who can’t produce it probably hasn’t been tracking it.
The Bottom Line
Bubble rate and color drift in deep pour epoxy production are not luck-dependent outcomes. They’re downstream effects of specific, traceable variables — in the mix, in the substrate, in the environment, and in the raw material. The shops that build reliable river table production lines are the ones that treat each of those variables as something to be measured and recorded, not improvised around.
Start with the process basics. Build the documentation layer. Then hold your deep pour epoxy supplier to the same standard of consistency you’re holding your own production to.
If you’re evaluating suppliers for scaled-up production and want to see batch consistency data alongside product specs, reach out to Jinhua Resin — we supply deep pour epoxy to furniture manufacturers across North America, Europe, and Southeast Asia and are happy to discuss technical requirements for your output volume.
Jinhua Resin | Professional Epoxy Resin Manufacturer | Deep Pour Epoxy & Table Top Epoxy | OEM & Bulk Supply Available
Somewhere in a furniture workshop right now, someone is sanding back a countertop that went amber six months after installation. The resin was marketed as UV-resistant. The application was textbook. The problem was never the process — it was a spec sheet nobody read closely enough.
For bulk buyers of table top epoxy, yellowing failures are expensive in ways that compound: rework labor, client disputes, replacement material, and the harder-to-quantify cost of a buyer who doesn’t come back. The frustrating part is that this outcome is almost entirely preventable — if you know which numbers to ask for and what they actually mean.
Here’s a practical breakdown of how UV performance data works, and how to use it to separate credible suppliers from ones riding on vague claims.
What Drives Yellowing in the First Place
Epoxy doesn’t yellow randomly. The mechanism is consistent and well-understood.
Ultraviolet light — whether from sunlight through glass, LED retail lighting, or direct outdoor exposure — targets specific bonds within the cured resin. In aromatic epoxy systems, those bonds sit in the molecular backbone itself, making them structurally vulnerable. When they break down, the resulting molecular fragments (chromophores) change how the surface reflects light — shifting it from clear toward yellow, then amber over time.
Two variables control the rate: the base chemistry of the resin itself, and the UV stabilizer system the manufacturer has built into the formula. A third variable is simply how much UV the finished piece encounters in its actual environment.
For commercial applications — restaurant counters, bar tops, retail displays, hotel furniture — that UV exposure is continuous and cumulative. A table top epoxy finish that looks flawless at installation and starts going warm-toned within a year creates real business problems: warranty claims, damaged relationships with end clients, and rework costs that weren’t in anyone’s margin calculation.
The Four Figures That Matter
UV performance data can look intimidating, but most of it collapses into four concrete metrics. Here’s what each one tells you:
ΔYI: The Primary Filter
Yellowness Index (YI) quantifies how far a transparent material has drifted from colorless — measured via spectrophotometer. The figure you want from any supplier is ΔYI: the shift in yellowness between a freshly cured sample and that same sample after standardized UV exposure. Lower numbers mean better performance.
A practical reference frame:
ΔYI After UV Testing
Field Implication
Below 2
Excellent — appropriate for high-end hospitality and premium furniture
2–5
Solid — viable for the majority of commercial indoor use cases
5–10
Marginal — color drift likely in well-lit environments over 2–3 years
Above 10
Inadequate — visible yellowing expected within 12–18 months
Any supplier who describes their table top epoxy as “low-yellowing” without attaching a ΔYI figure is offering an opinion, not a specification. The two aren’t the same thing.
Test Duration and Protocol: The Context Layer
Two products can both show ΔYI = 2 on paper. If one reached that result after 100 hours of testing and the other after 500, they’re not comparable — they’re telling completely different stories about long-term performance.
The standards most commonly cited for table top epoxy UV aging:
ASTM G154 — Fluorescent UV lamp testing (UVA-340 or UVB-313). The global benchmark for industrial coatings.
ASTM G155 — Xenon arc testing, which replicates the full solar spectrum more faithfully than fluorescent lamps.
ISO 4892-3 — The international counterpart to ASTM G154, prevalent among manufacturers in Asia and Europe.
A defensible minimum for professional-grade table top epoxy: ΔYI ≤ 3 at 500 hours, ASTM G154 (UVA-340). Suppliers who can only produce 200-hour results — or who can’t share the test methodology at all — are communicating something about their product whether they intend to or not.
Gloss Retention: The Overlooked Half
UV degradation doesn’t limit itself to color. Surface gloss erodes under the same conditions, and a coating that holds its color while losing its sheen still ends up looking like a failure to the client.
Gloss retention is measured with a gloss meter at 60°, comparing pre- and post-aging readings. For high-gloss table top epoxy products, the working threshold is 85% retention or better after 500 hours. Always request this number alongside ΔYI — color and gloss together give you a complete picture of how a finish will age in the field.
Haze: Clarity Beyond Color
Haze is distinct from yellowing. It describes the scattering of light within the cured film — visible as cloudiness or a slightly milky quality that undermines the optical depth that makes quality table top epoxy worth specifying in the first place.
Reported as a percentage, haze in a well-manufactured product should open below 1% and increase by no more than 2–3 percentage points following UV aging. A supplier who leads with ΔYI data and omits haze figures is giving you part of the story.
Base Chemistry: Why It Sets the Performance Ceiling
Before any stabilizer additive can do its job, the resin’s base chemistry establishes the upper limit of what’s possible.
Aromatic resins — bisphenol A systems being the most common — have aromatic ring structures in their backbone that are inherently susceptible to UV attack. These rings are precisely what photodegradation targets. Many mid-market table top epoxy products are built on aromatic bases because the feedstocks cost less. Stabilizers extend the service life, but they’re working against the underlying molecular structure the entire time.
Aliphatic resins, and aliphatic-polyurethane hybrid systems, are built without those vulnerable rings. Their UV resistance is structural, not additive. Products intended for demanding end markets — hospitality interiors, export furniture, architectural applications — are typically based on aliphatic or partially aliphatic chemistries.
It’s worth asking any supplier directly: aromatic or aliphatic base resin? That answer defines the performance ceiling for the product regardless of what stabilizer loading it carries.
Inside the Stabilizer Package
Assuming an aliphatic base, the stabilizer system is what separates good UV performance from excellent.
HALS — Hindered Amine Light Stabilizers interrupt the free radical chain reactions that UV initiates in the polymer. They don’t prevent UV absorption; they neutralize the damage downstream. Effective, durable, and standard in any serious UV-resistant formulation.
UV Absorbers — primarily benzotriazoles and triazines — operate upstream: they capture UV energy before it can initiate degradation, converting it harmlessly to heat. The most durable table top epoxy products layer both mechanisms. HALS handles what gets through; UV absorbers reduce what gets in. Used together, the two systems consistently outperform either in isolation.
“UV stabilizers added” is a starting point, not an answer. A supplier who can name the stabilizer classes, describe how they’re combined, and show loading-level data is giving you something you can evaluate. One who hands you a brochure is not.
Five Steps for Vetting UV Claims Before You Commit
Request the full third-party report — not the data sheet summary Product data sheets distill test results into the most favorable headline. The actual third-party aging report — with lab identification, sample preparation protocol, exposure parameters, and complete numerical output — is what tells you whether those headlines are earned. Reluctance to share it is informative.
Confirm the exposure hours Below 300 hours is insufficient for a serious procurement decision. Five hundred hours is the practical floor. Suppliers with 1,000-hour datasets have done the validation work and generally aren’t reluctant to share it.
Compare ΔYI under identical conditions ΔYI figures are only comparable when measured against the same standard and the same exposure duration. Collect results from multiple suppliers on the same basis, then compare directly. ΔYI = 1.8 at 500 hours outperforms ΔYI = 4.5 at 500 hours, regardless of how either supplier’s marketing copy frames it.
Ask for a physically aged sample A cured panel that has completed UV chamber aging — or a field-aged sample from an actual installation — provides information that no spreadsheet fully captures. Side by side, the visual gap between ΔYI = 2 and ΔYI = 5 is immediately apparent.
Align the test method with your destination market Fluorescent UV testing (ASTM G154) is a solid baseline. For products heading to high-solar-exposure environments — coastal hospitality, sun-belt retail spaces, high-window showrooms — xenon arc data (ASTM G155) is more predictive of real-world performance. If your market exposure warrants it, ask for it by name.
Putting It Into Practice
For manufacturers competing on finish quality and longevity, UV performance data belongs in the procurement qualification process, not in the afterthought section of a supplier review. A table top epoxy supplier who comes to the conversation with verified ΔYI figures, gloss retention data, transparent chemistry disclosure, and third-party test reports is one you can build reliable production quality around.
One that responds to technical questions with generalities is telling you something about the product even when they don’t mean to.
The next time a supplier leads with “UV-resistant” or “crystal clear” on their table top epoxy, redirect to one question: what’s the ΔYI at 500 hours under ASTM G154? The answer — or the absence of one — will tell you more than the rest of the pitch combined.
At Jinhua Resin, UV test reports to ASTM G154 and ISO 4892-3 are included with every product inquiry as standard. If you’d like to put our numbers alongside your current supplier’s for a direct comparison, reach out here — we’ll include the full technical package and a sample set.
Jinhua Resin | Professional Epoxy Resin Manufacturer | Table Top Epoxy & Deep Pour Epoxy | OEM & Bulk Supply Available
If you manage procurement for a restaurant chain, hospitality group, or furniture supply company, you already know that countertop surfaces take a beating. Scratches, heat rings, stains, and dull finishes accumulate fast — especially in high-traffic food and beverage environments. Replacing solid wood or stone countertops at scale is expensive and disruptive. That’s why more commercial buyers are turning to table top epoxy as a cost-effective, high-performance refinishing solution.
This guide walks through everything you need to know when sourcing and applying high gloss table top epoxy for bulk countertop projects: what to look for in a supplier, how to evaluate product specs, and how to streamline the application process across multiple locations.
Why Table Top Epoxy Makes Sense for Commercial Countertop Refinishing
Before diving into procurement specifics, it’s worth understanding why table top epoxy has become a preferred choice for commercial renovations:
Durability: A properly applied epoxy coating bonds directly to the substrate — wood, MDF, laminate, concrete — creating a hard, seamless surface that resists scratches, moisture, and most common food-grade chemicals. For restaurants and bars, this means surfaces that hold up through years of daily service.
Aesthetics: High gloss table top epoxy delivers a crystal-clear, mirror-like finish that enhances the natural look of wood grain or gives a sleek, modern appearance to otherwise plain surfaces. The visual upgrade alone can justify the investment for hospitality clients focused on ambiance.
Cost vs. Replacement: Refinishing a countertop with table top epoxy costs a fraction of full replacement. For a chain refinishing 50–200 table tops, the savings are substantial — often 60–80% compared to sourcing new solid wood surfaces.
Turnaround Speed: With the right product, curing times run 24–72 hours for light use and full cure in 7 days. This means minimal downtime for operating restaurants.
Key Product Specifications to Evaluate When Sourcing Table Top Epoxy
Not all table top epoxy products perform the same way in commercial settings. When requesting samples or quotes from suppliers, focus on these critical specifications:
1. Mix Ratio and Pot Life
Most commercial-grade table top epoxy systems use a two-part formula (resin + hardener). A 1:1 mix ratio by volume is easiest to manage for large-scale projects, reducing measurement errors. Look for a pot life of at least 30–40 minutes at room temperature — this gives applicators enough working time to cover large surfaces without rushing.
2. UV Resistance and Anti-Yellowing Performance
This is non-negotiable for any surface exposed to sunlight or artificial UV light. Ask suppliers for UV aging test data. A quality table top epoxy should maintain clarity and color stability for a minimum of 3–5 years under normal indoor light exposure. Request UV yellowing index data (ΔYI) if you’re comparing products technically.
3. Self-Leveling Properties
High gloss results depend on the resin’s ability to self-level after pouring. A viscosity range of 500–900 cps at 25°C is ideal for table top applications — fluid enough to spread and level, thick enough to stay on horizontal surfaces without running off edges. Always confirm the product is specifically formulated for horizontal pours, not vertical casting.
4. Coverage Rate
For budgeting purposes, confirm the coverage rate per unit. Typical table top epoxy covers 12–16 square feet per mixed quart at approximately 1/8 inch thickness. For large-volume procurement, negotiate pricing based on coverage needs, not just container volume.
5. VOC Content and Safety Compliance
For indoor commercial use — especially in food service environments — VOC levels matter. Check whether the product meets REACH or RoHS compliance standards if you’re operating in or supplying to European markets. For U.S. markets, look for low-VOC formulas that comply with local air quality regulations.
Procurement Considerations for Bulk Orders
When you’re buying table top epoxy at scale — whether for a renovation project across 20 restaurant locations or for a furniture factory producing 500 table tops per month — the procurement process requires more rigor than a single retail purchase.
Minimum Order Quantities (MOQ)
Most professional-grade epoxy manufacturers set MOQs starting at 200–500 kg per order. If your usage is consistent month over month, negotiate blanket purchase agreements to lock in pricing and ensure supply continuity. Spot-buying at scale is expensive and creates lead time risk.
Packaging Options
For bulk commercial use, request 5-gallon (20L) kits rather than smaller retail units. Larger packaging reduces per-unit cost and minimizes packaging waste on job sites. Confirm that Part A (resin) and Part B (hardener) are packaged in correct pre-measured ratios to reduce on-site mixing errors.
Lead Times and Inventory Planning
High gloss table top epoxy has a shelf life of 12–18 months when stored properly (sealed, away from heat and direct light). Plan procurement in 60–90 day inventory cycles to balance cash flow against the risk of stockouts during peak renovation seasons.
Technical Support from Supplier
For commercial projects, your supplier should offer more than just product — they should provide technical data sheets (TDS), safety data sheets (SDS), application guidelines, and ideally direct access to a technical team that can troubleshoot issues like fish-eyes, clouding, or adhesion failures. This is especially important when you’re training multiple application crews across different sites.
Application Best Practices for Large-Scale Projects
Even the best table top epoxy underperforms if applied incorrectly. Standardizing your application process across crews is critical for consistent results at scale.
Surface Preparation: Sand surfaces to 120–220 grit, remove all dust, and degrease with isopropyl alcohol. Any existing coatings, wax, or silicone contamination must be fully removed — these are the most common causes of fish-eyes and adhesion failure.
Temperature Control: Mix and apply table top epoxy at 65–80°F (18–27°C). Cold temperatures increase viscosity and slow curing; high temperatures accelerate gel time and may cause bubbling. For large-scale projects across different climates or seasons, brief your crews on ambient temperature requirements.
Mixing Protocol: Mix Part A and Part B thoroughly for 3–5 minutes, scraping the sides and bottom of the mixing container. Insufficient mixing is a leading cause of soft spots or sticky patches in the cured surface.
Bubble Removal: After pouring, use a propane torch or heat gun passed lightly over the surface to pop air bubbles. This step takes less than 2 minutes per table top and makes a significant difference in final clarity.
Dust Control: Epoxy surfaces attract dust during the cure window. Cover freshly poured surfaces with a tent or clean plastic sheeting — without touching the surface — to prevent debris from embedding in the finish.
Choosing the Right Table Top Epoxy Supplier
The global market for table top epoxy has grown significantly, with manufacturers across North America, Europe, and Asia offering competitive products. When evaluating a supplier — particularly for bulk procurement from overseas — consider the following:
Production Capacity: Can they fulfill large or recurring orders on schedule? Suppliers with dedicated manufacturing lines and monthly output in the hundreds of tons offer more reliability than smaller operations.
Quality Certifications: Look for ISO 9001 certification and ask for third-party test reports on UV resistance, hardness (Shore D), and heat deflection.
Private Label / OEM Options: If you’re building a brand in your market, sourcing a private-label table top epoxy from a capable manufacturer can be significantly more cost-effective than developing your own formula. Ask specifically about OEM capabilities, including custom labeling, formulation adjustments, and minimum order thresholds for branded products.
Sample Program: Any credible supplier should provide product samples before you commit to a bulk order. Test samples in your own application conditions — surface types, temperature ranges, and finish expectations that match your actual use cases.
Final Thoughts
Bulk countertop refinishing with high gloss table top epoxy is one of the most cost-effective ways to upgrade commercial interiors at scale. The key to success lies in choosing a product with the right technical specifications, working with a supplier who can support your volume and quality requirements, and standardizing your application process across teams.
Whether you’re a furniture manufacturer producing finished table tops for retail, a hospitality procurement manager coordinating multi-site renovations, or a distributor building out your product catalog, sourcing the right table top epoxy partner is worth investing time in upfront.
If you’re evaluating suppliers for your next project, we’d be happy to provide technical data sheets, samples, and pricing tailored to your volume requirements. Contact us to start the conversation.
Jinhua Resin | Professional Epoxy Resin Manufacturer | OEM & Bulk Supply Available
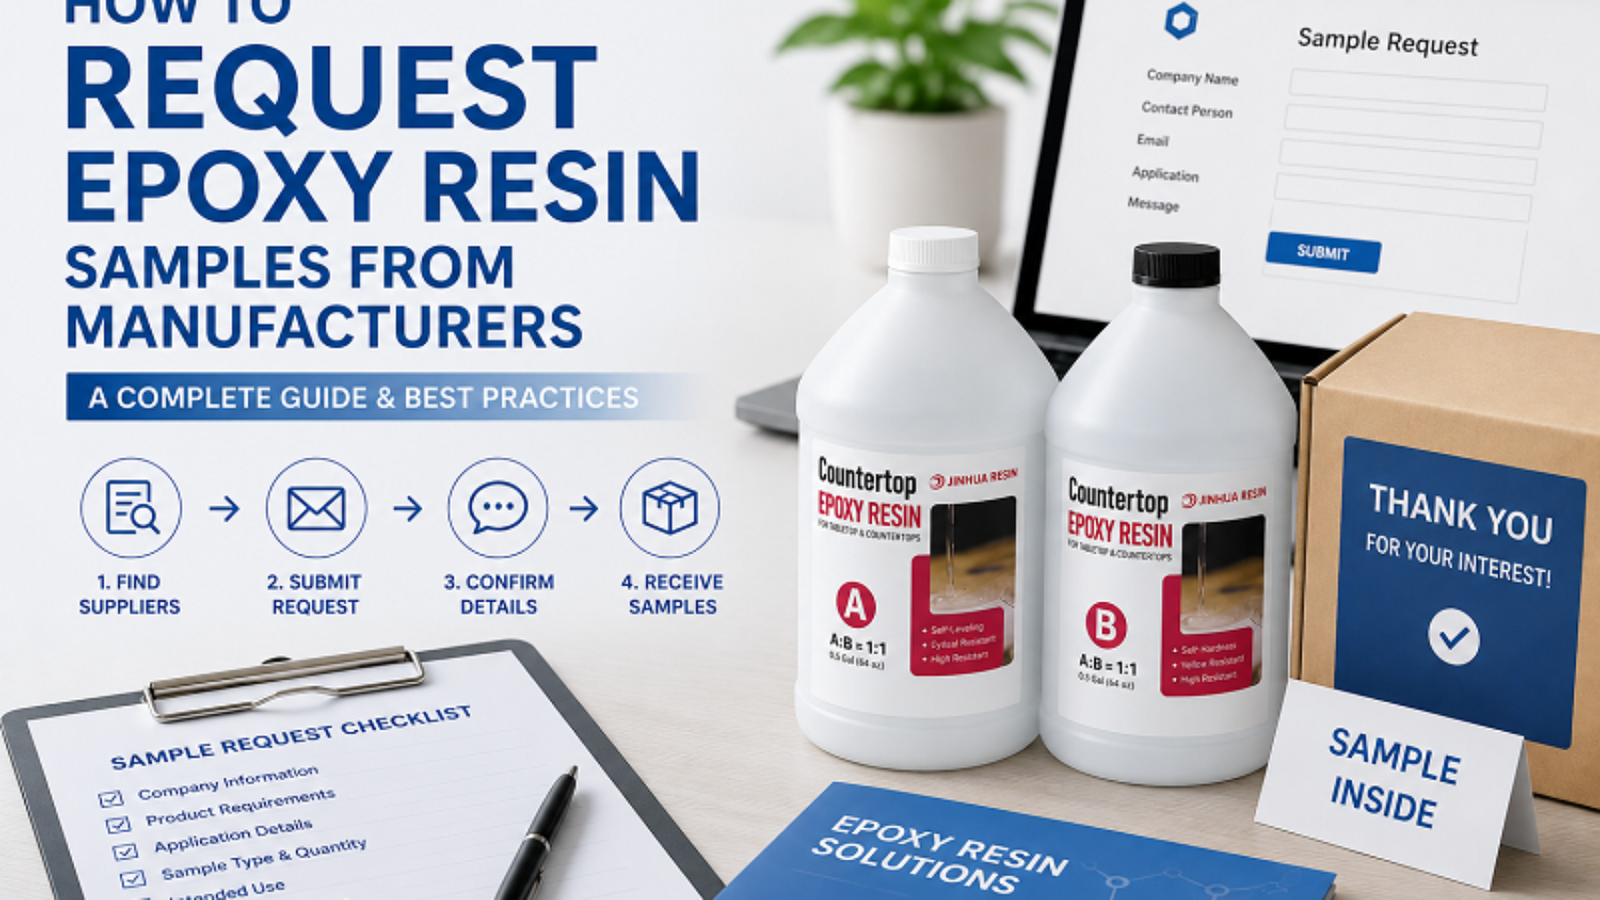
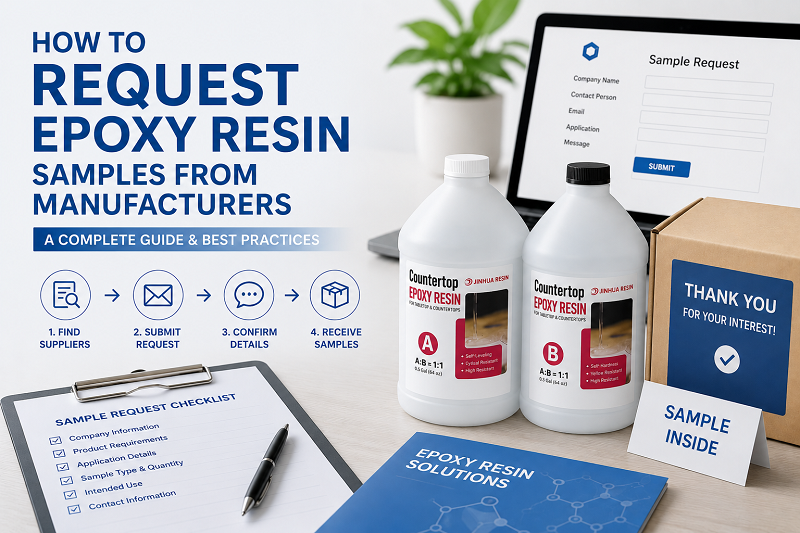
Procurement errors in industrial settings rarely originate at the purchase order. The damage is usually done earlier — a buyer waves off the sample stage, rushes through testing, or fires off a request so thin on detail that the supplier ships whatever clears the warehouse rather than what the job actually calls for.
Getting samples from an epoxy resin manufacturer is not a box to check. When the process is taken seriously, it’s the single most effective way to de-risk a supplier relationship before any real money changes hands. What follows is a practical walkthrough — from the first contact through the final go/no-go call on a bulk order.
Step 1: Lock Down Your Application Requirements Before Reaching Out
The evaluation process breaks down more often because of misaligned expectations than because of bad product. Vague requests produce irrelevant samples. Before you type a single word to a supplier, get the following on paper:
What the resin is actually doing. Floor coating, composite laminate, electronics potting, adhesive, casting — these aren’t variations on the same need. They pull the resin system in completely different directions. A viscosity that flows cleanly through a vacuum infusion setup is wrong by an order of magnitude for a deep pour casting.
The parameters you can’t compromise on. Write out the non-negotiables: viscosity window, pot life, cure schedule, glass transition temperature (Tg), chemical resistance profile, mechanical specs like tensile strength or Shore D hardness. If you’re not yet working with exact figures, describe the operating environment and let the manufacturer’s technical team take a first pass at a starting spec.
Your processing reality. What mixing equipment are you running? What does temperature and humidity look like on your floor? Does your production schedule impose hard windows on cure time? The answers shape which hardener grade makes sense and whether the product can be run in your actual environment — not a controlled lab somewhere else.
Compliance requirements upfront. Food-contact, REACH, RoHS, flame retardancy, UL listing, MIL-SPEC — if any of these apply, lead with them. There’s no value in testing a sample that can’t clear your compliance bar regardless of how well it performs.
Having all of this ready before you contact an epoxy resin manufacturer signals that you’re a serious buyer, cuts down the back-and-forth considerably, and meaningfully raises the odds that what shows up is actually worth testing.
Step 2: Narrow the Field Before Requesting Anything
Blasting sample requests to a dozen suppliers at once looks efficient. It rarely is. The responses come back at different levels of quality, in different formats, with different levels of detail — useful comparison becomes nearly impossible, and it tells any manufacturer worth working with that your evaluation process isn’t particularly structured yet.
A more productive approach: apply minimum qualification criteria to get down to two or three epoxy resin manufacturers before a single sample request goes out.
Production capacity that matches your forecast. A manufacturer already running close to full capacity isn’t a stable long-term partner regardless of product quality. Ask early.
Documentation without conditions. A credible epoxy resin manufacturer hands over a TDS and SDS without needing a purchase commitment first. If basic technical documents come with strings attached, that’s worth noting.
Demonstrated experience in your sector. Certifications, published case studies, and verifiable customers in your application area carry more weight than general capability claims. Anyone can write a brochure.
How the first contact actually went. Response time matters, but so does response quality. Did they address your application directly, or did a generic catalog land in your inbox? Pre-sale communication style tends to mirror post-sale support.
Step 3: Write a Request That Gives the Supplier Something to Work With
Most sample requests fail the supplier before the evaluation even starts. Not enough context means they can’t send the right product. A tight, well-structured request removes guesswork and signals that you intend to take the evaluation seriously.
Cover these points:
Who you are and what the resin is for. A sentence or two. You don’t need to hand over proprietary details — a functional description of the application is enough for them to understand what they’re matching to.
The grade or category you want to test. If you have a target spec, name it. If you’re still open on grade, lay out the performance requirements and ask them to recommend the closest fit.
How much material you need. Size the request to support real testing. For most industrial evaluations, 500g to 2kg per component — resin and hardener separately — is a workable floor. Too little and you can’t run the tests properly; too much and neither side benefits from the excess.
The documents you expect with the shipment. TDS and SDS for the specific product being sent, plus a Certificate of Analysis (CoA) for the production batch the sample is drawn from. A CoA gives you actual measured values for that material — not just the published specification envelope.
Your decision timeline. State when you expect to finish evaluation and make a call. A real deadline tells them the process is genuine, and that your request is worth prioritizing.
Shipping logistics and import constraints. Epoxy components ship as chemicals. Depending on where you’re receiving them, there may be restrictions, documentation requirements, or preferred carrier arrangements worth confirming before anything leaves the warehouse.
Step 4: Watch What the Manufacturer Does Before the Sample Ships
The window between receiving your request and putting a package on a truck tells you quite a bit about an epoxy resin manufacturer — sometimes more than the sample itself.
Do they ask clarifying questions? A supplier who comes back with follow-up questions about your application cares about sending the right product. One who ships immediately without asking anything is probably sending what’s convenient.
What does the documentation look like? The TDS that ships with the sample should carry actual test values, not just specification ranges. If viscosity reads “500–2000 cPs” with no measured value for the batch in hand, ask for the CoA before you go any further with testing.
Is there a named technical contact? Someone you can call or email during the evaluation period who can actually answer application questions — not just forward tickets. This matters more than buyers typically expect. Problems surface during sample testing, and the quality of the answers you get shapes how much you trust the relationship going forward.
Step 5: Test Under Conditions That Reflect Your Actual Process
This is where evaluations most often fall short. Running a sample in a clean lab under controlled conditions generates data that won’t predict what happens when the material hits your production floor.
Replicate your real process environment. Use the same mixing equipment, the same substrate, the same ambient temperature and humidity. If your facility runs at 15°C through the winter, don’t test at 23°C and call it representative.
Measure what actually matters for your application:
Viscosity — at your working temperature, using a Brookfield viscometer. Confirm the material can be processed by your existing equipment without modification.
Pot life and gel time — again, at your working temperature. A product with a 45-minute pot life at 25°C can gel in under 20 minutes at 35°C. TDS values are typically measured at laboratory standard conditions, not yours.
Cure profile — verify the material achieves adequate cure under your actual schedule. If a post-cure is called for, check whether it fits your line timing.
End-use properties — hardness, adhesion to your specific substrate, chemical resistance if relevant, and whatever mechanical properties your application specification requires.
Keep a complete record. Batch numbers, processing conditions, ambient temperature and humidity, every measured result. This becomes the reference baseline for incoming bulk material — and your best tool if a later shipment doesn’t match what you approved.
Step 6: Probe Consistency Before You Sign Off on the Supplier
One good sample is not a guarantee. Before a supplier earns approved status, ask these questions directly and pay attention to how they answer:
What are your internal limits on batch-to-batch variation for viscosity and epoxy equivalent weight? A well-run epoxy resin manufacturer holds tighter internal tolerances than the published TDS range and won’t hesitate to share them. Vague answers here are meaningful.
Do you retain reference samples from each production batch? Retained samples are what make root cause analysis possible when a production lot comes in off-spec. No retention program means no paper trail if something goes wrong.
Walk me through your in-process QC checkpoints. The answer should name specific tests — peak exotherm measurement, viscometry, equivalent weight titration are standard in well-run facilities. Generic language about “rigorous quality management” isn’t an answer.
Consistent, specific, confident responses to these questions tell you something real about the reliability of the production process behind the sample you just tested.
Step 7: Close the Loop — Either Way
Once the evaluation is done, go back to the manufacturer with a clear outcome — pass or fail. If the sample holds up, move toward a qualification order and open the commercial conversation. If it doesn’t, be specific about what fell short. Which parameter. By how much. Under what conditions.
That specificity does two things: it gives the manufacturer a real shot at recommending a better-fit grade, and it keeps the door open for a future evaluation if your requirements evolve. Walking away without feedback costs both parties something.
A responsive epoxy resin manufacturer who engages seriously with test results — especially failure data — is showing you something important about how they’ll handle problems when they arise at volume.
Quick Reference: What a Solid Sample Request Process Looks Like
Stage
What You’re Doing
Watch Out For
Pre-request
Application specs documented in writing
Vague specs lead to wrong samples
Shortlisting
2–3 manufacturers qualified on docs and responsiveness
Slow or generic replies signal weak support
Sample request
Context provided, grade specified, TDS + CoA requested
Manufacturer who asks follow-up questions
Pre-shipment
Documentation reviewed before sample arrives
CoA absent, or TDS with ranges only
Testing
Run under real production conditions
Lab-only testing produces misleading results
Consistency check
QC process and batch retention policy confirmed
Vague answers = production risk
Decision
Specific technical outcome communicated
Keeps the relationship viable for future rounds
The sample request process is a working preview of the supplier relationship. An epoxy resin manufacturer who handles it with clear communication, honest documentation, and genuine technical engagement is telling you something about how they’ll behave when a problem lands on your desk at volume. That track record starts accumulating before the first order is placed.
Users interested in epoxy resin products are welcome to request samples from jinhuaresin. We are committed to serving you with professionalism and technical expertise at every step.
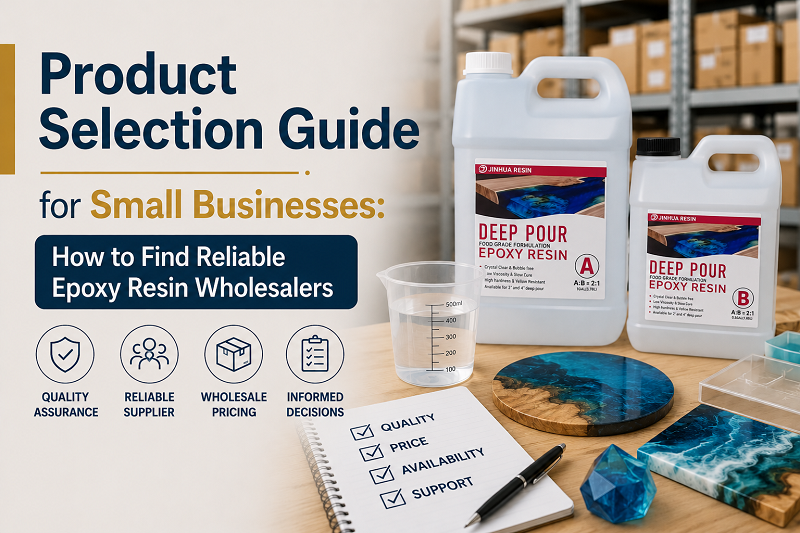
Running an epoxy resin business sounds easy enough — right up until you try to buy materials at any real volume. The distance between picking up a gallon kit online and placing your first wholesale order is wider than most small business owners expect. MOQs run from 1 kilogram to 500. Quotes swing wildly between suppliers. And working out whether a source is genuinely trustworthy takes a lot more than scanning through Amazon listings or a polished Alibaba storefront.
This guide is for owners who are done with retail sourcing and ready to do this properly. River table shops, resin art sellers, flooring crews, product-line builders — the approach is the same across the board. Find the right supplier by asking the right questions first, before any money changes hands.
Price Is Rarely What Gets You
It’s an easy trap to fall into — leading with cost. Wholesale epoxy resin quotes between suppliers can swing 30–60%, and when margins are tight, that number grabs your attention. But price is almost never the thing that actually derails a small business.
What causes real damage is unpredictability. A batch that behaves differently from the last one. A shipment that shows up three weeks behind schedule. A supplier who answered every message promptly until after your first payment cleared. Those problems cost significantly more than the few dollars per kilogram you saved by going with the lowest quote.
Reliability, supply consistency, and how a company responds when something goes sideways — these are what actually matter in a supplier relationship, especially for businesses operating without deep inventory buffers or cash reserves.
The goal here isn’t the cheapest epoxy resin wholesaler on the market. It’s the one worth building something with.
Step 1: Get Your Requirements on Paper First
Before you approach a single supplier, spend twenty minutes writing down what you actually need. Vague inquiries invite vague responses — and vague responses waste everyone’s time.
Usage volume and reorder frequency. How much are you going through each month, in kilograms or gallons? How often do you want to restock? If you’re currently using 20 kilograms a month, a supplier with a 500kg floor isn’t a match — regardless of what their pricing looks like.
Product type and spec. Epoxy isn’t one thing. Table top, deep pour, self-leveling floor coat, UV-cure, marine grade — each is a distinct formulation. Know which you need, and if you have requirements around viscosity, mix ratio, pot life, or cure time, write those down too.
Certifications you’ll need. Selling into the US or EU, or working in a regulated application like food contact surfaces, electronics, or marine? You’ll need paperwork. ISO 9001 is the baseline. RoHS and REACH matter for electronics and consumer goods. Not every epoxy resin manufacturer keeps this documentation current and accessible — worth checking early.
Packaging format. 5-gallon pails, 55-gallon drums, something in between? The format affects unit economics and storage practicality both. Not every epoxy resin manufacturer ships in every configuration.
Step 2: Where to Actually Look
The sourcing landscape looks different than it did five years ago. Fewer cold calls and trade show business cards; more platforms and direct outreach. More options overall, but also considerably more noise.
B2B platforms. Alibaba, Made-in-China, and Global Sources collectively list thousands of epoxy resin suppliers, the majority based in China — which dominates global production. Guangdong, Jiangsu, and Zhejiang are the main manufacturing regions; Guangdong’s port access makes it a strong export base, while Jiangsu’s established chemical infrastructure keeps production capacity consistent. These platforms are worth using as a starting point. Just treat every listing as a lead that still needs to be qualified — not a vetted supplier.
Trade shows. Major chemical industry events in Asia and Europe give you direct access to epoxy resin manufacturers showing their latest products in person. For small businesses, these are often where the most durable long-term relationships begin. An hour of face-to-face conversation moves faster than a week of email back-and-forth.
Going direct to manufacturer websites. Many established epoxy resin manufacturers run their own wholesale and OEM inquiry pages. Cutting out the platform middlemen typically means better pricing, cleaner communication, and access to technical support that a reseller simply can’t offer.
Word of mouth. If you’re active in any maker community — woodworking forums, flooring contractor groups, resin art circles — ask who people are actually buying from. A personal recommendation from someone running a similar operation is worth more than any directory listing.
Step 3: Do Your Homework Before Placing an Order
Once you have a shortlist, do the work before committing. A few hours of due diligence now is worth considerably more than the months of frustration it replaces.
Request documentation upfront. Any serious epoxy resin manufacturer should hand over a Technical Data Sheet (TDS) and Certificate of Analysis (COA) without you having to push for it. Key specs to look at: epoxy equivalent weight, viscosity range, hydrolysable chlorine content, volatility. A supplier who hesitates on basic documentation isn’t one you want holding your supply chain.
Ask specifically about batch consistency. This separates production manufacturers from trading companies that are just reselling someone else’s product. What does their QC process actually look like? How do they verify batch-to-batch consistency? Do they retain samples? A real epoxy resin manufacturer answers these questions with specifics.
Watch how they communicate. How long did the first reply take? Do their technical answers actually address what you asked? A supplier who’s slow or vague before the sale will be slower and vaguer once you’ve paid.
Find verifiable references. Case studies, third-party reviews, direct customer references. An epoxy resin manufacturer with a real production track record behind them carries less risk than a newer operation with aggressive pricing and no history you can check.
Order samples before committing to volume. Test the actual product in your actual workflow — pour it, cure it, push it. No TDS substitutes for that.
Step 4: MOQ Is Negotiable More Often Than You’d Think
Minimum order quantities are the most common sticking point for small businesses trying to enter the wholesale market. The reality is more flexible than it used to be.
Historically, many suppliers on platforms like Alibaba structured their MOQs around industrial buyers — hundreds or thousands of kilograms as a starting point. That’s still true for some. But a growing number of epoxy resin manufacturers have adjusted their programs to include small business tiers, because they’ve recognized that smaller accounts that grow over time are worth having.
When you’re looking at MOQ terms, push past the headline number:
Can you combine multiple products to hit the threshold?
Is the MOQ calculated per SKU or across the whole order?
Do they have tiered pricing that improves with volume, without requiring large upfront commitments?
Will they lower the MOQ for a first order if you’re willing to commit to a reorder schedule?
A supplier who’s genuinely interested in a long-term relationship will find a way to make the first order work. One who won’t move on anything is built for industrial accounts — probably not the right fit for where you are now.
Step 5: The First Order Is Just the Beginning
The best wholesale partnerships for small businesses aren’t transactional — they’re operational. When you’re evaluating an epoxy resin manufacturer, the real question is whether this is a company you can still be working with three years from now.
Accessible technical support. A good supplier can help you choose the right product for a new substrate, troubleshoot a curing issue, or work through an application problem. For businesses without an in-house chemist, that kind of support has real practical value — particularly when you’re scaling or taking on a new product category.
Room for custom formulations. As your volume grows, the ability to work directly with an epoxy resin manufacturer on viscosity, cure time, or colorant requirements becomes a genuine competitive edge. Not everyone offers it. But knowing whether it’s possible down the road matters when you’re choosing who to grow with.
OEM and private label capability. Building a brand rather than just consuming resin as an input? Look for an epoxy resin manufacturer with real OEM capacity. Your own labeled product changes the margin structure and brand perception considerably.
Pricing that scales with you. Does the supplier show you a clear pricing roadmap tied to volume? A good epoxy resin manufacturer tells you what the price looks like at 100kg, at 500kg, at 1000kg — not just quotes a one-time number and leaves it there. Knowing what growth means for your unit economics matters.
The Checklist: What a Reliable Epoxy Resin Wholesaler Actually Looks Like
Before finalizing any supplier, run through this:
✅ ISO 9001 certified at minimum; REACH / RoHS / FDA docs available on request
✅ TDS and COA provided without being asked twice
✅ Documented batch consistency process and QC records
✅ Responds to B2B inquiries within 24 hours
✅ Sample order available before MOQ commitment
✅ Flexible or negotiable MOQ for first orders
✅ Clear, tiered volume pricing — not just “contact us”
✅ Verifiable customer references or published case studies
✅ Post-purchase technical support included
✅ Open to custom formulation or OEM conversation as volume increases
Worth Saying Once More
Finding a reliable epoxy resin wholesaler takes more upfront work than retail ever did. But for any small business planning to stay in this space beyond a few months, that work pays off. The right epoxy resin manufacturer doesn’t just lower your material costs — they give you a stable supply chain, real technical backing, and a partner that’s actually invested in your operation running well.
Map your requirements first. Build a shortlist and qualify it properly. Sample before you commit. And when you find a supplier who communicates straight, delivers what they promised, and takes a small order as seriously as a large one — that relationship is worth protecting.
If you’ve been buying epoxy resin off the shelf — or clicking “add to cart” on Amazon — there’s a good chance you’re leaving serious money on the table. Flooring contractors, river table builders, resin artists, and small business owners all face the same fork in the road: pay retail prices for convenience, or commit to wholesale and pocket the difference?
Here’s the short answer: go wholesale when you can. Per-kilogram costs often drop by 30% to 60% compared to retail. The rest of this article explains exactly why that gap exists, who stands to benefit most, and what to actually look for when vetting an epoxy resin manufacturer for a long-term supply deal.
The Numbers Don’t Lie
Pricing data from early 2026 tells a pretty clear story. On the wholesale side, industrial buyers sourcing directly from an epoxy resin manufacturer are typically paying somewhere between $1.87 and $4.32 per kilogram — with the lower end driven by Chinese and Northeast Asian export quotes, and US or European buyers generally landing in the $3.00–$4.50/kg range depending on volume and spec.
Retail? A different world entirely. Factor in branding, small-batch packaging, and distributor margins, and you’re looking at $8 to $20+ per kilogram — with art-grade or specialty resin pushing even higher.
That’s not a small gap. For the same raw chemistry, retail buyers routinely pay two to five times more per kilogram than their wholesale counterparts. Distribution layers, retail markup, and packaging together pile on an extra 20–40% above the manufacturer’s base cost.
The real-world math: swap out 55 gallons of retail kit purchases for a direct wholesale order, and most buyers save 30–50% or more on total spend. For anyone running through significant monthly volume, that compounds fast over a year. Exact figures vary by formulation, brand, and shipping destination — which is why getting a direct quote from an epoxy resin manufacturer is always worth the five-minute email.
What’s Actually Driving Retail Prices Up
It helps to understand where the markup comes from, because it’s not all profit — some of it is real cost that wholesale sidesteps entirely.
Container sizing. Quart and gallon containers cost more to produce, fill, and label per unit of resin than a 55-gallon drum. You’re essentially paying a packaging tax on every small-format purchase.
Marketing spend. Consumer resin brands run Instagram ads, sponsor YouTube tutorials, and pay Amazon fees. That’s real money — and it gets baked into the price you pay.
The distribution chain. Every hand the product passes through between the epoxy resin manufacturer and your door takes a cut. Wholesale eliminates most of those steps.
Niche formulation premiums. Pre-tinted resin, UV-stabilized art resin, countertop-specific kits — the marketing category adds price even when the underlying chemistry isn’t dramatically different. Sourcing direct from an epoxy resin manufacturer lets you spec the formulation you actually need without paying for positioning.
Who Actually Wins with Wholesale
Not everyone needs a pallet of drums. But if any of the following sounds familiar, the math is probably already working in wholesale’s favor:
High-volume and consistent users. Pouring 5+ gallons a month — for floors, castings, furniture, or anything else — means your monthly spend compounds fast at retail rates. Most epoxy resin manufacturers have MOQ requirements, but the industry has shifted: many now start wholesale programs at 15–20 units, which is accessible for smaller operations.
Product sellers. River table makers, resin art sellers, and surface coating businesses live or die by margins. Sourcing direct from an epoxy resin manufacturer instead of restocking at retail is one of the fastest margin levers available.
Contractors and installers. A mid-size flooring job can burn through 30–60 gallons in a week. Paying retail on that volume is a real hit to job profitability. Drum pricing exists precisely for buyers like this.
Anyone who needs batch consistency. Retail stock rotates. Colors shift. Cure times vary between lots. A direct account with an epoxy resin manufacturer locks in batch-to-batch consistency — which matters enormously if you’re matching finishes or scaling production.
The Value That Has Nothing to Do with Price
Cost is only part of it. Buyers who’ve made the switch to direct wholesale sourcing tend to mention a few things that don’t show up on a price sheet:
Custom formulations. Need a specific viscosity, a longer open time, or a particular shore hardness? Many epoxy resin manufacturers will dial in formulations for volume buyers. Some offer full OEM private label if you’re building a product line. That conversation doesn’t happen with a retail supplier.
Real technical support. A wholesale account with an epoxy resin manufacturer usually comes with access to actual engineers — people who can walk you through a fisheye problem, recommend the right primer for a tricky substrate, or help you optimize a pour schedule. Retail customer service isn’t built for that.
Less packaging waste. Bulk drums generate a fraction of the plastic and cardboard waste of equivalent retail volume. For businesses tracking their environmental footprint, this adds up.
Simpler procurement. Thirty separate online orders a quarter is a time drain. One bulk PO to an established epoxy resin manufacturer, with palletized delivery and a predictable lead time, is just easier to manage.
When Retail Is Still the Right Call
Wholesale isn’t for everyone. Stick with retail if:
You’re a hobbyist or DIYer with occasional, small-scale projects
You’re trialing a new resin type before committing to volume
You need a very specific pre-mixed or pre-colored consumer product
Import costs or minimum freight charges eat up the savings
The principle is simple: pay for retail convenience when you genuinely need it. Stop paying for it when your volume says otherwise.
Vetting an Epoxy Resin Manufacturer: What to Actually Check
Finding a wholesale supplier takes more than a Google search. Here’s what separates reliable partners from risky ones:
Certifications. ISO 9001 is the floor. For anything touching food surfaces, going into electronics, or crossing into EU or US regulated markets, you’ll want to verify FDA, REACH, and RoHS compliance upfront. A serious epoxy resin manufacturer will have documentation ready.
Published pricing structure. Legitimate wholesale programs show you tiers. If the only answer you get is “send us your requirements,” that’s not necessarily a red flag — but press for actual numbers before you commit.
Sensible MOQ thresholds. Small businesses should look for an epoxy resin manufacturer that doesn’t gate wholesale access behind container-load minimums. Reasonable entry points exist — find a supplier who’s actually interested in growing with you.
Track record you can verify. Case studies, third-party reviews, industry references. An epoxy resin manufacturer with 20+ years in production carries less execution risk than a low-price newcomer with a polished website and no history.
Range depth. Deep pour, table top, self-leveling floor coat, marine grade, UV-cure — can they supply what you need now, and what you might need as your business evolves? A one-product manufacturer creates a sourcing headache down the road.
Wrapping Up
The wholesale price advantage is real — typically 30% to 60% lower per unit than retail. But the smarter argument for going wholesale isn’t just the discount. A direct relationship with a quality epoxy resin manufacturer brings consistency, technical depth, custom formulation options, and a supplier that’s genuinely invested in your success.
If retail epoxy purchases are running past $500 a month, that’s the signal to start making calls. Map out your monthly volume, get quotes from a few epoxy resin manufacturers, and line up the numbers against what you’re spending now. Most buyers find the switch pays for itself on the very first order.
Walk any production floor long enough and you’ll hear the same complaint: air pockets. They show up uninvited in floor coatings, composite layups, and electronics potting assemblies alike — and once they’re locked into a cured part, there’s no easy fix. For sourcing teams that work directly with an epoxy resin manufacturer, knowing the mechanics behind bubble formation is every bit as valuable as negotiating price or confirming lead times.
What follows is a hands-on breakdown of where air actually comes from in an epoxy system, what reliably gets rid of it, and which process variables to watch so the problem doesn’t keep coming back.
Where the Air Actually Comes From
Blaming “bad technique” rarely solves anything. Bubble problems tend to trace back to one of four specific sources, and identifying which one you’re dealing with changes what you do next.
Mixing turbulence. The moment you combine the resin and hardener, you’re creating opportunities for air entrapment. High-speed stirring is the main culprit — it whips the two components together rather than folding them, and the result is a mixture laced with micro-bubbles that the material’s viscosity then holds in suspension.
Substrate outgassing. Concrete, timber, open-cell foam, and bare metal all behave the same way under warm resin: they breathe. Moisture and trapped gas work their way toward the surface, punching through the wet film and leaving craters or pinhole clusters behind. This catches a lot of installers off guard because the surface looked perfectly dry before they started.
Temperature mismatch. Lay cold resin over a warm slab — or the reverse — and the thermal gradient drives convection through the liquid. Air gets pulled along for the ride, rising in columns that stall just below the gel point if the temperature window closes too fast.
Viscosity that won’t let go. Thick systems simply don’t have the flow behavior needed to let bubbles climb out on their own. They form during mixing and stay exactly where they formed. The resin gels around them before gravity has a chance to do anything useful.
Sorting out which category you’re in is the diagnostic first step. A well-documented epoxy resin manufacturer will have the TDS data to help you assess this — viscosity curves, pot life at temperature, and gel time windows are all clues worth looking at before you change anything else.
Step One: Attack the Problem at the Mixing Stage
Remediation after the fact is always harder than prevention during prep. These habits at the mixing stage make everything downstream easier.
Slow the paddle down. Three hundred to four hundred RPM on a paddle mixer is enough to achieve a thorough blend. Anything faster introduces more air than it’s worth. The motion you want resembles folding batter, not beating eggs.
Scrape the container walls twice. Resin that clings to the sides doesn’t just miss the hardener — it creates pockets of incompletely reacted material that show up later as soft spots or voids. Run a flat scraper along the bottom and sides at the halfway point of your mix time, then again at the end.
Transfer to a second container. It sounds like extra work, but pouring the blend into a fresh vessel and stirring briefly a second time eliminates the unmixed film left behind by the container walls. Professional composite shops do this as a matter of routine.
Bring the resin up to temperature first. Part A sitting at 18°C has noticeably higher viscosity than the same material at 28°C. A short warm-water bath before you open the lid drops the viscosity enough that bubbles climb out far more willingly during and after mixing. Always cross-check the epoxy resin manufacturer‘s processing window — not every chemistry tolerates the same range.
Pull a vacuum when the application demands it. For cast optical components, electrical potting, and anything where a single visible void would mean scrapping the part, vacuum degassing is non-negotiable. Five to ten minutes in a chamber at moderate vacuum removes nearly all entrained air before the material ever reaches the mold. Aerospace and high-reliability electronics manufacturers treat this as standard, not optional.
Step Two: Deal With What Surfaces After Pouring
Even a well-mixed batch will push some air to the surface during its open time. These techniques handle what’s left.
A torch pass, done correctly. A propane or butane torch swept quickly across the surface — never lingering — lowers the local surface tension just enough for bubbles to rupture and the film to close over. The key word is quickly. Dwelling in one spot scorches the surface and can drive yellowing into the cured film. For large industrial pours, a radiant heat lamp gives more even coverage with less operator variability.
A heat gun for thinner systems. Set somewhere between 50 and 60°C, a heat gun works more gently than open flame and suits formulations that are touchy about thermal shock. It takes a bit longer, but it’s a better fit for thin flood coats over decorative substrates where scorching would be visible.
An IPA mist for pigmented work. A light pass of 90-plus percent isopropyl alcohol over the surface breaks tension and pops bubbles without adding heat to the equation. This matters when you’re working with colored pours where a torch could alter the pigment distribution. Keep the application thin — soaking the surface with IPA creates its own problems at the cure line.
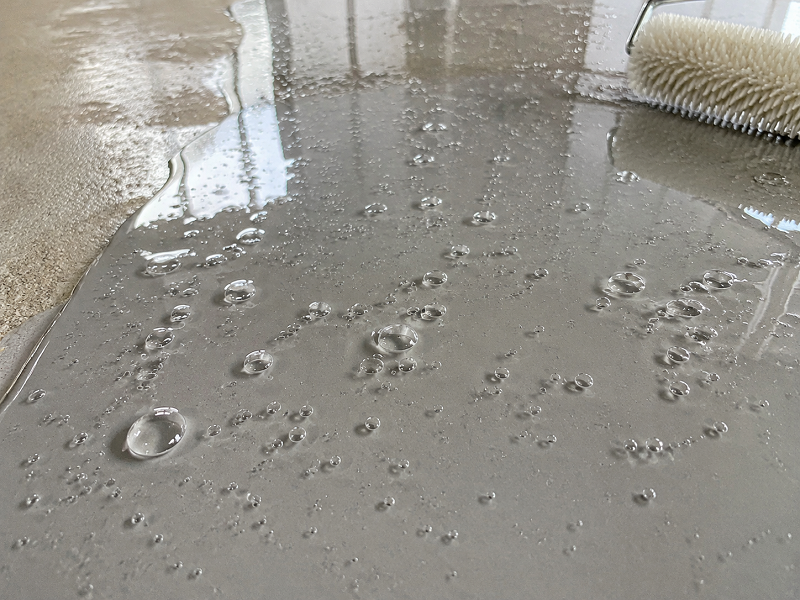
Mechanical spreading on horizontal surfaces. On floor applications, a notched squeegee or short-nap roller run across the wet surface shortly after pour does double duty: it breaks near-surface bubbles mechanically while leveling the coating at the same time.
Step Three: Manage the Environment
The room you’re working in has more influence on bubble outcomes than most people account for.
Get the substrate temperature right. The surface you’re coating should sit at least 3°C above the dew point and within a 15 to 25°C band. Cold substrates don’t just slow bubble rise — they can trigger condensation at the interface, which turns into a different set of adhesion problems entirely.
Seal porous surfaces before the main coat. A thin pass of low-viscosity primer over concrete or timber closes the pores that would otherwise keep releasing gas into your topcoat. Many epoxy resin manufacturers that supply industrial floor systems offer primer grades specifically designed for this step — it’s worth asking your contact whether the system you’re using was designed to be applied directly or over a sealed base.
Keep humidity in check. Amine-based hardeners are particularly sensitive to moisture in the air. Above 75% relative humidity, you start seeing surface bloom, cloudiness, and micro-blistering alongside the bubble issues. If you can’t control the space, choose a moisture-tolerant hardener grade — most epoxy resin manufacturers offer options rated for higher-humidity installation conditions.
Hold temperature steady through the cure window. A pour that gels in a 22°C room and then cools to 14°C overnight because the heating went off will move through thermal contraction that can reopen voids already partially healed. Consistent ambient temperature through the initial cure period pays dividends in surface quality.
Step Four: Match the Resin to the Job
This is the lever that gets underused most often. Choosing a formulation that was designed for your specific application scenario removes a lot of the struggle from the other steps.
Low-viscosity infusion grades are built around air release. Their entire processing logic — vacuum infusion, resin transfer molding — assumes that air is being actively evacuated. The flow characteristics of these materials let them wet out fiber reinforcement with minimal air entrapment at the fiber-resin boundary.
Self-leveling floor systems typically include surfactant packages that help the wet film shed bubbles at the surface without operator intervention. The bubble behavior in a purpose-built flooring resin looks very different from what you’d get using a casting grade on a horizontal pour.
Extended pot life or low-exotherm systems buy time. Slower hardeners let the material stay fluid long enough for bubbles to find the surface before the viscosity climbs. This matters most in thick section pours, where the combination of depth and exotherm in a standard system can lock air in place before it has anywhere to go.
A epoxy resin manufacturer worth working with will ask about your application before recommending a grade. When you reach out for samples or pricing, bring the specifics: how you’re applying it, what substrate you’re going on, how thick the pour is, and what the ambient conditions look like. That information changes the recommendation.
When the Problem Keeps Coming Back
Systematic bubble defects after best-practice processing usually point to something in the environment or the substrate that hasn’t been addressed. This table maps the common patterns:
What You’re Seeing
Most Likely Source
Where to Start
Bubbles appearing 2–4 hours after pour
Substrate still outgassing
Primer coat; slow down moisture cure on slab
Air concentrated near the bottom of a cast part
Mold or substrate below ideal temperature
Preheat to 20–25°C before pouring
Uniform bubble distribution throughout the pour
Mixing introduced the air
Drop RPM; switch to two-container method
Pinhole clusters on a floor surface
High ambient humidity during application
Dehumidify; swap to moisture-tolerant hardener
Bubbles return after torching
Substrate outgassing not stopped
Seal substrate; reduce single-pour depth
If none of these adjustments moves the needle, the conversation needs to shift to chemistry. Get a technical rep from your epoxy resin manufacturer on-site or on a call. The better suppliers keep application engineers available for exactly this — someone who can look at your batch records, walk your process, and figure out whether the formulation, the substrate, or the environment is the root cause.
What to Take Away From This
Reliable, bubble-free results don’t come from one technique. They come from four things working together: a formulation selected for the application, a mixing process that doesn’t introduce air unnecessarily, a substrate that’s been prepared to stop outgassing, and an environment that stays stable through the cure.
For industrial buyers, that starts at the sourcing stage. The epoxy resin manufacturer you work with should be able to hand you a TDS with real processing parameters, connect you with technical support when something goes wrong, and offer grades that fit your actual process rather than the nearest shelf product. Before committing to volume, run a documented trial under your real conditions — temperature, substrate, equipment, crew. What works in a controlled lab setting often behaves differently when it meets a real job site.
Bubble problems are fixable. But they’re fixed most efficiently by people who understand what caused them — not by running the same process harder and hoping for a different result.
Here’s something most first-time buyers find out the hard way: the resin that gave your bar top a flawless finish will likely crack, cloud, or overheat the moment you try to use it for a river table. These are different materials solving different problems, and lumping them together under “epoxy resin” is where projects go sideways before they even start.
Deep pour epoxy resin has one job — handling thick, single-pass casts cleanly. Getting that job right involves more than just picking the highest-reviewed product on a supplier’s website. This guide breaks down what actually separates a solid deep pour epoxy from one that looks good on paper, what to watch for when comparing specs, and the mistakes that catch out even experienced woodworkers and resin artists.
So What Actually Makes Deep Pour Epoxy Different?
The short version: chemistry designed around heat management.
When epoxy cures, it generates heat. In thin coats, that heat escapes quickly and nothing bad happens. Push the same formula into a 3-inch-deep mold and the heat has nowhere to go — it builds up in the center of the pour, causing the resin to crack, go yellow, or develop a foggy haze through the middle. The finished piece looks fine on the outside and is ruined on the inside.
Deep pour epoxy resin — also sold as casting resin or thick-set epoxy — gets around this with a slower-reacting hardener and a lower-exotherm formula. The curing reaction still produces heat, but it’s spread out over a longer window, giving it time to dissipate before it concentrates enough to do damage. The tradeoff is cure time: where a surface coat might be touch-dry in 12 hours, a proper deep pour epoxy typically needs 48 to 72 hours before it can be demolded, and a full 7 to 14 days before it reaches its working hardness.
Standard tabletop epoxy maxes out around a quarter inch per layer. A good deep pour epoxy resin handles 2 to 4 inches in a single pass. Industrial formulas go further — some push to 6 or even 8 inches — but those are purpose-built for specific commercial applications, not general woodworking.
What to Actually Look at When Comparing Products
Most product pages lead with pour depth. That’s fine, but it’s only one piece of the picture — and it’s also the number most likely to be inflated. Here’s what deserves equal attention.
Pour depth — but verify it. A stated 4-inch pour depth is only meaningful if it holds up across real working conditions, not just a controlled lab pour at optimal temperature with a small volume of resin. The brands worth trusting publish a technical data sheet (TDS) that specifies pour depth alongside pour volume limits and temperature ranges. If that documentation doesn’t exist, treat the headline claim with skepticism.
Viscosity — the spec most people skip. For deep pour epoxy, viscosity in the 200–600 mPa·s range is where you want to be. Low-viscosity resin flows into tight gaps, wraps around embedded objects completely, and lets air bubbles travel to the surface without intervention. Thicker resin traps bubbles and fights you during the pour. This number matters more than it looks like it should.
Working time. A river table with live-edge wood and a pigmented fill isn’t a fast operation. You need time to mix, pour, position any objects, adjust color gradients, and deal with unexpected issues. Sixty minutes of working time is the floor for anything complex; 90 to 120 minutes is better. Products with shorter working windows are harder to use on larger or more detailed pours.
UV resistance — built in, not bolted on. Every deep pour epoxy resin will eventually yellow if exposed to UV without protection. The question is whether UV inhibitors are part of the base formula or whether the product just recommends a UV-blocking topcoat afterward. Built-in inhibitors offer more consistent protection across the full depth of the cast; a topcoat only protects the surface. If the spec sheet doesn’t mention UV resistance at all, assume yellowing resistance wasn’t a formulation priority.
Bubble behavior. A well-formulated deep pour epoxy largely takes care of its own bubbles. The combination of low viscosity and a slow cure schedule gives air plenty of time to rise out naturally. One pass with a heat gun or butane torch in the first hour handles stragglers. If a product requires constant monitoring and repeated torch work throughout the pour, that’s a signal the viscosity is fighting the application.
Certifications — particularly for food-adjacent surfaces. Kitchen countertops and dining tables sit close enough to food that this matters. BPA-free formulation, low VOC content, and recognized compliance marks — FDA, REACH, ROHS, EN71 — are worth checking before committing to a product. A reputable manufacturer will supply SDS documentation on request without making you hunt for it.
Where Deep Pour Epoxy Actually Belongs
Deep pour epoxy resin is the right call for a specific set of projects. Knowing where it earns its place — and where you’re better off with something else — prevents expensive mistakes.
River tables are the obvious one. You’ve got a live-edge slab, a gap in the center, and you need to fill that gap to the full depth of the wood — typically 1.5 to 3 inches — in one clean pour. Standard epoxy physically cannot do this in a single pass. Deep pour epoxy can, and it’s what the application was designed for.
Casting with embedded objects is where the long working time really earns its keep. Dried flowers, insects, coins, fossils, photographs — anything you want permanently suspended in clear resin needs time to place properly. Low viscosity means the resin flows around the object rather than pushing it out of position, and 90 minutes of working time means you’re not racing the clock.
Thick resin art — sculptural pieces, deep ocean pours, large abstract castings — requires volume and depth that standard art resins can’t handle. Deep pour epoxy resin is the material that makes these pieces structurally possible.
Wood void and crack filling on natural slabs often involves depth. Rather than stacking multiple thin coats and waiting for each to cure, one application of deep pour epoxy fills the void completely.
Where it doesn’t belong: surface coatings, floor coatings, and countertop topcoats. These applications need a harder, faster-curing surface resin. Using deep pour epoxy as a topcoat gives you a softer, slower finish that wasn’t optimized for surface wear — it’s the wrong tool for the job.
The Techniques That Separate Good Results from Wasted Pours
The resin can only do so much. Technique accounts for a significant share of whether a deep pour epoxy project comes out right.
Seal the wood first. Wood holds trapped air and moisture. Without a seal coat — any standard surface epoxy works here — that air bubbles up through your pour and leaves a trail of voids behind it. Apply a thin seal coat, let it cure fully, then proceed with the deep pour epoxy. On live-edge slabs with open grain and deep figure, skipping this step is almost always regretted.
Work within the temperature window. Most deep pour epoxy resin formulas are calibrated for 70°F to 80°F (21°C–27°C). Drop below 65°F and the cure slows down considerably — you’ll also see an uptick in surface cloudiness. Push above 85°F and the exothermic reaction speeds up, which on larger pours can mean overheating in the center. Cold shop? Warm your resin and hardener in separate containers of hot water, bring them back to room temperature, then mix.
Measure by volume, not by feel. The 2:1 ratio (resin to hardener) that most deep pour epoxy formulas use needs to be accurate. Off-ratio mixing is the leading cause of surfaces that stay tacky or fail to cure fully, even days after the pour. Use graduated measuring cups — proper ones, not kitchen cups. Add resin first, hardener second.
Mix slowly and completely. Six to eight minutes of thorough stirring, scraping the sides and bottom of the container throughout. Rapid mixing whips air in; a slow, folding motion keeps the mixture clear. Once you’ve finished in the first container, transfer everything to a second clean one and stir for another minute or two. Unmixed streaks on the container walls are the enemy.
Protect the cure without sealing it. A simple cardboard tent over the piece keeps dust and debris off the surface without trapping heat. Full covers — plastic sheeting laid directly over the mold — hold heat in and can cause problems in the center of large pours. Let it breathe. Initial surface hardness at 48 to 72 hours; structural cure in 7 to 14 days. That timeline is real and shouldn’t be compressed.
Deep Pour vs. Table Top: The Side-by-Side
This comparison generates a lot of search traffic because people genuinely mix these up. Here’s the actual breakdown.
Layer thickness: Deep pour epoxy — 2 to 4+ inches per layer. Table top epoxy — roughly 1/8 to 1/4 inch per layer.
Cure timeline: Deep pour — 48–72 hours to demold, 7–14 days to full hardness. Table top — 12–24 hours to touch, 3–5 days to full cure.
Viscosity: Deep pour sits lower for free-flowing mold behavior. Table top runs slightly thicker so it stays put on flat surfaces without creeping over edges.
Heat tolerance: Deep pour is built for low exotherm in thick sections — that’s the whole point. Table top epoxy poured thick will overheat. It’s not a workaround.
Surface hardness: Table top epoxy cures harder and more scratch-resistant — the right call for a surface that sees daily use. Deep pour trades some surface hardness for the optical clarity and pour depth the application requires.
On a typical river table build, both products show up. Deep pour epoxy resin handles the river channel fill. Once that’s cured and sanded flat, a flood coat of table top epoxy goes over the entire surface to bring the hardness and gloss up to where a working dining table needs to be.
What Separates Good Deep Pour Epoxy Resins in 2026
The deep pour epoxy market has settled into a clearer shape over the past few years. The products that hold up under scrutiny tend to share a few traits that are easy to verify before you buy.
Published TDS documentation that specifies pour depth under actual working conditions — not just a maximum figure. Third-party certifications rather than self-declared compliance: ISO9001 for manufacturing consistency, REACH and ROHS for chemical safety, BPA-free where food contact surfaces are involved. Accessible technical support that answers questions about cure schedules and project-specific situations, not just a FAQ page.
For commercial buyers and production-scale users, the stronger manufacturers also offer OEM and private label options, batch-level quality documentation, and drum-quantity shipping without the per-unit markup that comes with retail packaging.
The Short Version
Deep pour epoxy resin is a precision material. It handles applications nothing else can — river table fills, thick casts, deep embedments — but it gives back exactly what you put in. Use the right product for the depth you need. Work at the right temperature. Mix accurately and mix thoroughly. Give it the full cure time.
Before buying anything, pull the TDS. Compare viscosity and working time alongside pour depth. Price per unit is the last thing to optimize for — a cheaper resin that doesn’t perform costs far more than the price difference once you’ve wasted a slab and started over.
If you’ve ever run your hand across a glossy epoxy countertop, pulled up a stool at a river table bar, or set a plate down on a handcrafted wood slab, the question probably crossed your mind: is any of this actually safe when food is involved? It’s a reasonable thing to wonder — and as epoxy becomes a go-to material for kitchens, dining rooms, and commercial spaces, more homeowners, woodworkers, and business owners are asking the same thing.
The honest answer: it depends. Epoxy resin products vary widely in their chemistry, and whether something qualifies as food safe comes down to the specific formula, how carefully it’s mixed, and whether it’s been allowed to cure fully. Here’s what you should know before putting any epoxy surface near food.
What “Food Safe Epoxy Resin” Actually Means
“Food safe” isn’t just a phrase brands toss on packaging to sound responsible. It carries a specific technical meaning: a food safe epoxy resin is one that, once properly mixed and fully cured, becomes chemically inert. It no longer reacts with surrounding materials — including food — and won’t transfer harmful compounds to whatever rests on its surface.
In the United States, the FDA sets the benchmark through regulation 21 CFR 175.300, which covers resinous and polymeric coatings used in food contact applications. Products that comply have been independently tested to confirm no harmful migration occurs under normal use conditions. A reputable epoxy resin manufacturer will put their product through third-party lab verification to earn this status — and they’ll say so clearly in the product documentation.
If a brand doesn’t reference FDA compliance or CFR 175.300 anywhere on their product or website, that absence is worth paying attention to. Standards may also differ by country, so always verify against the regulations that apply where you are.
Why Full Curing Changes Everything
This is where a lot of people go wrong. Epoxy resin is only food safe after it has finished curing completely. In its liquid or partially cured state, epoxy contains reactive chemical compounds — uncrosslinked amines and other substances — that can migrate into food and cause real harm.
Once the resin and hardener are combined and the reaction runs to completion, the result is a hardened, inert plastic. At that stage, the surface is stable and safe for incidental food contact. But if curing is cut short — whether due to incorrect mixing ratios, temperatures that are too low, or not waiting long enough — those reactive components may still be present in the surface.
Most quality epoxy resin manufacturers recommend a basic cure time of 48 to 72 hours before the surface can handle light use, with a full hard cure taking anywhere from 7 to 14 days. No food contact should happen during that window.
Practical tip: Don’t rush it. Even when the surface looks and feels solid, stick to the full cure time your manufacturer recommends before setting plates, glasses, or food directly on it.
The BPA Question
Bisphenol A, commonly known as BPA, is a chemical used in producing certain plastics and epoxy resins. It’s been the focus of ongoing health research and consumer concern, and many people specifically look for BPA-free products when it comes to food contact surfaces.
The FDA’s current position is that BPA is safe at the very low levels typically present in food. And while BPA does serve as a starting material in epoxy manufacturing, reputable formulations fully react it during production — leaving behind trace amounts so small that the finished product is considered BPA-free.
When reviewing any epoxy resin manufacturer’s products, check whether they explicitly state that the resin is BPA-free. This information should appear in the product’s Safety Data Sheet (SDS).
Pigments and Additives: A Detail That Matters
One thing that often gets overlooked: adding colorants to epoxy resin can remove its food safe status entirely.
FDA compliance testing is performed on the clear formulation. Once you introduce mica powders, alcohol inks, liquid pigments, or other additives, the chemical composition shifts — and those added substances haven’t necessarily been tested to the same standard.
If you’re working with a colored epoxy pour on a countertop or bar top and want to keep the surface food safe, the right move is to apply a clear, certified food safe topcoat over the pigmented layer. You get the visual effect of the color while keeping the actual food-contact surface compliant.
Where Epoxy Works — and Where It Doesn’t
Knowing the limits of food safe epoxy matters as much as knowing its appropriate uses.
Appropriate uses for food safe epoxy:
Kitchen countertops and bar tops
Serving trays and charcuterie boards (for incidental food contact)
Epoxy table tops used in dining settings
Fruit bowls, coasters, and decorative tableware
River tables and live-edge dining tables
What to avoid:
Cutting directly on epoxy surfaces. Knives will scratch and gouge the material, creating grooves where bacteria can settle — and potentially introducing resin particles into your food. Keep a cutting board handy.
Placing very hot items on cured epoxy. Most epoxy formulations have a heat tolerance of around 120–150°F (50–65°C). Dishes straight from the oven or a boiling pot can warp, scorch, or discolor the surface.
Using industrial epoxy in food contact situations. Epoxies designed for floors, marine applications, or fiberglass work are not formulated for food contact. Don’t substitute them for food-grade products.
Putting epoxy items in the dishwasher or microwave unless the specific product documentation says it’s safe for those conditions.
How to Verify a Product Is Genuinely Food Safe
Not every product that claims food safe status has the testing to back it up. Here’s how to check:
1. Look for compliance certification. A credible epoxy resin manufacturer will reference their compliance standard directly on the product or in its documentation — confirming the resin has been independently tested for food contact suitability. Bear in mind that standards vary by country, so check against your local requirements.
2. Ask for the SDS and TDS. The Safety Data Sheet and Technical Data Sheet contain the full breakdown of ingredients, curing conditions, and safety restrictions. Any legitimate epoxy resin manufacturer will provide these on request or publish them publicly.
3. Look for third-party lab verification. Self-certification carries much less weight than independent testing. The strongest food safety claims are backed by results from accredited labs, not just internal sign-off.
4. Read the application conditions carefully. Even a certified food safe epoxy must be used correctly to stay safe. Deviating from the recommended mixing ratio or curing environment can invalidate the safety guarantee entirely.
Food Safe vs. Food Grade: Not the Same Thing
These two terms get used interchangeably, but they describe different levels of compliance.
Food safe means that a cured surface won’t contaminate food during normal, incidental contact. Most high-quality countertop and table top epoxy resins fall into this category when applied and cured correctly.
Food grade is a stricter designation, typically applied to materials that will have prolonged, direct contact with food — like the lining inside food packaging or processing equipment. This standard goes beyond what most decorative epoxy applications require.
For home kitchens, dining tables, and bar tops, food safe is the standard you need to meet. For commercial food processing or packaging contexts, speak directly with your epoxy resin manufacturer about whether a food grade product is the right call.
Questions Worth Asking Your Epoxy Resin Manufacturer
If you’re sourcing epoxy for a commercial project, a furniture production run, or large-scale countertop work, it’s worth asking detailed questions before committing to a supplier. A qualified epoxy resin manufacturer should answer all of the following without hesitation:
Does your product comply with the relevant food contact standard in my country?
Has it been tested and verified by an independent, third-party laboratory?
Is the formulation BPA-free?
What is the recommended cure time before food contact?
Do colorants or additives affect the food safe rating?
What is the maximum heat tolerance of the cured surface?
If a supplier can’t answer these questions clearly, that’s a signal worth heeding. Transparency is a baseline expectation from any serious epoxy resin manufacturer.
The Bottom Line
Epoxy resin can absolutely be food safe — but not automatically, and not without some care. The four things that matter most:
Choose the right product: Look for verified compliance with your country’s food contact standard and third-party lab testing.
Mix it correctly: Follow the manufacturer’s ratio exactly. There’s no room for guesswork here.
Wait for full cure: A surface that hasn’t finished curing is not safe. Give it the time it needs.
Maintain the surface: Keep it clean, avoid cutting on it, and respect the heat limits.
For woodworkers, contractors, and business owners, the good news is that food safe options are widely available. The key is knowing what to look for — and working with an epoxy resin manufacturer who is open about their testing, certifications, and product limitations. When in doubt, ask for the data sheet and look for a clear compliance statement. A product that’s genuinely food safe will have the documentation to prove it.
Walk into any epoxy aisle — online or in a hardware store — and you’ll quickly notice that not all resins pour the same way. Some run like warm water. Others sit in the container like cold honey. That difference comes down to one property: viscosity.
Viscosity measures how much a liquid resists flowing. In the epoxy world, it’s expressed in centipoise (cP) or millipascal-seconds (mPa·s), and the number matters far more than most beginners expect. Pick the wrong viscosity for your project and you’ll end up with resin running off vertical surfaces, trapped air bubbles you can’t get rid of, or a pour that generates enough heat to crack your mold.
Here’s the short version before we go deeper:
Low viscosity epoxy resin — thin, pourable, typically under 1,000 cP. Flows like cooking oil. Great for penetrating porous surfaces, self-leveling coatings, and thick casting pours.
High viscosity epoxy resin — thick, paste-like, often above 10,000 cP and sometimes reaching several hundred thousand cP. Clings to vertical surfaces. Built for bonding, filling, and structural repair.
Neither is better. They’re designed for entirely different jobs.
Low Viscosity Epoxy Resin — What It Does Well
Core Properties at a Glance
Property
Typical Value
Viscosity range
100–3,000 cP
Flow behavior
High — self-leveling
Penetration depth
Excellent
Bubble release
Easy — bubbles rise and pop naturally
Working time
Usually longer, which helps with large pours
Mixing accuracy
Easier to achieve consistent ratios
Where Low Viscosity Actually Shines
Deep penetration into porous surfaces. Because the resin is thin, it wicks into the microscopic channels of wood, concrete, and fiber reinforcements rather than sitting on top. This is what makes low viscosity formulas the default choice for structural lamination and crack repair.
Self-leveling on flat surfaces. Pour it out and it finds its own level without much coaxing. That’s why floor coatings use it — you’d spend hours chasing a thick paste across a warehouse floor.
Bubble-free results. Air introduced during mixing rises to the surface quickly in a thin resin. In a thick one, those bubbles get stuck. This alone is reason enough to choose low viscosity for any transparent art piece where clarity matters.
Long working windows. The same chemistry that slows the cure rate also gives you more time to work. Handy when you’re managing a big pour across a 12-foot dining table.
Products Best Suited for Low Viscosity Epoxy
Epoxy Floor Coating The self-leveling nature of thin resin is exactly what you need when covering a garage, factory floor, or commercial space. Applied correctly, it wets out the concrete surface and cures to a hard, chemical-resistant finish without roller marks or high spots.
Art Resin / Casting Resin Transparent art pieces — resin paintings, geode coasters, decorative objects — depend on a bubble-free, high-clarity result. Low viscosity delivers both. It also accepts alcohol inks, mica powders, and pigment pastes without muddying the color.
River Table & Decorative Wood Pours The colored or clear “river” running through a live-edge slab needs to fill the gap evenly and release all its air before gelling. Low viscosity handles that job. For slabs deeper than about a quarter inch, you’d switch to a deep pour formula (more on that shortly).
Carbon Fiber & Fiberglass Lamination Composite fabricators rely on thin resin to fully saturate the fiber weave. If the resin is too thick, dry spots form inside the laminate — weak points that can fail under load. Boat builders, automotive shops, and aerospace suppliers all specify low viscosity infusion or laminating resins for this reason.
Concrete Crack Injection Ultra-low viscosity products in the 50–200 cP range are literally injected under pressure into hairline cracks in bridges, tunnels, and foundations. The resin flows through the crack network and bonds the concrete back together from the inside out.
Electronics Potting & Impregnation Thin resin seeps between transformer windings, around PCB components, and into connector housings where a thicker material simply wouldn’t go. After curing, it provides electrical insulation and moisture protection in a single step.
Jewelry & Small Craft Pieces Encasing dried flowers, glitter, or small objects in a clear resin requires something thin enough to fill every void without trapping air. Small silicone molds pair particularly well with low viscosity casting resins.
Wood Stabilization Rotted or punky wood that would otherwise crumble can be salvaged by soaking it in thin resin. The resin displaces the moisture and locks the wood fibers together. After curing, the stabilized piece machines and finishes cleanly.
High Viscosity Epoxy Resin — What It Does Well
Core Properties at a Glance
Property
Typical Value
Viscosity range
10,000 cP and above (including paste/thixotropic grades)
Flow behavior
Low — holds its shape
Vertical surface performance
Excellent — won’t sag or run
Gap-filling capacity
Strong — stays put in large voids
Load bearing
High when fully cured
Bubble control
Requires more deliberate mixing technique
Where High Viscosity Pulls Ahead
Non-sag on vertical and overhead surfaces. This is the defining advantage. A thick, thixotropic epoxy stays exactly where you put it — on a hull side, a pipe, a ceiling joint — until it cures. Thin resin would puddle at the bottom of the joint.
Bridging wide gaps. Low viscosity resin would drain straight through a loose-fitting joint or a large void. Paste-grade epoxy fills the gap and supports the load while curing.
Structural bonding strength. Thixotropic epoxy adhesives are engineered specifically for high shear and peel loads. They’re what holds aircraft components, marine hulls, and structural assemblies together in demanding environments.
Thick single-pass coatings. A high viscosity coating applied with a trowel or notched squeegee can lay down several millimeters of material in one pass — useful for protective linings on tanks, containment areas, and industrial floors.
Products Best Suited for High Viscosity Epoxy
Structural Adhesive / Epoxy Putty The hardware store version of this is often sold as “steel epoxy” or two-part putty. You knead the two components together and apply the resulting paste to metal, ceramic, stone, or wood. It sets hard enough to machine, drill, and paint. Used everywhere from plumbing repairs to antique furniture restoration.
Protective Topcoats & Anti-Corrosion Coatings Heavy-duty marine and industrial coatings are formulated at high viscosity so a single brush or roller pass builds meaningful film thickness. Ship hulls, offshore platforms, and pipeline exteriors rely on this for long-term corrosion protection.
Marine Fiberglass Repair Gel coat damage, delamination, and osmotic blistering on a boat hull all get filled with high viscosity paste. It doesn’t run out of the repair before it gels, and it bonds well to existing fiberglass laminates.
Tile & Stone Setting (Epoxy Grout / Mortar) Epoxy tile adhesives and grouts outperform cement-based alternatives in wet, chemically aggressive environments. Swimming pools, commercial kitchens, and laboratory floors often specify epoxy mortar because it won’t crack, stain, or support mold growth.
Chemical Anchoring (Injection Epoxy) Injection-grade high viscosity epoxy fills a drilled hole and bonds a rebar or threaded rod to concrete with holding loads that exceed the strength of the concrete itself. Used extensively in curtain wall installation, bridge retrofits, and heavy equipment foundations.
Wind Turbine Blade Repair Leading-edge erosion on turbine blades is repaired with thixotropic paste that can be shaped and smoothed on a curved, near-vertical surface without sagging. Downtime is costly, so the material also needs a reasonably fast cure.
Epoxy Mortar for Concrete Repair Industrial floors take a beating. High viscosity epoxy mortar mixed with aggregate fills spalled areas, pothole-like damage, and joint failures. Once cured, the repair is often harder and more abrasion-resistant than the original concrete.
Sealing & Caulking Paste-grade epoxy sealants handle joints, pipe penetrations, and expansion cracks in concrete where long-term chemical resistance matters more than flexibility.
Three Products Worth Knowing in Detail
The following product categories show up constantly in search results and buyer questions. Each occupies a distinct niche — here’s what actually matters about them.
What it is: A medium-to-low viscosity two-part epoxy formulated specifically for wood tabletops, bar counters, and decorative furniture surfaces. It’s the resin category that probably drove most of the DIY epoxy boom over the last decade.
Table epoxy is engineered around a specific set of requirements: crystal clarity, self-leveling behavior, a long enough working time to remove bubbles with a heat gun, and a surface that cures hard enough to resist scratches, alcohol spills, and daily use.
Typical Specifications
Parameter
Typical Range
Viscosity
800–3,000 cP
Mix ratio
2:1 or 1:1 by volume
Pot life
30–45 minutes
Demold time
24–48 hours
Full cure
72 hours to 7 days
Pour depth per layer
3–6 mm (surface coat)
Clarity
Crystal clear, anti-yellowing formula
Where People Use It
River tables. Two live-edge slabs separated by a gap filled with colored or clear resin — this is probably the project that introduced table epoxy to a mainstream DIY audience. The resin becomes the “river” running between the wood, and the finished piece looks like nothing else you can buy at a furniture store.
Bar tops. Bars coat their wood counters with table epoxy to get a surface that handles spilled drinks, wet glasses, and years of hard use without absorbing stains. The glossy finish also makes cleanup easy.
Embedding objects in tabletops. Pressed flowers, bottle caps, maps, seashells, coins — anything flat (or nearly flat) can be encased under a clear epoxy pour. Schools and restaurants sometimes commission tables with local maps or historical photos built into the surface.
Furniture refinishing. A worn dining table with scratches, water rings, and old finish can be resurfaced entirely with table epoxy. Fill the cracks first, let that layer cure, then flood the surface with a self-leveling coat.
Kitchen and restaurant counters. Food-safe formulas (look for products that specifically state food safety after full cure) work on kitchen islands and countertops. They resist heat from hot pans better than most finishes, though extreme temperatures — over about 150°F — can cause some softening.
Buying Advice
Go with a UV-stabilized, non-yellowing formula if the piece will see any sunlight. Cheaper resins yellow noticeably within a year near a window. Also check VOC content — water-clear results can come from low-VOC formulas too, and indoor air quality matters.
For large tables, pour in layers no thicker than 4mm and wait for each layer to reach the gel stage before adding the next. Stacking too much liquid epoxy at once means the exothermic heat from the deeper layers has nowhere to go, which can cause bubbles, cracking, or worse.
What it is: An ultra-low viscosity casting resin built for single pours significantly thicker than what table epoxy can handle — typically 25mm to 100mm in one shot, depending on the product.
The problem with standard epoxy in thick pours is purely thermal. Epoxy cures through an exothermic chemical reaction. In a thin coat, the heat dissipates into the air. In a thick block, it has nowhere to go, and temperatures inside the pour can spike high enough to crack the resin, create massive bubbles, or in extreme cases, start a fire. Deep pour formulas solve this by using a slower-reacting hardener that spreads the exotherm over a much longer window.
Typical Specifications
Parameter
Typical Range
Viscosity
100–500 cP
Single pour depth
25–100 mm
Pot life
60–120 minutes
Demold time
48–72 hours
Full cure
7–14 days
Clarity
Optically clear, glass-like
Color stability
Long-term anti-yellowing
Deep Pour vs. Table Epoxy — Side by Side
Feature
Table Epoxy
Deep Pour Epoxy
Max pour depth per layer
3–6 mm
25–100 mm
Viscosity
Medium-low
Ultra-low
Cure speed
Faster
Slow (low exotherm)
Bubble release
Good
Excellent
Suitable for thick castings
No (needs multiple layers)
✅ Yes
Suitable as surface topcoat
✅ Yes
No (too thin)
What People Build With It
River table fill. Deep pour lets you fill the entire gap between two slabs in a single session rather than building up 3mm layers over multiple days. For a river that’s 50mm deep, this cuts days off the project timeline.
3D ocean and landscape scenes. Artists use deep pour to create transparent blocks containing underwater scenes — suspended fish, coral, air bubbles — that look genuinely three-dimensional because the resin itself becomes part of the depth illusion.
Large transparent castings. Furniture legs, decorative columns, award trophies, and architectural elements can be cast as solid clear blocks. Deep pour is the only practical way to achieve this without sectioning the piece into thin layers.
Preservation casting. Sports memorabilia, insects, military medals, even a pair of baby shoes — people cast these in clear deep pour blocks as permanent keepsakes. The result is essentially a solid glass-like object surrounding the preserved item.
Illuminated resin art. LED strips embedded inside a deep pour block create glowing sculptures. The transparency of the cured resin carries light surprisingly well, especially with tinted pours.
A Few Things Worth Knowing Before You Pour
Keep the ambient temperature between 20–25°C throughout the cure. Below that range, the resin may cure cloudy or incompletely. Above it, even a slow-cure formula can overheat in thick sections. Warming your resin to around 30°C before mixing reduces viscosity further and helps any remaining air escape quickly after the pour.
What it is: A single-component resin that cures not through a chemical reaction with a hardener, but through exposure to ultraviolet light. No mixing, no pot life — it stays liquid indefinitely in a dark bottle and solidifies within seconds to a few minutes under a UV or LED lamp.
UV resin contains photoinitiators — molecules that absorb UV light (typically at 365–405nm) and kick off the polymerization reaction almost instantaneously. The convenience this creates is real: you can work with small amounts precisely, cure only what you need, and move on immediately.
UV Resin vs. Two-Part Epoxy — How They Actually Differ
Feature
UV Resin
Epoxy Resin
Components
Single part, no mixing
Two parts (resin + hardener)
Cure trigger
UV/LED light
Chemical reaction
Cure time
Seconds to 5 minutes
Hours to days
Working time
Unlimited (keep away from light)
Limited by pot life
Max pour depth
~1–3 mm per layer
Several centimeters to 100mm+
Clarity
Very high
Very high
Yellowing resistance
Variable (poor in budget grades, good in professional grades)
Good with UV-stabilized formulas
Cost per volume
Higher
Lower
Practical for large volumes
No
Yes
Viscosity in UV Resin — It Also Matters
UV resin isn’t one-size-fits-all on the thickness front either.
Thin (low viscosity) UV resin flows easily into small molds, fills fine details, and levels itself out. Best for jewelry pieces, flat embedments, and small casting work where clarity is the priority.
Thick (gel) UV resin holds shape when applied to curved or vertical surfaces. Useful for building up dome effects on flat pieces, creating water droplet decorations, and applying topcoat layers to irregular objects without the resin running off the edge before it cures.
Where UV Resin Gets Used
Jewelry and accessories. This is probably the biggest use category for consumer UV resin. Fill a small silicone mold with flowers, glitter, or charms, hit it with a 36W UV lamp for two minutes, and pop out a finished pendant. The turnaround is minutes rather than hours, which makes it ideal for craft markets, custom orders, and teaching environments.
Nail art and gel nails. The gel polish at nail salons is, chemically speaking, a close relative of UV resin. It cures under a UV or LED lamp in the same way. The nail industry was arguably the first to commercialize UV cure chemistry at the consumer level.
Scale model and miniature repair. A broken sword on a 28mm figurine, a snapped antenna on a plastic model kit — UV resin fills and bonds these micro-repairs with a precision that’s hard to achieve with two-part epoxy. Mix ratios and pot life become irrelevant when you’re working with drops.
Electronics and photonics. In industrial manufacturing, UV cure adhesives hold fiber optic connectors in alignment, secure lens assemblies, and bond components that can’t tolerate the heat of conventional curing. The cure happens in under a second with the right light source, which keeps production lines moving fast.
Optical bonding. Specialty UV resins formulated for optics cure to a glass-like clarity with a controlled refractive index — meaning light passes through without distortion. These are used in camera lenses, eyeglass lens bonding, and display assemblies.
Art and photography protection. Poured over a flat canvas or photograph, UV resin creates a high-gloss protective layer that’s clearer and more durable than conventional varnish. Because it cures in minutes, there’s no waiting around for dust to settle on a wet surface.
SLA and DLP 3D printing. The photopolymer resins used in resin 3D printers are essentially UV resins with tuned viscosity and photosensitivity. After printing, parts go into a UV wash-and-cure station to complete the polymerization and reach full hardness.
Before You Buy UV Resin
Get a lamp with at least 36W output. A 9W lamp will technically cure the surface but often leaves the interior soft — a problem called “undercure” that only shows up later when the piece flexes or scratches unexpectedly.
Store open bottles in a dark, cool place. Even indirect sunlight through a window can gradually thicken the resin and shorten its shelf life. UV resin in a dark amber or black bottle is packaged that way for good reason.
Cure in thin layers. UV light doesn’t penetrate more than a few millimeters into most resins. For anything deeper than 3mm, cure in stages and check for tackiness between each layer.
Uncured UV resin is a skin sensitizer. Short-term exposure probably won’t cause problems, but repeated contact can develop into a persistent allergy. Nitrile gloves and eye protection are worth the habit, especially if you’re working with it regularly.
High Viscosity vs. Low Viscosity — The Full Comparison
Art resin, floor epoxy, deep pour, crack injection
Structural adhesive, chemical anchor, epoxy mortar
How to Pick the Right Epoxy for Your Project
A few targeted questions usually get you to the right answer faster than reading specification sheets:
Is the surface vertical or overhead? Yes → high viscosity. It won’t sag before it gels. No → either works, depending on the other criteria.
Do you need the resin to soak into a porous material? Yes → low viscosity. Penetration is its whole point. No → high viscosity is usually more practical.
Is the pour deeper than 6mm in a single session? Yes → deep pour epoxy specifically. Standard low viscosity resin will overheat.
Is transparency and visual clarity the main goal? Yes → low viscosity art or casting resin, UV-stabilized formula.
Do you need structural strength — high loads, shear forces, impact resistance? Yes → high viscosity structural adhesive or epoxy mortar.
Do you need a quick turnaround on small, precise work? Yes → UV resin. Nothing else cures in under five minutes.
Frequently Asked Questions
Does higher viscosity mean higher strength? Not directly. Viscosity and cured mechanical properties are largely independent of each other — they’re controlled by different aspects of the chemical formulation. High viscosity structural adhesives tend to be stronger in shear because they’re designed for bonding, but a low viscosity laminating resin can produce composite panels with extraordinary tensile strength when paired with fiber reinforcement.
Can you use low viscosity resin on a wall? Standard low viscosity resin will run. If you specifically need a thin resin on a vertical surface — say, for consolidating crumbling stone on a wall — look for thixotropic grades that are formulated thin but still have enough gel structure to resist flow. Otherwise, switch to a high viscosity product.
What’s the easiest way to reduce epoxy viscosity on-site? Warm the unmixed components to 30–45°C before mixing. Viscosity drops significantly with temperature, and the extra working time loss is usually minor. Avoid solvent thinners — they interfere with the cure chemistry and weaken the final product.
Are thick high-viscosity resins more brittle after curing? That depends on the formulation, not the viscosity. Flexible epoxy systems can be either thick or thin. If you need impact resistance or some degree of flexibility in a cured part, look for formulas that specifically mention flexibility or elongation in their technical data sheet rather than inferring it from viscosity.
Can UV resin replace epoxy resin for table pours? Not practically. UV light can only penetrate a few millimeters into resin, so a 4mm river table pour would require many separate cure cycles with precise light positioning — slow, inefficient, and still likely to leave undercured spots in the corners. Two-part epoxy remains the right choice for any significant pour volume.
Final Thoughts
The viscosity of an epoxy resin isn’t a quality indicator — it’s a design decision made by the manufacturer to suit a specific set of tasks. Thin resins flow, penetrate, and self-level. Thick resins grip, fill, and hold. Matching the product to the job is how you get results that look and perform like they’re supposed to.
For decorative and furniture work: table epoxy for surfaces, deep pour for thick fills, UV resin when speed and precision matter more than volume.
For structural and industrial work: high viscosity adhesives, mortars, and injection systems where strength, gap-filling, and vertical adhesion are what count.
When you’re not sure, the manufacturer’s technical data sheet is more reliable than any product description on the front label. Viscosity, pot life, mix ratio, and recommended pour depth are all there — and those four numbers will tell you everything you need to know before you open the can.
Shopping Basket
Manage Consent
To provide the best experiences, we use technologies like cookies to store and/or access device information. Consenting to these technologies will allow us to process data such as browsing behavior or unique IDs on this site. Not consenting or withdrawing consent, may adversely affect certain features and functions.
Functional
Always active
The technical storage or access is strictly necessary for the legitimate purpose of enabling the use of a specific service explicitly requested by the subscriber or user, or for the sole purpose of carrying out the transmission of a communication over an electronic communications network.
Preferences
The technical storage or access is necessary for the legitimate purpose of storing preferences that are not requested by the subscriber or user.
Statistics
The technical storage or access that is used exclusively for statistical purposes.The technical storage or access that is used exclusively for anonymous statistical purposes. Without a subpoena, voluntary compliance on the part of your Internet Service Provider, or additional records from a third party, information stored or retrieved for this purpose alone cannot usually be used to identify you.
Marketing
The technical storage or access is required to create user profiles to send advertising, or to track the user on a website or across several websites for similar marketing purposes.